Standard options and upgrades for Lancer X
Keyless access (KOS) on Lancer X
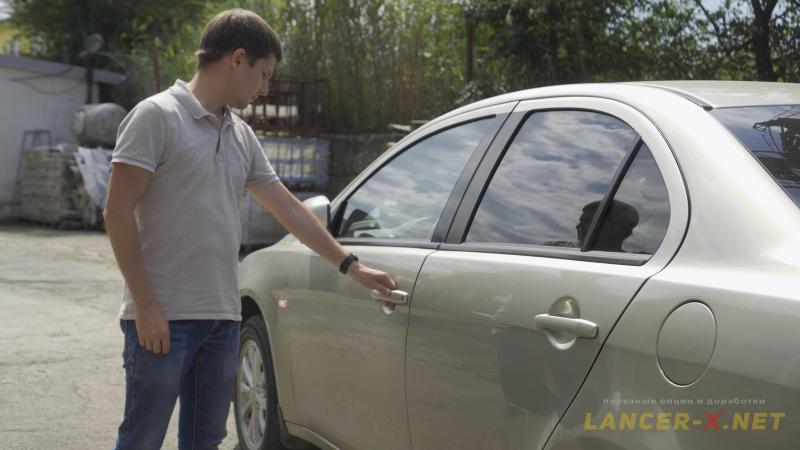
Let us install and activate the standard keyless operation system (KOS) on Mitsubishi Lancer X.

Lancer-X.net
The standard keyless operation system (KOS) is one of the most convenient options on Mitsubishi Lancer X, but not every Lancer X owner installs it, as there are some difficulties in auto VIN code writing to the units, laying of missing wiring and activation during the installation process.
On before restyling auto, most of the wiring is present, that is why in general, the installation is much more easier. But on restyled Lancer X (since 2011 year made) difficulties are doubled, as the wiring for KOS is completely absent, one has to restore it.
I just have a restyled auto. For that reason, I will have to install the standard keyless operation system on my Mitsubishi Lancer X almost from scratch.
For easy reference, this article is represented in 2 versions: text and video at the end.
Versions for standard keyless access for Mitsubishi Lancer X
First of all, it is necessary to pay attention on the fact that there are two versions of KOS: before restyling and restyled.
 Before restyling set has touch sensors and open button in the outside door handles.
On restyled set touch sensors are absent, as there were complaints from owners about sometimes not triggering sensors in frost. For that reason, the manufacturer has decided not bother with it and move towards cost-cutting just removed sensors and leave only buttons.
In addition, there are European KOS sets, keys of which operate on frequency of 433 MHz. And American/Japanese, keys of which operate on frequency of 315 MHz.
My set is Japanese, before restyling with touch sensors and buttons in the door handles. By the way, it will be possible to connect the standard tire pressure monitoring system to the Japanese set in the nearest future.
The list of components for KOS installation on Mitsubishi Lancer X
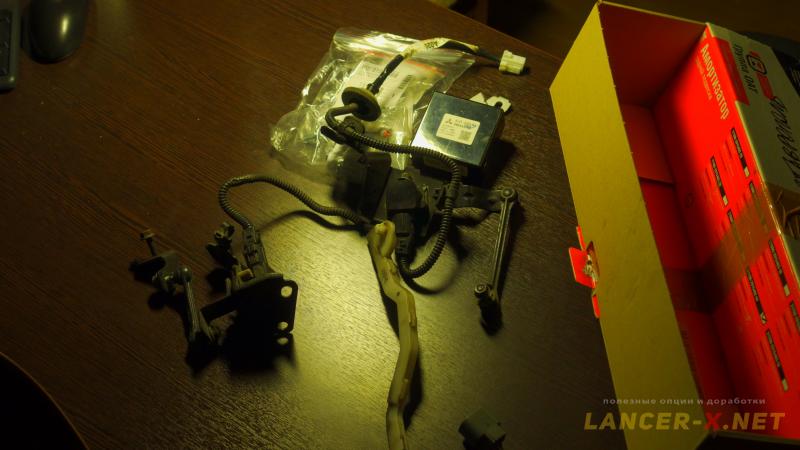
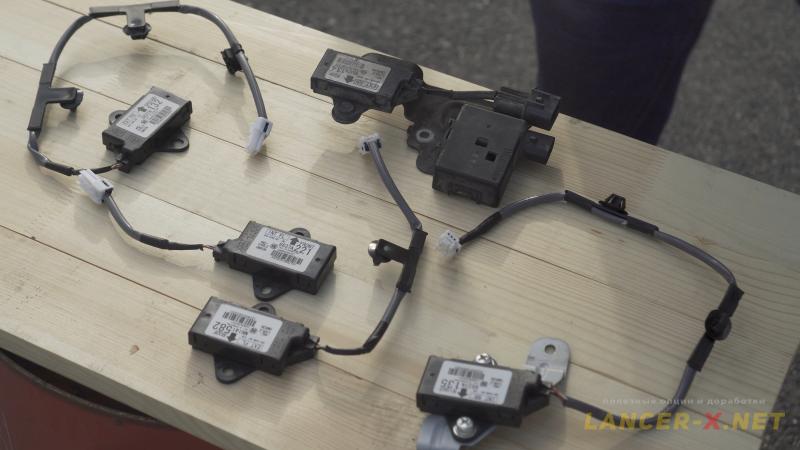
I have bought my KOS set second-hand in LancerX26 group, that was removed from Japanese sawing of Galant Fortis (Japanese name of Lancer). The set includes:
1. KOS unit - 8637A392
2. Bracket for KOS unit - 8637A003
3. Bracket's self-tapping screws, 3 pcs. - MF453031
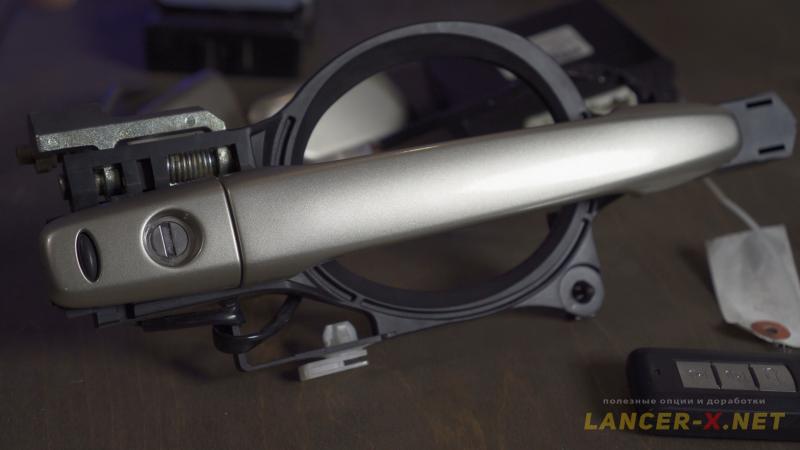
4. Door handles with a button and touch sensors, 2 pcs.
5. Guide bars with fastening for handles wiring, 2 pcs. (not necessary).
6. Rubber protective covers, 2 pcs.
7. Door wiring with handles wiring.
8. Door lock for right door (not necessary).
9. Antenna to the central tunnel - 8637A221
10. Antenna to the central rack on the driver's side - MN141582
11. Antenna to the central rack on the passenger's side - 8637A132
12. Antenna for the back shelf - 8637A135
13. Antenna with buzzer, under the rear bumper - 8637A134
14. Bolts for antennae fastening, 7 pcs. - MS240121
15. Antenna wiring (if it is absent in your trim level).
16. Wiring for antenna in the area of rear bumper.
17. Ignition lock with the receiving antenna- immobilizer.
18. Standard ignition lock - 1 pce.
19. Standard KOS remote control key - 1 pce.
20. Twist-off bolts, 2 pcs. - MB572857
21. Under-torpedo wiring for KOS unit (if it is absent in your trim level).
22. Electronic latch - 5927A012
23. Trunk open button - 5927A004
24. Retaining clip (Bracket) for the button - MB590337
 As for under-torpedo wiring, it is absent on restyled Mitsubishi Lancer X.
I would recommend you follow my way and buy not the separate wiring for KOS, but the whole under-torpedo harness and plait the wiring independently, due to the fact that the remains of under-torpedo harness helped me several times during the installation of keyless access, as that is a huge source of additional connectors, pins and wires.
Installation of bracket and KOS unit on Mitsubishi Lancer X
 KOS unit is fastened on the special bracket 8637A003, but I failed to order it separately, everywhere there was refusal. But I managed to find this bracket in one of the announcements on the net, but I had to buy it together with analog parking sensor unit, as on this bracket are standard fastened both KOS unit and parking sensor unit standard.
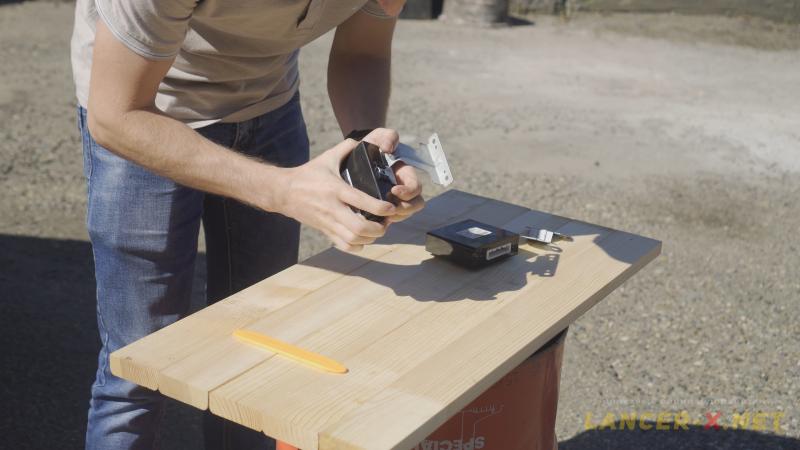 Remove an analog parking sensor unit, we do not need it, due to the fact that I am going to install the parking sensor unit, which works along the CAN bar, in the future.
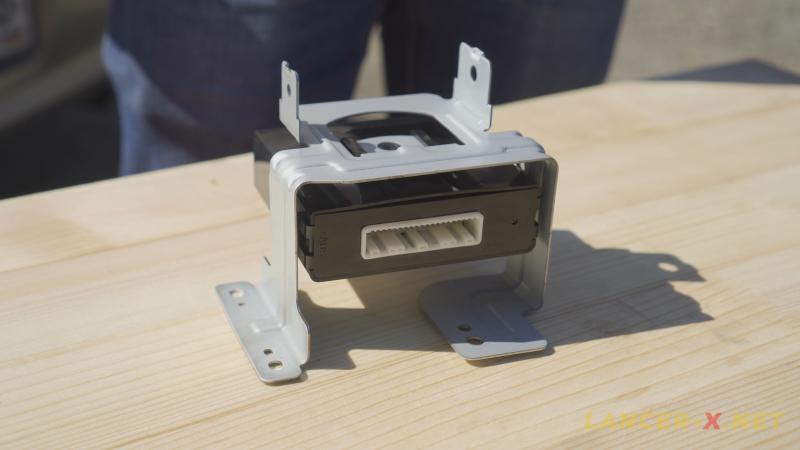 Fasten KOS unit on the bracket, and screw the bracket in the standard place.
  The bracket with KOS unit is fastened in the area of gas pedal, basically, in the same place where we fastened the interior temperature sensor tube in the article about climate control installation on Lancer X.
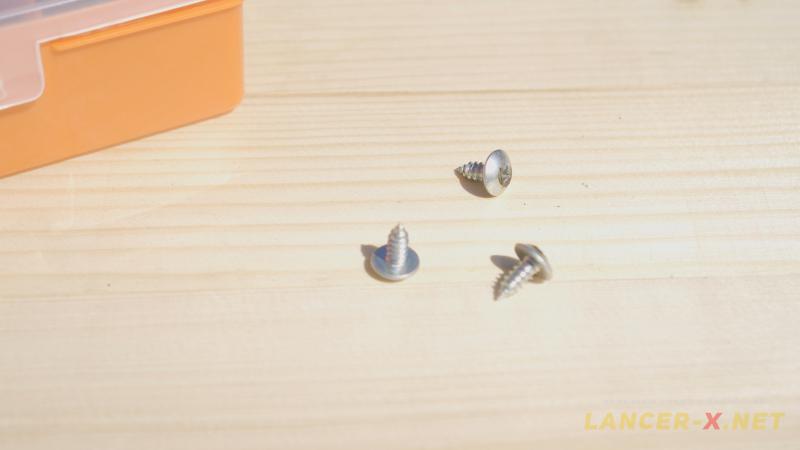 The bracket is fastened with 3 self-tapping screws of a certain length - MF453031, if the self-tapping screws will be longer than necessary you could break through the housing of cabin heater.
 If you do not find the bracket, you can fasten the KOS unit with simple couplers to the wiring.
Installation of door handles with a button and sensor for KOS on Mitsubishi Lancer X
 There were 2 handles with a button and touch sensor in the bought KOS set. But the colour of handles was silver.
I was not bother with through selection of paint from some element of car body, and just rode to the shop and bought paint in code S18 and gave handles for painting, at the same time I also had the headlights washer injector caps repainted, as in series about installation of standard headlights washer these caps were different colours.
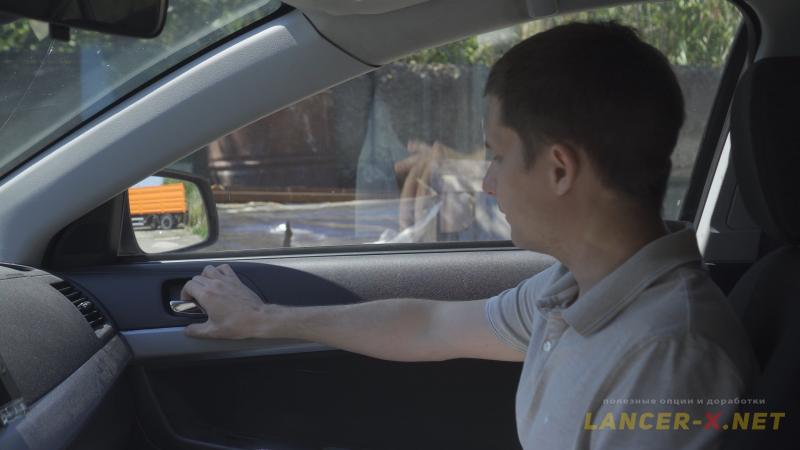
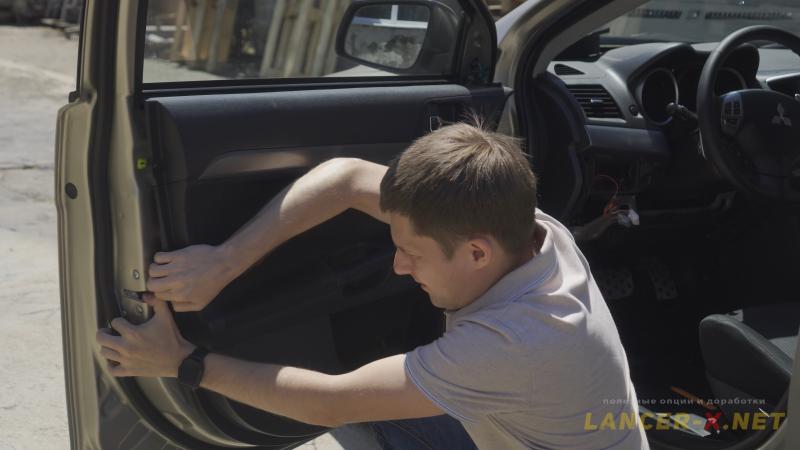 Door handles are changed quite easy. Remove the door cards from driver's and passenger sides, they are fastened with 3 self-tapping screws and clamps along the outline.
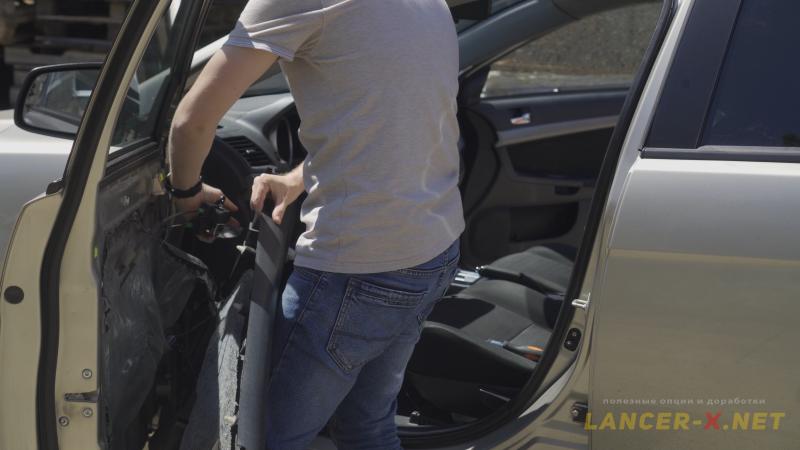 Unscrew screws and with the confident small effort unlatch the door card from the door. Unscrew the cabin door handle and unlatch all connectors.
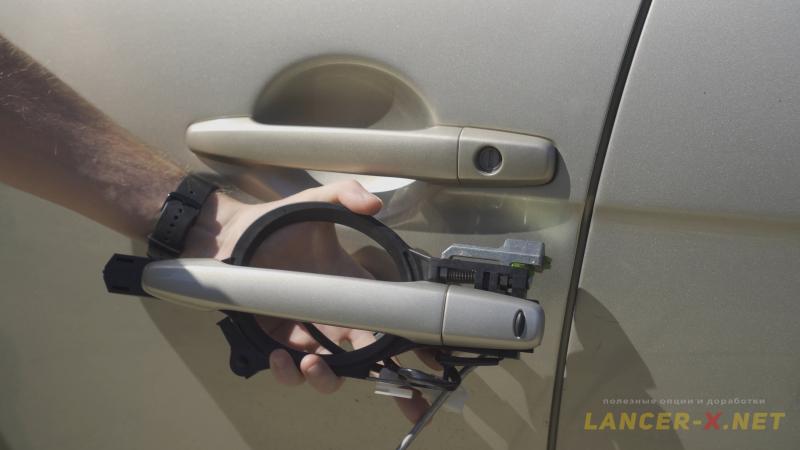
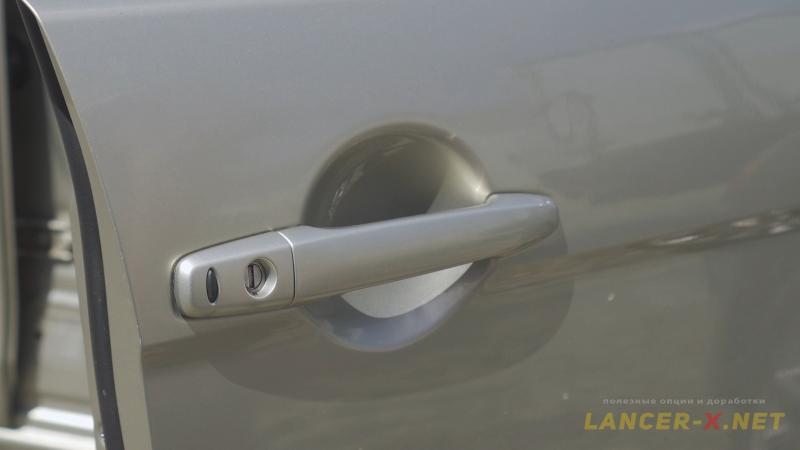
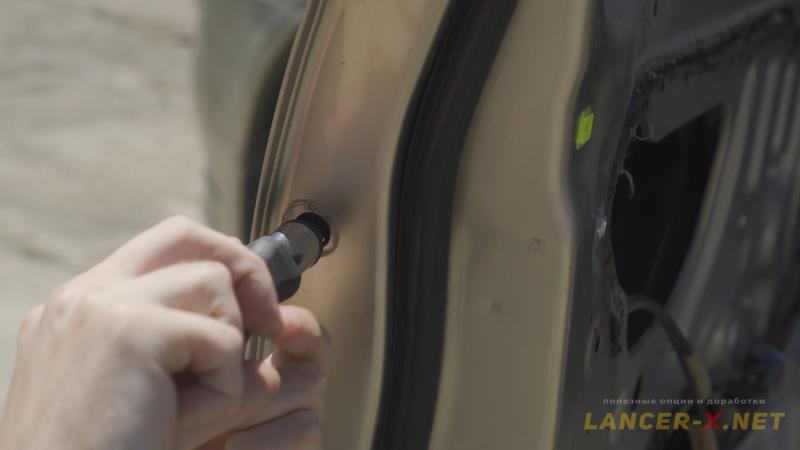 The external door handle is fastened with 1 screw from the door end, the place of screw position is patched up with black sticker, unstick and unscrew the screw.
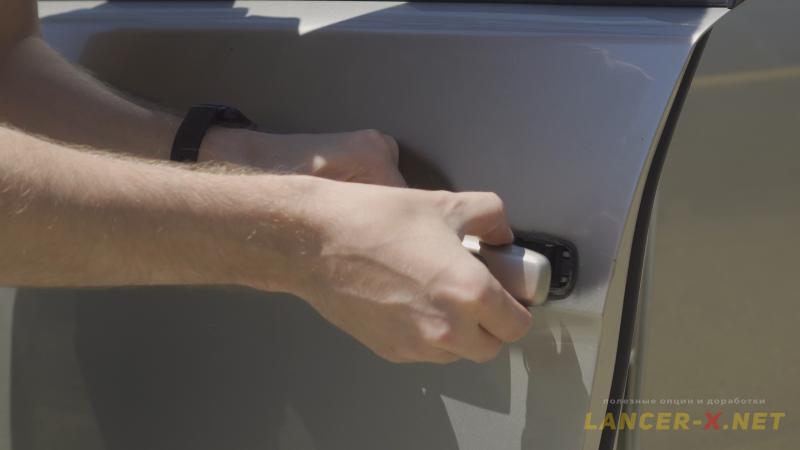 The door handle is removed in 2 stages, first of all a plastic blind plug with lock insert, and then the door handle itself and sealing rubbers.
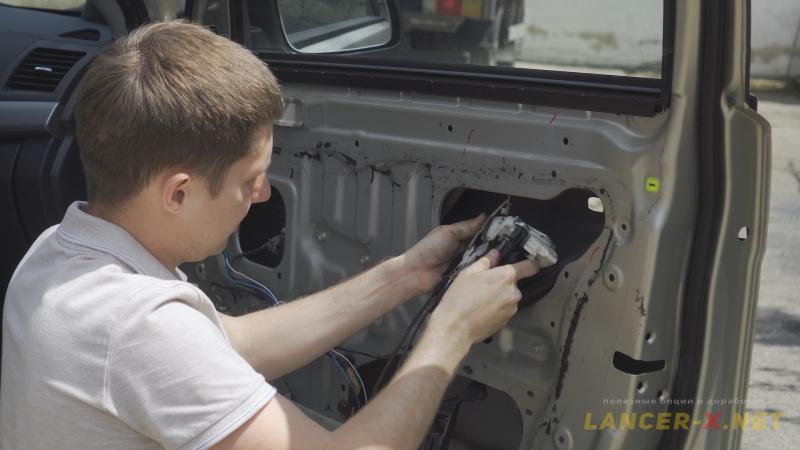
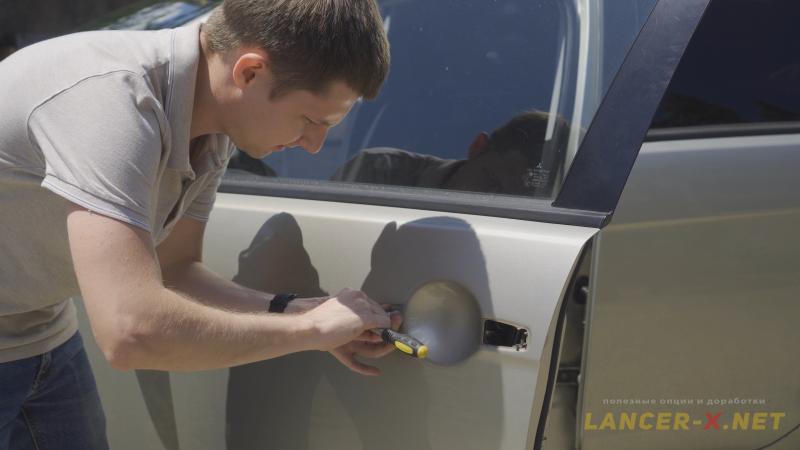 Inner skeleton of the door handle is fastened with 1 screw. unscrew it. But in order to remove the skeleton, it is necessary to detach the metal rods from the door lock, and as there is not much place in the door itself, one will also has to unscrew the door lock.
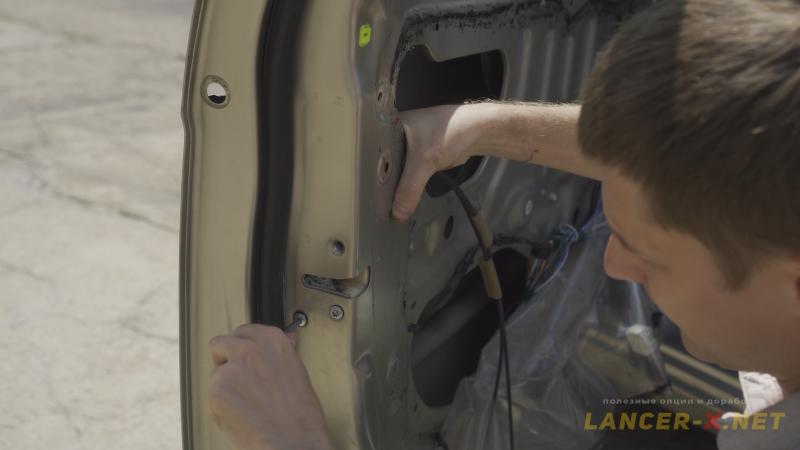 The lock is fastened with 3 screws, unscrew, after that remove an unified skeleton construction of the door handle and door lock.
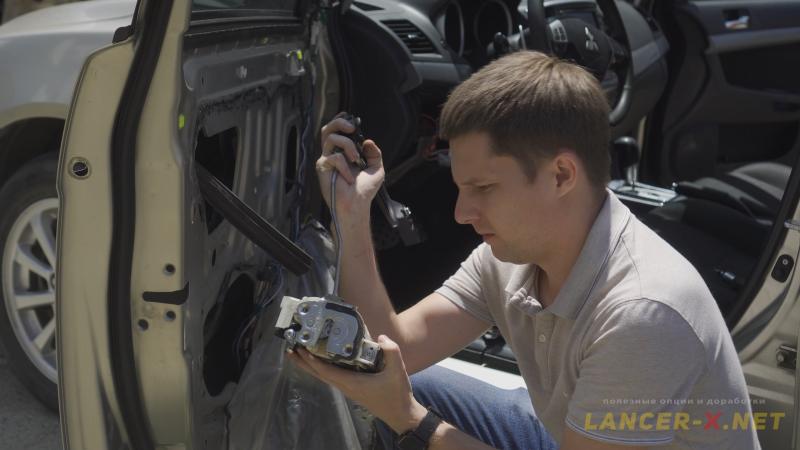 Unlatch the metal rods of old skeleton from the lock. Next latch the new skeleton of door handles to the lock and install it all in reverse order.
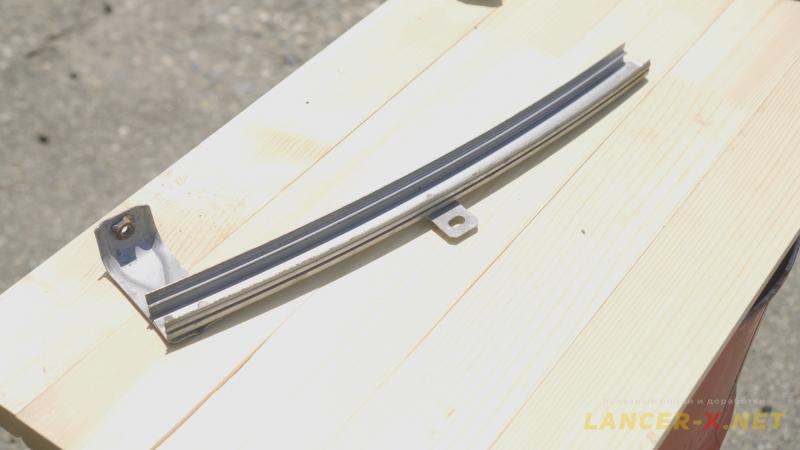 There were guides with the KOS set, along which the glass gets down inside the door with fastening for wiring of the button and door handle sensor. I have also changed them.
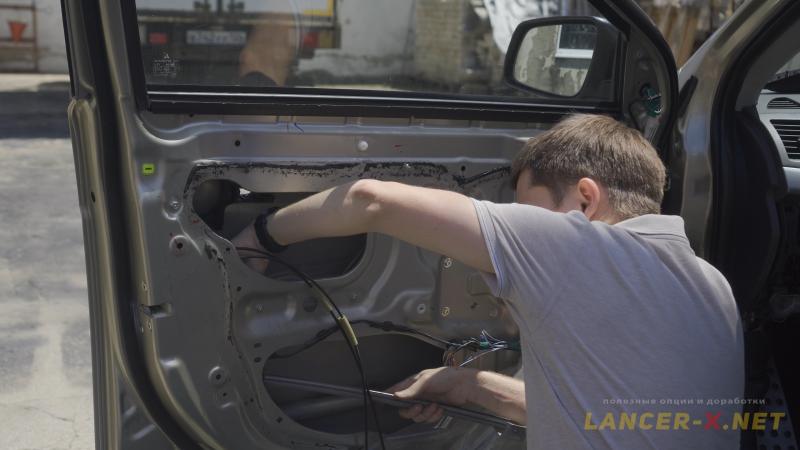 The guide is fastened with 1 screw, unscrew, after that pull it off the rubber and install the new guide, everything is intuitively intelligible. The guide is not necessary for the replacement, but if you have the possibility, do it.
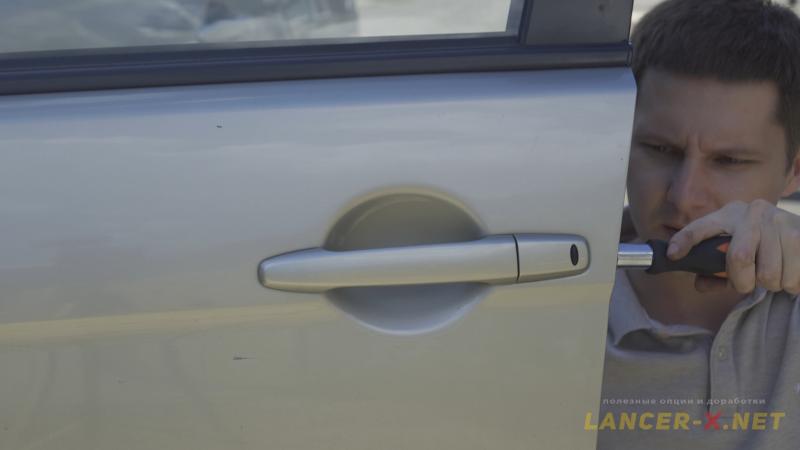 Next install a new door handle with touch sensor and the button.
There were rubber blind plugs in the set, using which it is possible to hide the hole in the door end.
Repeat it all on the right passenger's door. But I will change not only the door handles, skeleton and guides, but also a door lock for a lock, removed from right-hand drive Lancer X, as it has all the benefits of the lock on the driver's side.
Replacement of the passenger's door lock for the lock from Galant Fortis
 Basically,it is not necessary to change the passenger's lock, but I will do it for a number of reasons.
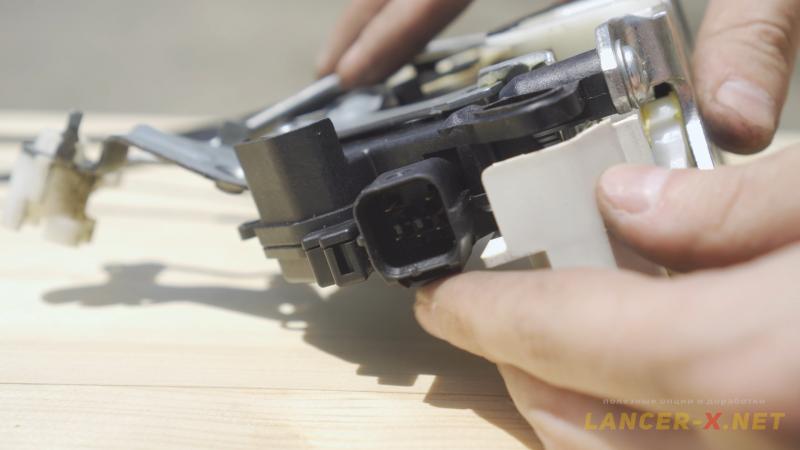 The first reason, the passenger's lock that is installed now is a cut down version in comparison with the driver's one. The driver's lock has a limit switch of the lock position, that means the possibility of control whether the lock open or close.
It will be relevant after the final installation of keyless operation system, there will be no false operation of central locking when car has been already opened as the lock status will be visible.
 And the second reason, on the cut down version of the lock, if a passenger pull the handle of door opening during the unlocking of central locking, the door will not open, even if they switch an opening flag, as the result, passengers pull the handle unknowingly, nearly wrench it.
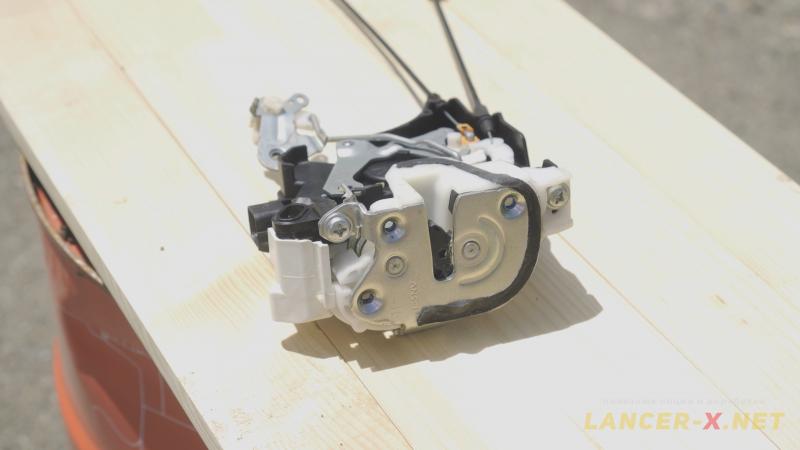 You won't have that problem with new lock, it has all functions of driver's lock and will open without any problem even if the central locking is closed.
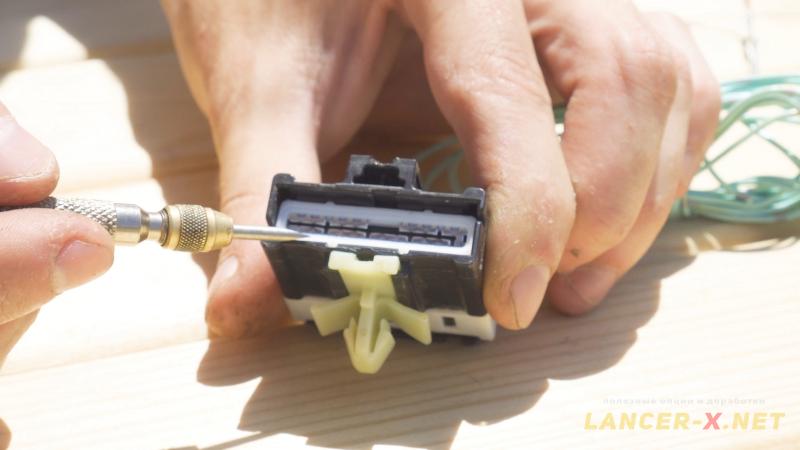
 That is why we displace the cabin opening handle to the new lock, it is fastened to the 2 lock cables, they are fastened with use of plastic brackets, that are pried by flat screw driver.
After that install the new lock with inner part of door handle (skeleton) and of course a new door handle with sensor and button to the passenger's door.
 The only thing is that the lock insert will be not on the driver's side, but on the passenger's side. For me this is not a decisive argument, as we are installing the keyless access.
But if it is important for you, it is possible to saw the protrusions of plastic blind plugs of door lock inserts and switch their places. Or you can look for these blind plugs on the breaker's yards, that thing is rare but is sometimes found.
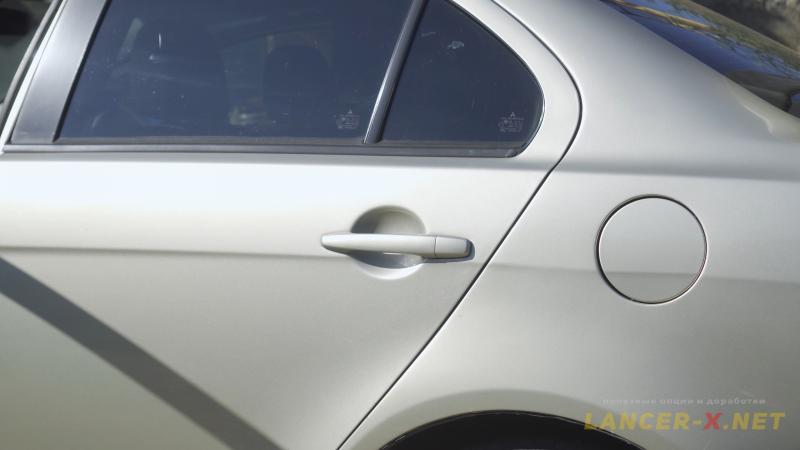 Also there is a possibility to install the door handles with the button and touch sensor on the rear doors, but I have decided not to install it yet.
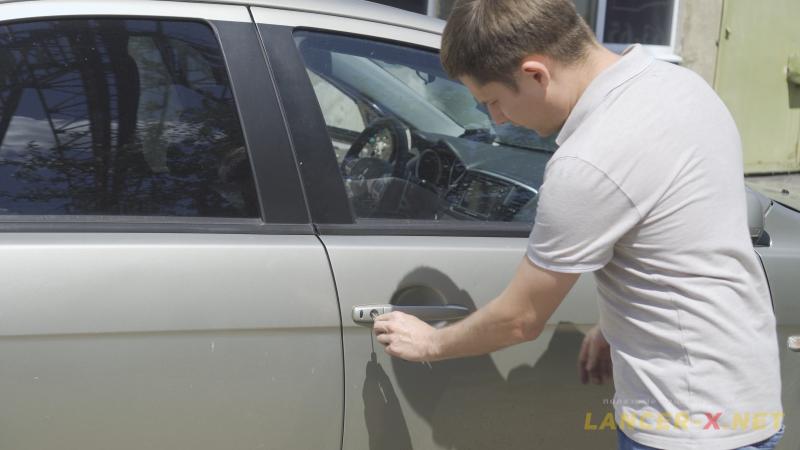 After final lock installation, check its operation. Everything must be opened and closed with a key.
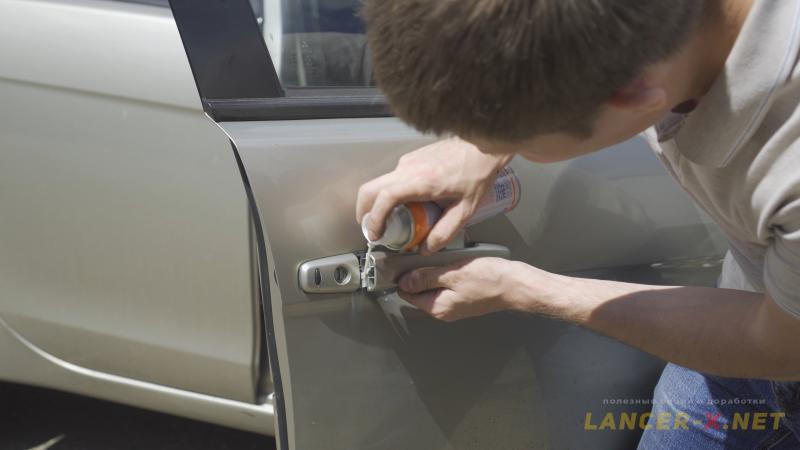 Additionally, I have also lubricated with special grease all the moving elements of the locks and handles.
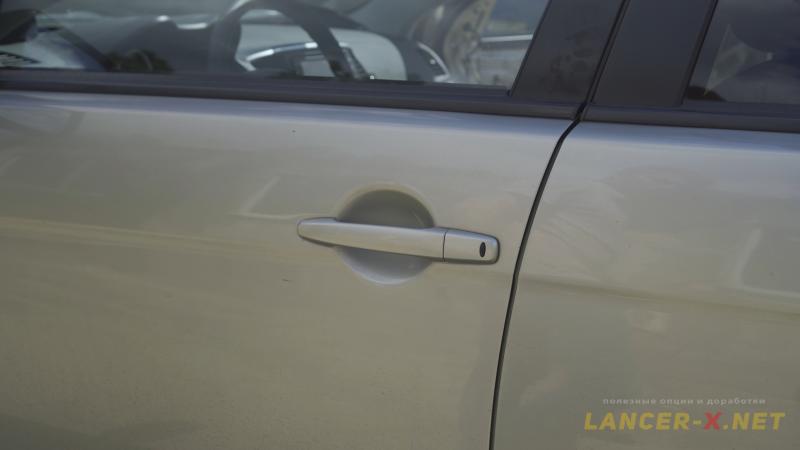 In comparison with my old door handles, one senses that the new ones with low mileage, the handles move tighter and smoother to open.
Now it remains to plait the wires into the door wiring in order to connect the sensor and door handle buttons.
Wiring for KOS connection on Mitsubishi Lancer X
I am sure most of you know that on before restyling Mitsubishi Lancer X (before 2011 year made), as a rule, the major part of the wiring for various options is present from the factory. And on restyling (after 2011 year made) the major part of wiring is absent.
In the case of KOS system:
1. Mitsubishi Lancer X, before restyling (before 2011 year made):
- under-torpedo KOS wiring - present.
- wiring for connection of in-cabin antennae - present.
- wiring for connection the door handles with the button and sensor - absent.
- wiring for connection the antenna and buzzer in the area of rear bumper - absent.
2. Mitsubishi Lancer X, restyling (transitional model, 2011 year made):
- under-torpedo KOS wiring - absent.
- wiring for connection of in-cabin antennae - present.
- wiring for connection the door handles with the button and sensor - absent.
- wiring for connection the antenna and buzzer in the area of rear bumper - absent.
3. Mitsubishi Lancer X, restyling (from 2011 year made):
- under-torpedo KOS wiring - absent.
- wiring for connection of in-cabin antennae - absent.
- wiring for connection the door handles with the button and sensor - absent.
- wiring for connection the antenna and buzzer in the area of rear bumper - absent.
I have Lancer X of 2011 year made, transitional model between before restyling and restyling, and that means that the part of the wiring for KOS connection is present.
In any case, check the wiring presence before installation specifically on your car, it could be possible that the previous owner laid it or the wiring is present from the factory.
Wiring of door handles with a button and sensor for KOS on Mitsubishi Lancer X
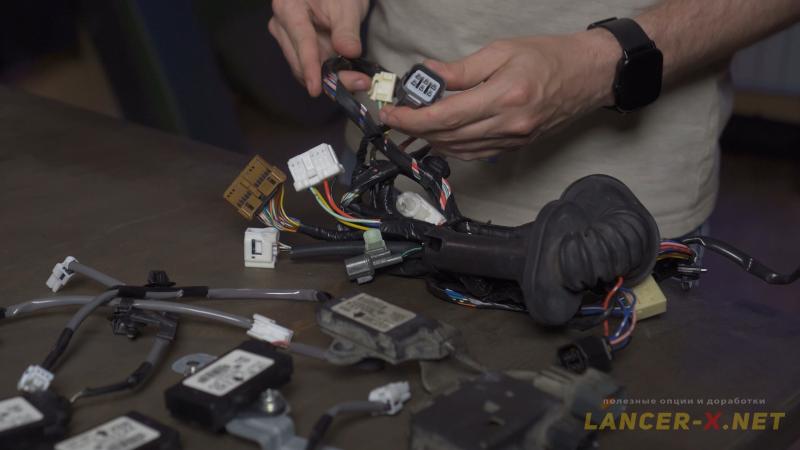 In the KOS set that I have bought was the maximum donor wiring, fully ready to replacement in doors. But it was removed from before restyling auto, and I have restyled.
 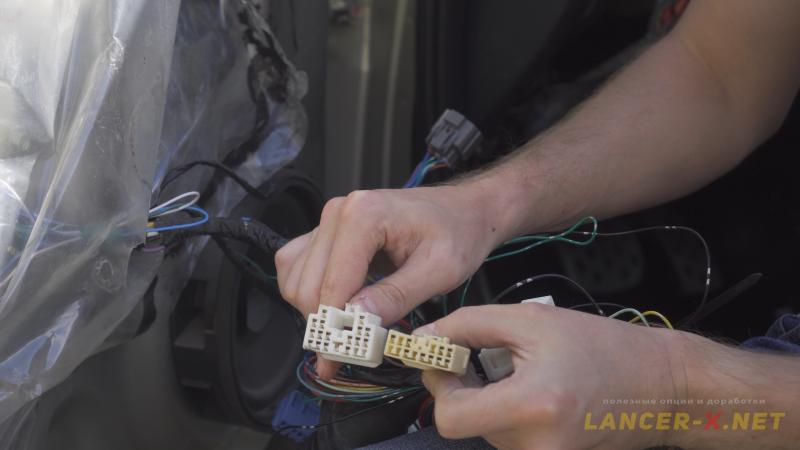 Some connectors on donor wiring are before restyled and will not fit to my car, for example the connector of window regulator unit.
Of course you can bother and re-pin everything, or adapt my wiring for before restyling window regulator unit, in which all window regulators will have auto mode, but it will take too long time, and this is not so important function.
I have already plaited the wiring in my door wiring for powerfold mirrors implementation in the article about Powerfold mirrors on Lancer X.
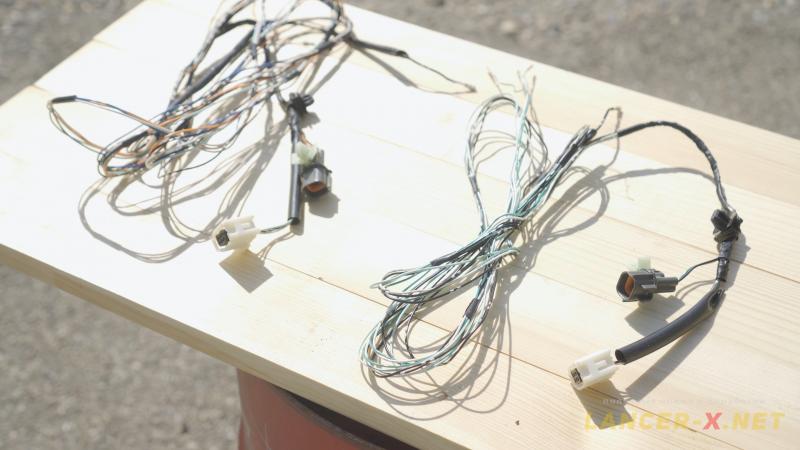 That is why I will unplait necessary wires from donor wiring and plait it in my door wiring.
And if you have before restyling auto and your donor wiring is also before restyling, you can change the wiring in full. In short, make sure to check before installation whether the connectors match or not.
 I will plait 5 wires with connectors in the door wiring of driver's door: connector Е-16 with 2 wires is a button, connector Е-17 with 3 wires is a touch sensor of door handle.
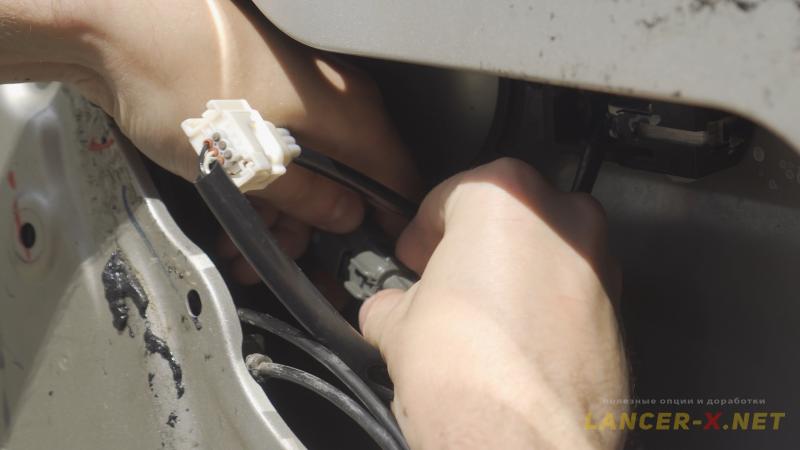
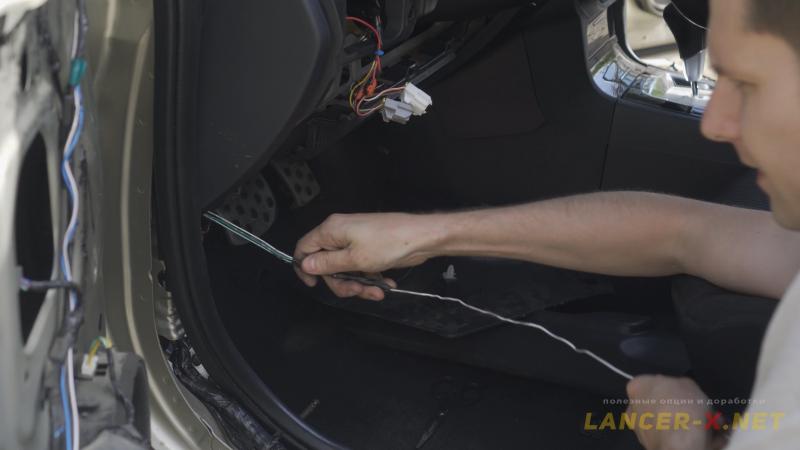 I connect the connectors and lay wires along the standard wiring through the door corrugation to the connectors of left kick-panel. It is more convenient to lay wiring through the door corrugation with a wire, having previously wound the wiring to the end of the wire with electrical tape.
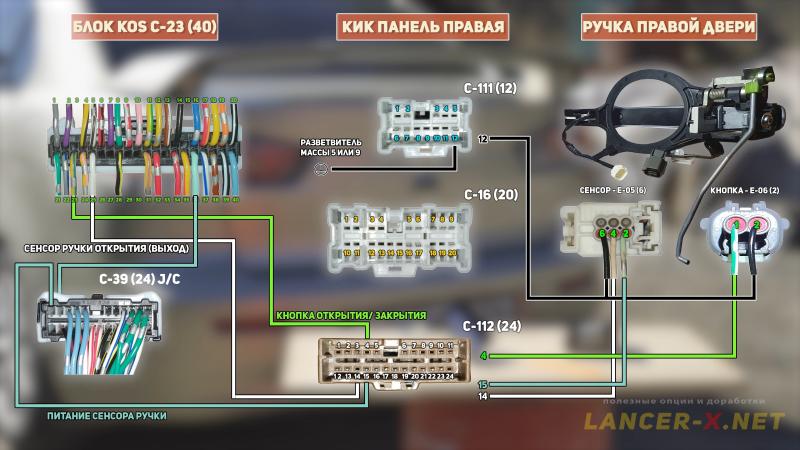
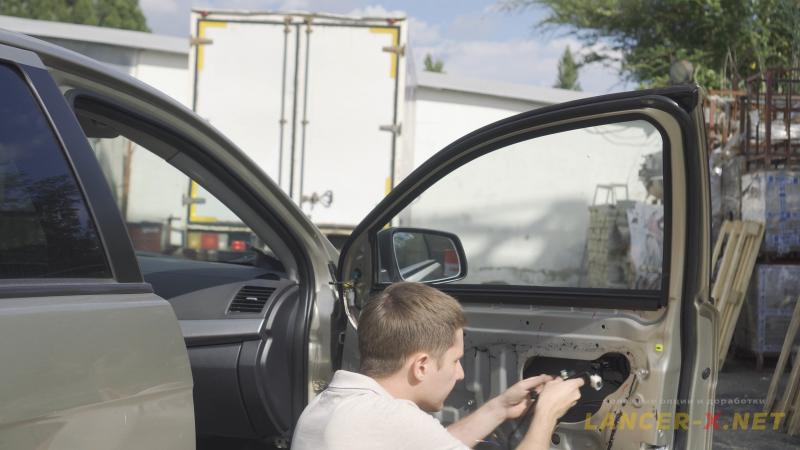 It is necessary to plait in the door wiring of passenger's door not 5 wires with connectors, but 7: connector Е-06 with 2 wires is a button, connector Е-05 with 3 wires is a touch sensor of door handle and also additionally the mass wire and a wire- input of door lock limit switch, that we had installed earlier.
 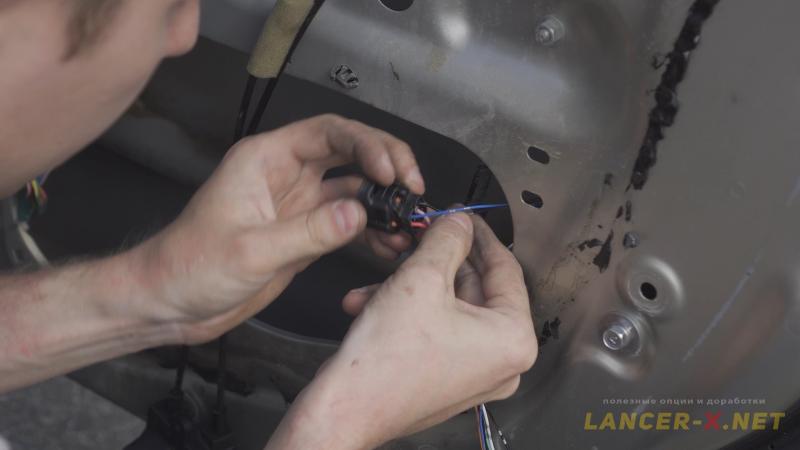 Connect connectors of button and sensor. And in the connector of door lock add 2 wires: limit switch wire in pin 1, and mass in pin 3.
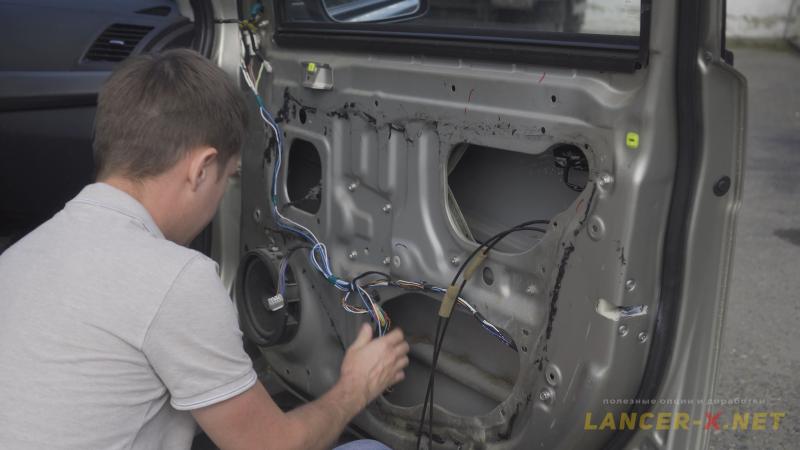 Next lay wiring along the standard harness, and by analogy with driver's door lay wiring through the door corrugation using wire and electrical tape to the right kick-panel.
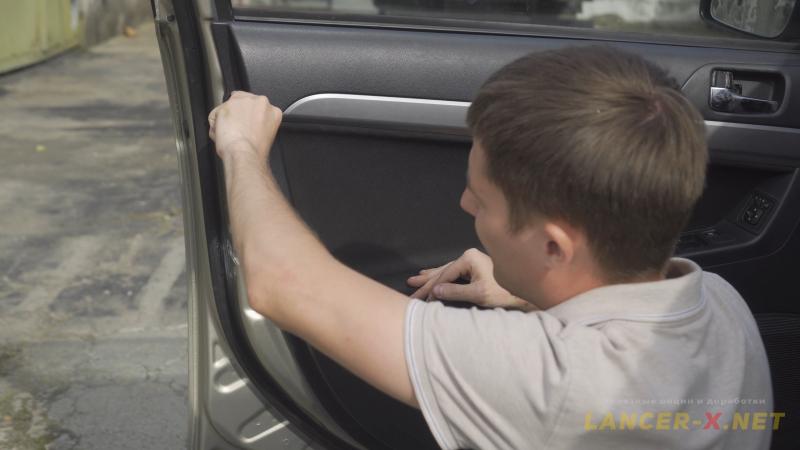 I will tell about further connection a little later. And in the meantime check the wiring, lay it carefully. After that it is possible to fasten door cards back on the doors, we have finished all necessary manipulations.
Connection of KOS wiring on Mitsubishi Lancer X
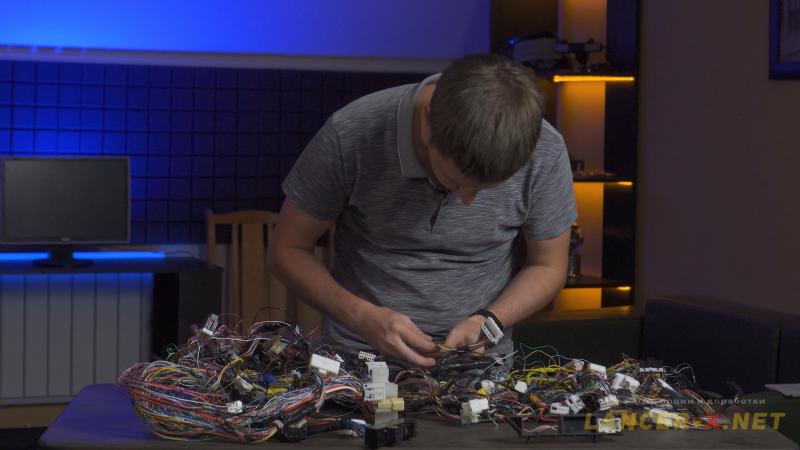
Before wires connection, I recommend you to disconnect terminals from battery in order not to close anything during continuity and connection of all connectors.
During connection I have focused on Electrical circuit of KOS connection.
But it is quite difficult for an ordinary car owner to focus on them, that is why I will try to describe everything as simple language and simplified pictures.
To make it easy for you, I recommend you to number every wire. And be sure to disconnect terminals from the battery.
Let me remind you that I bought fully under-torpedo harness and unplait from it the under-torpedo wiring for KOS connection.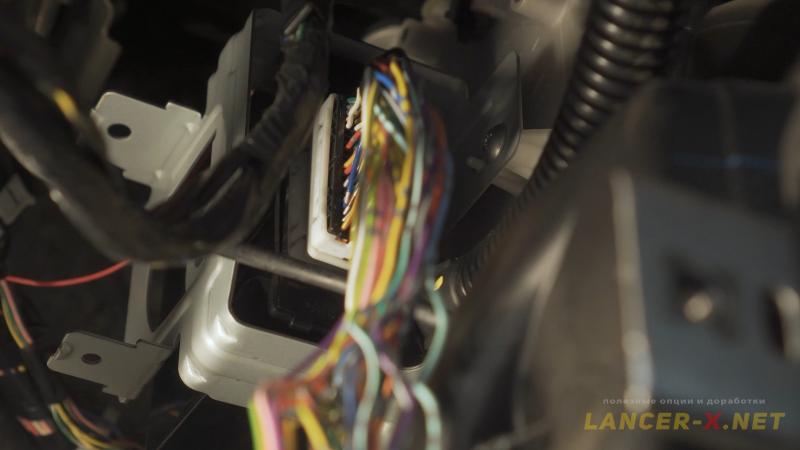 Put a connector in the KOS unit and begin to distribute wires. Ideally, it is better to remove a torpedo fully and lay wires, but I won't do it, as after several years of improvements, I know how and where to lay wires without torpedo removing.
Connection of button and sensor from driver's side
Let us begin with connection of the sensor and door handle button wires from the driver's side.
We need to lay wires from KOS unit С-23 (40-pin) up to connectors С-126 (24-pin) and С-125 (12-pin) to the left kick-panel.
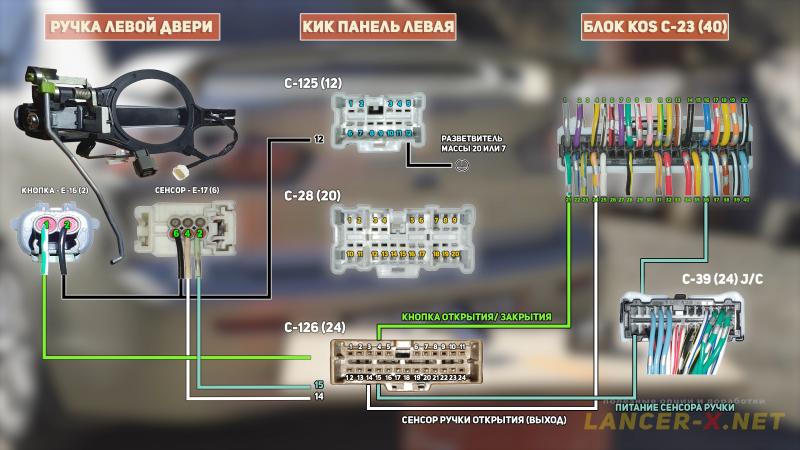 The general connection scheme are as follows.
 Begin with connector C-125 (12-pin) of left kick-panel:
Connector С-125 pin 12 is a mass.
It presents on any wiring type, either before restyling or restyled auto, this is a general mass, to which almost everything in the door is connected. If you have changed the door wiring fully to donor one, then the mass will be already connected to the button and sensor connectors.
And if you plait the wiring independently in your door wiring as I do, then connect the button mass and sensor mass to the mass wire with pin 12, for example using the mortise terminals. This is the easiest variant of mass connection.
On the connector Е-16 of mass button is pin 2, on the connector Е-17 of mass sensor is pin 6.
I did not cut into standard mass wires, and just laid an additional mass from car body through free pin in the connection С-125 for sensor and door handle button.
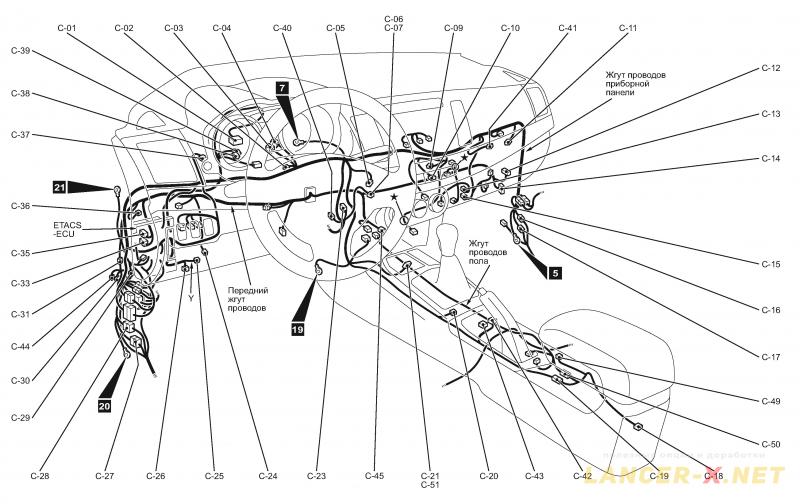 Branching and mass connection points on the car.
 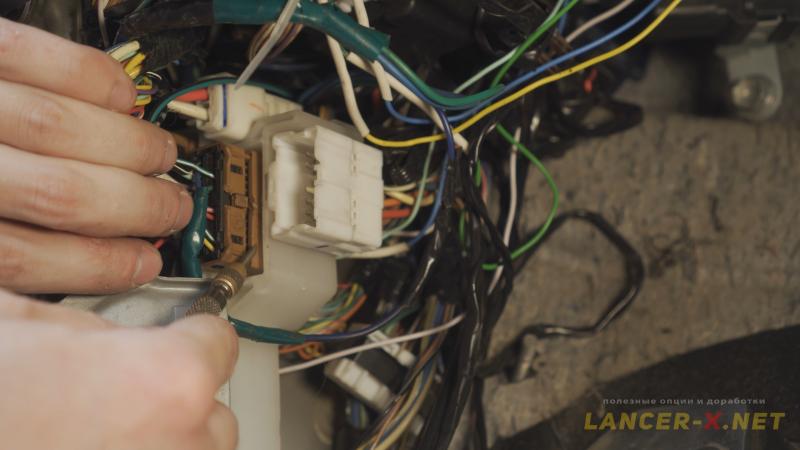 Next we need a door connector C-126 (24-pin) of left kick-panel:
KOS unit connector C-23 pin 21 is an open/close button, lay along the standard wiring up to the connector C-126 pin 4 and next through the mating connector, the wire from pin 1 of button connector E-16 connects to this pin. That is all, the button is connected.
KOS unit connector C-23 pin 24 is an output of handle sensor, connect in pin 14 of connector C-126 and next through the mating connector, the wire from pin 4 of sensor connector E-17 connects to this pin.
KOS unit connector C-23 pin 36 is a supply of handle sensors. That is a common supply as for the left sensor as for the right. That is why we need to branch this wire to the driver's and passenger's sides.
In this case, you can join several wires by adhesion, swaging etc. I will do it by standard way.
 There are J/C connectors (Join Connection) in the donor wiring. This is a special connector in the Mitsubishi wiring, which allows to branch 1 wire to several. There are 2 types of J/C connectors, with branching to 2 wires.
And with branching along left and right side, the last one is often used for branching of CAN bar in the car.
 So, chose what way of wires joint is more convenient for you, I will use exactly this J/C connector (with branching to 2 wires), which I will remove from donor under-torpedo braid and connect into the free pins, for example 1,2 and 12.
KOS unit connector C-23 pin 36 is a supply of handle sensors, connect it into the J/C connector pin 2 and by branching from pin 12, lay along the standard wiring up to the connector C-126 pin 15 and next through the mating connector, the wire from pin 2 of sensor connector E-17 connects to this pin. That is all, the sensor on the driver's door is connected.
Connection of button and sensor from passenger's side
Now repeat almost the same for the connection of a button and sensor of door handle from the passenger's side.
We need to lay wires from KOS unit C-23 (40-pin) up to connectors C-112 (24-pin) and C-111 (12-pin) to the right kick-panel.
 The general connection scheme are as follows.
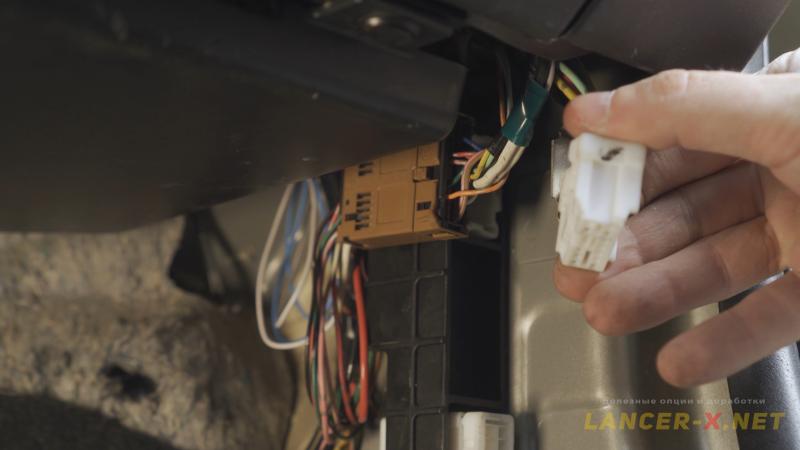 Begin with connector C-111 (12-pin) of right kick-panel:
Connector C-111 pin 12 is a mass.
It presents on any wiring type, either before restyling or restyled auto, this is a general mass, to which almost everything in the door is connected. If you have changed the door wiring fully to donor one, then the mass will be already connected to the button and sensor connectors.
And if you plait the wiring independently in your door wiring as I do, then connect the button mass and sensor mass to the mass wire with pin 12, for example using the mortise terminals. This is the easiest variant of mass connection.
On the connector Е-06 of mass button is pin 2, on the connector Е-05 of mass sensor is pin 6.
I did not cut into standard mass wires, and just laid an additional mass from car body through free pin in the connection С-111 for sensor and door handle button.
Next we need a door connector С-112 (24-pin) of right kick-panel:
KOS unit connector C-23 pin 23 is an open/close button, lay along the standard wiring up to connector C-112 pin 4 and next through the mating connector, the wire from pin 1 of button connector Е-06 connects to this pin. That is all, the button is connected.
KOS unit connector С-23 pin 25 is an output of handle sensor, connect in pin 14 of connector C-112 and next through the mating connector, the wire from pin 4 of sensor connector Е-05.
KOS unit connector C-23 pin 36 is a supply of handle sensors. We have branched this wire through J/C connector. From pin 1 of J/C connector lay along the standard wiring up to the connector С-112 pin 15 and next through mating connector, the wire from pin 2 of sensor connector Е-05 connects to this pin. That is all, the sensor on the driver's door is connected.
Connection of lock limit switch of the passenger's door
Here is necessary to connect the mass and an input of lock limit switch. If you have changed your door wiring to the donor one, then these wires are already present.
I have plaited missing wires in my door wiring early and also have plaited the mass and input of door lock limit switch, together with wires
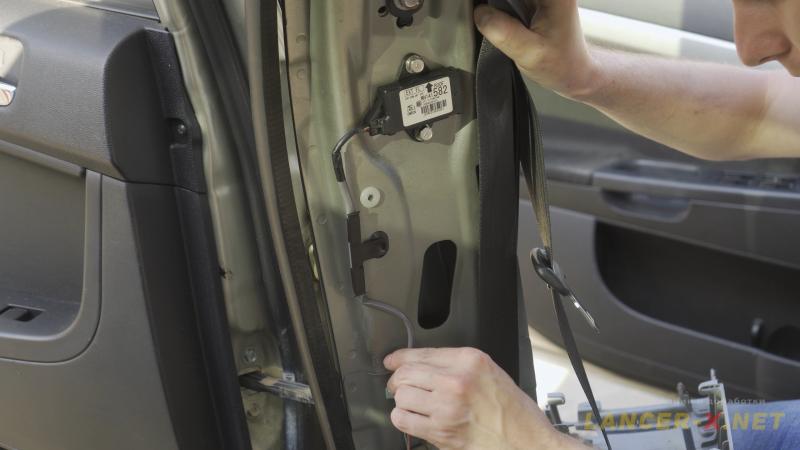
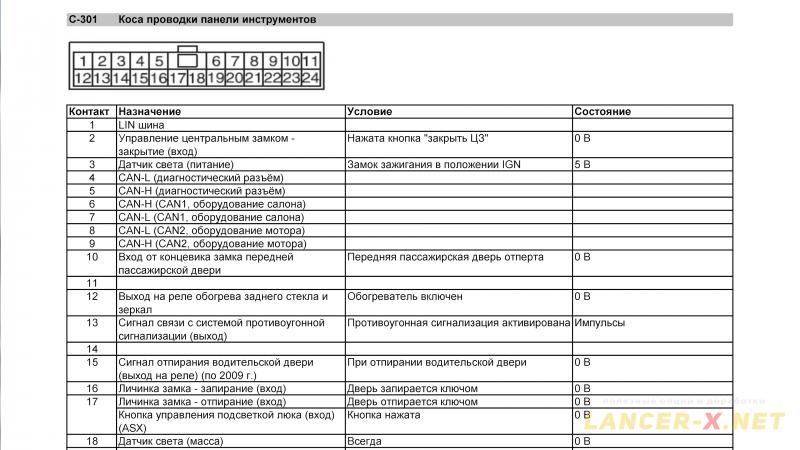 If we look at the diagram of ETACS unit pinning, then the input of lock limit switch of front passenger's door begins with connector C-301 pin 10 of ETACS unit.
On before restyling car this wire, as a rule, is laid from the factory up to the door connector C-112 pin 23 in the area of right kick-panel.
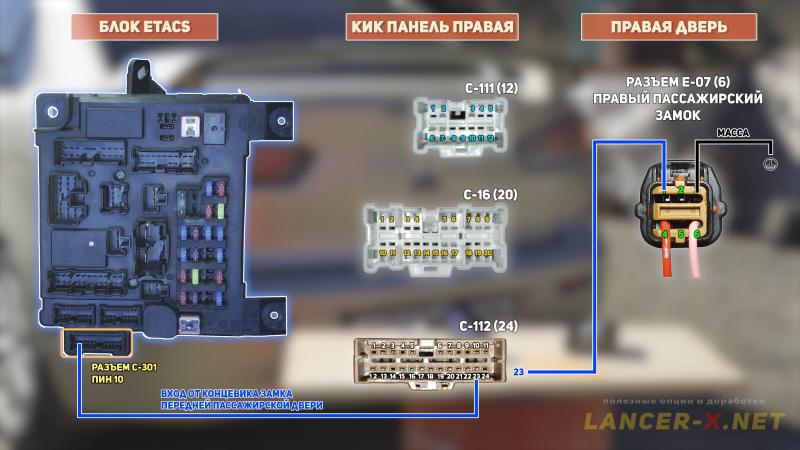 There is no this wire on restyled car. For that reason I unplait it from the donor wiring and lay along the standard under-torpedo harness of wiring from connector C-301 pin 10 of ETACS unit, up to door connector of right kick-panel C-112 and connect it in pin 23.
  And next through the mating connector C-112, the wire from pin1 of right passenger's lock connector E-07 connects to this pin 23.
And I connect a mass, which you can take from general branching or car's body, in the pin3.
 Ready, buttons and sensors of door handles are connected. And there is a lock with all functions of driver's one is installed from the passenger's side, including the visible status of the lock.
Installation and connection of KOS antennae on Mitsubishi Lancer X
 Next stage is an installation and connection of KOS antennae in the central rack from the driver's side and from the passenger's side, on the back shelf and antenna with buzzer, which is installed in the area of rear bumper.
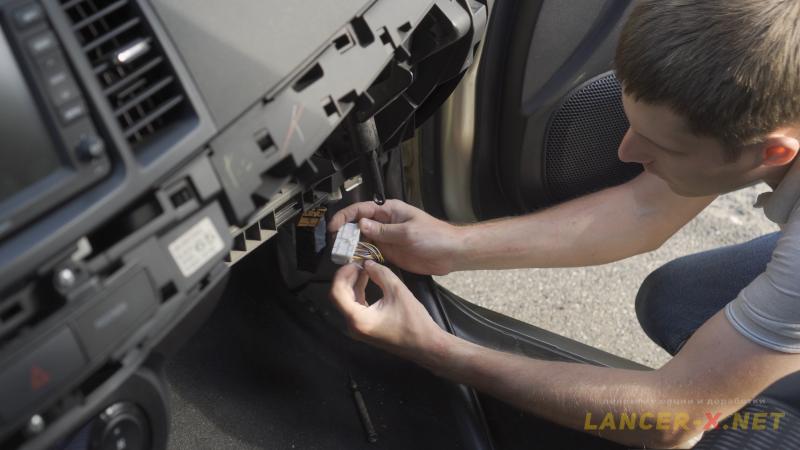 And when I laid the wiring for door handles, I paid attention on the presence of wires in the door connectors, that are responsible for antennae connection.
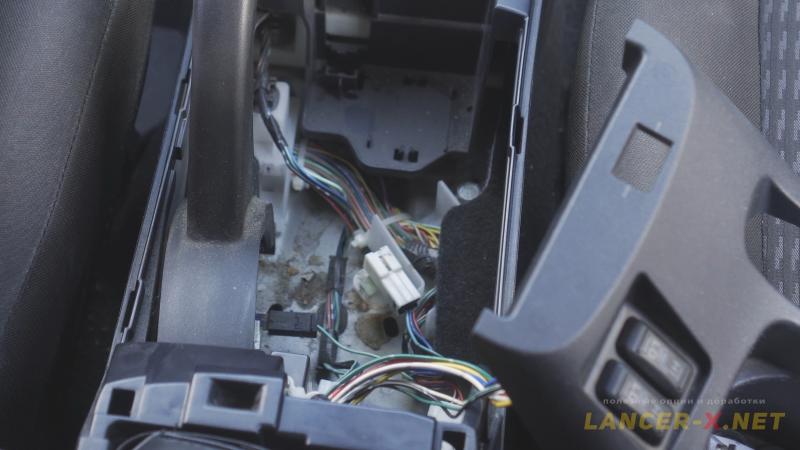 Removing the central tunnel, I saw the connector for antennae connection.
 To be sure, I have tested this antenna connector and connector in the kick-panel, where antenna wires must be connected, for continuity, and they have continuity. And that means, that I have the wiring for antennae connection, this makes an installation a lot easier. Thankfully my auto is a transitional restyling of 2011 year made.
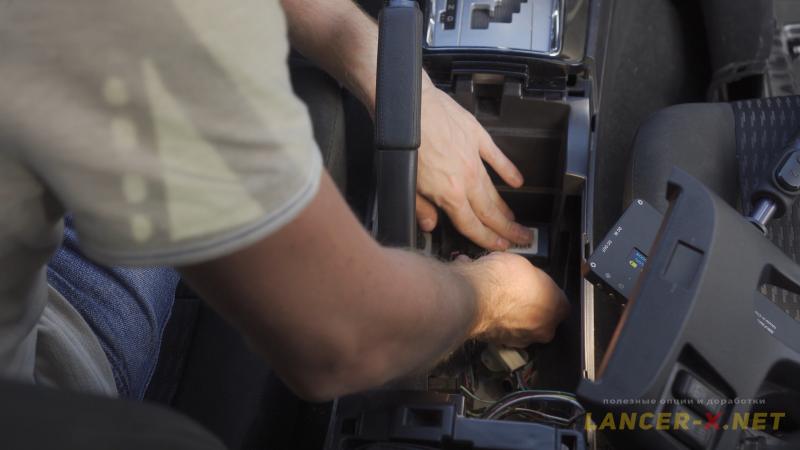 Antenna in the central console 8637A221 is installed in the standard place, it just latches and is connected in the connector C-115 (3-pin).
For installation of antennae in the central racks, it is necessary to remove carefully the plastic facings.
 Antenna in the central rack from the driver's side MN141582 is fastened with 2 bolts in the standard place and is connected in the connector D-20 (3-pin).
 Antenna in the central rack from the passenger's side 8637A132 is also fastened with 2 bolts in the standard place and is connected in the connector D-37 (3-pin).
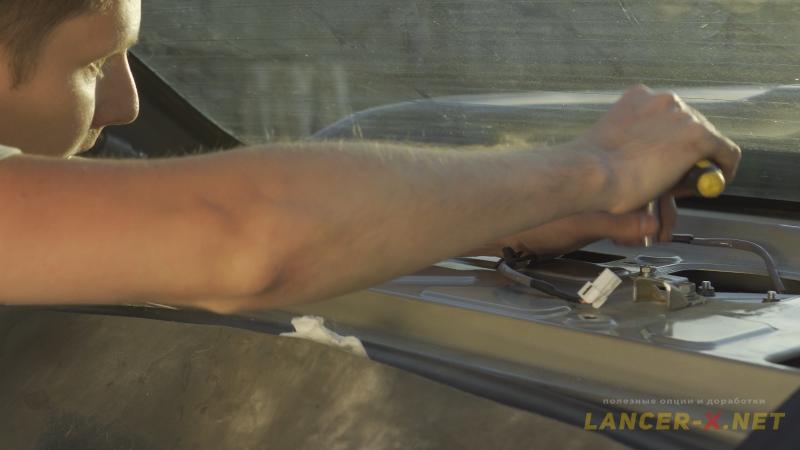 Antenna on the back shelf 8637A135 has the bracket and is also fastened with 2 bolts, for its installation it is necessary to remove carefully the plastic facings of rear racks and the back shelf, the back shelf is fastened on the plastic clamps.
The shelf is unlatch by confident effort upwards. Antenna is connected into the connector F-07 (3-pin).
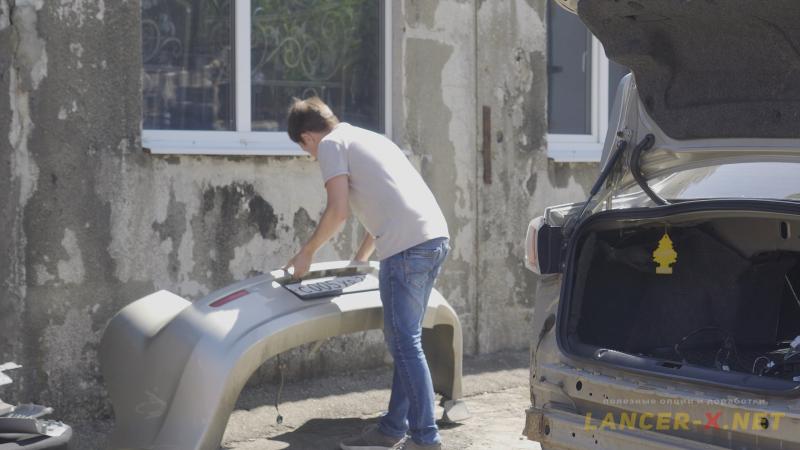 For installation of antenna with buzzer in the area of rear bumper 8637A134, it is necessary to remove the rear bumper.
 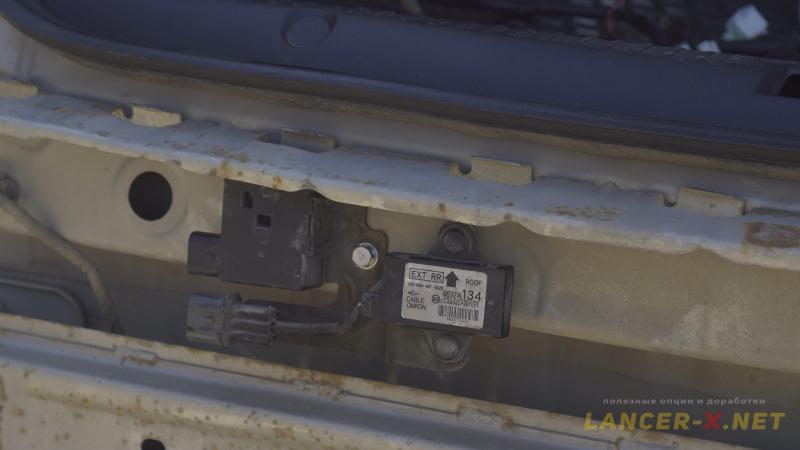 Antenna is fastened with a bolt in the standard place, the holes for its fastening on sedan is provided from the factory. But there are no wiring for connection neither on before restyling nor restyling cars.
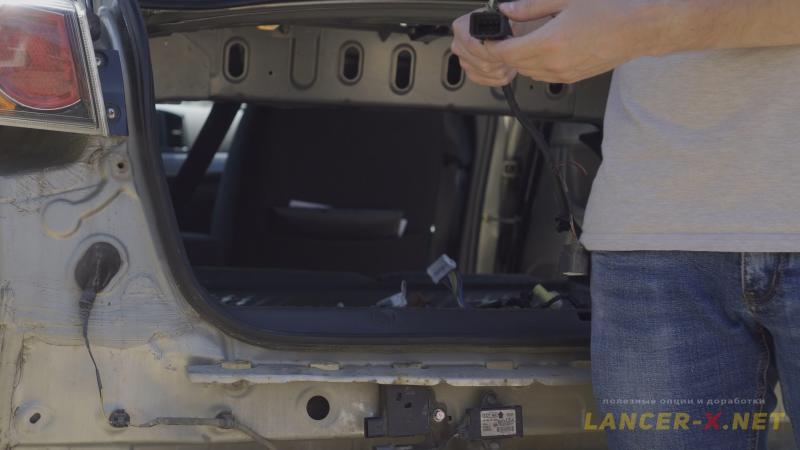 And here you also have 2 variants as with the door wiring: plait the missing wires or change the wiring in whole.
In this situation, I have decided to change the wiring in whole, as the donor wiring is a maximum wiring, in which there is a presence of wires for connection the standard Rockford acoustic system and connector for connection of rear parking system, which I am going to install in the nearest future.
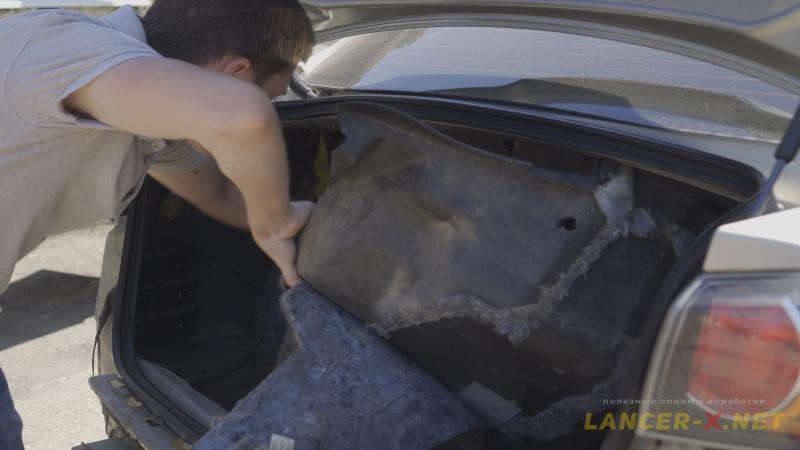 I remove all the contents from the trunk. I remove the left inner facing, by the way I will change it to the new one, as my old facing is in a very poor condition.
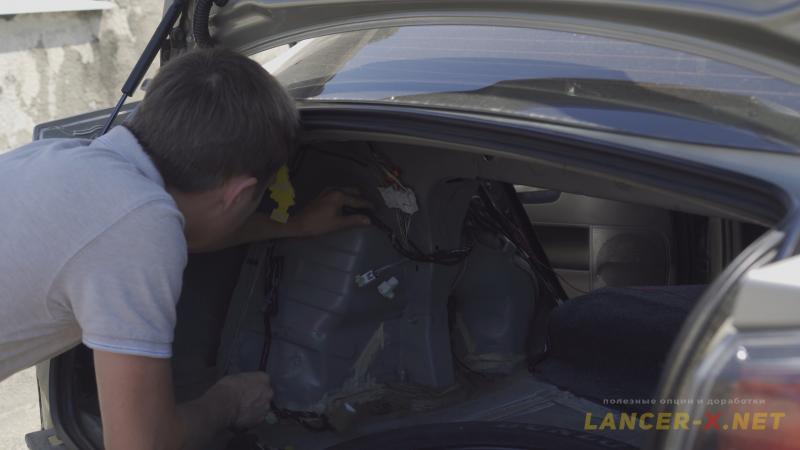 I remove carefully the old wiring and change it to the new donor-maximum.
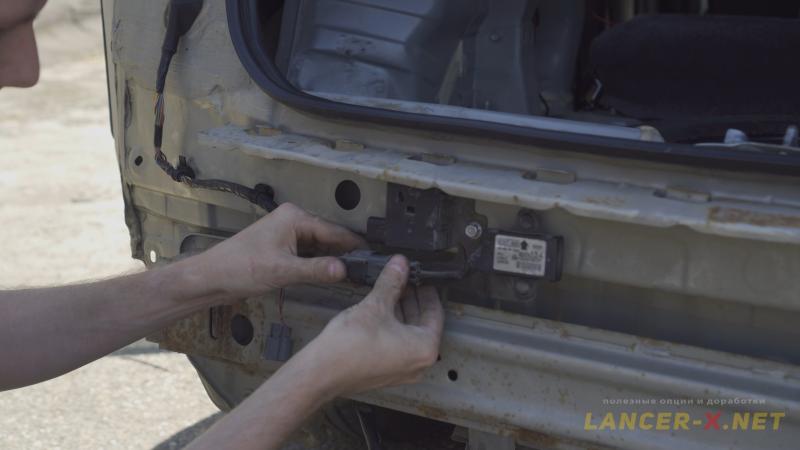 Connect an antenna in the connector F-17 (3-pin) and a buzzer in the connector F-16 (2-pin).
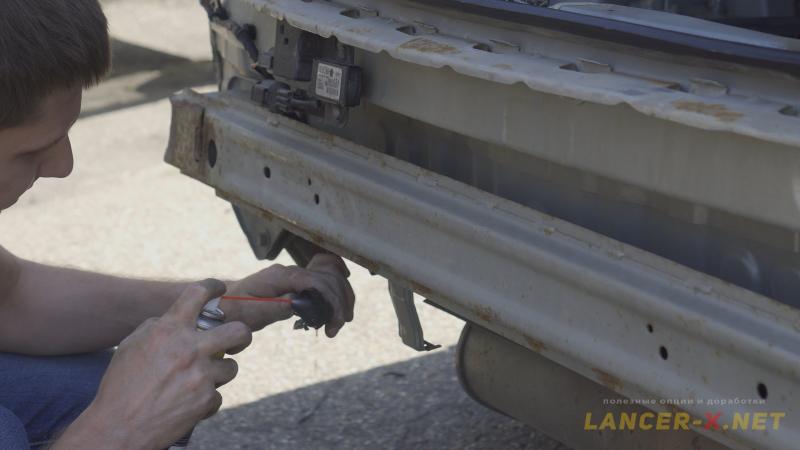 I fasten the new connector of parking system in the standard place, I purified pins in order to remove the dirt and oxides on the contacts.
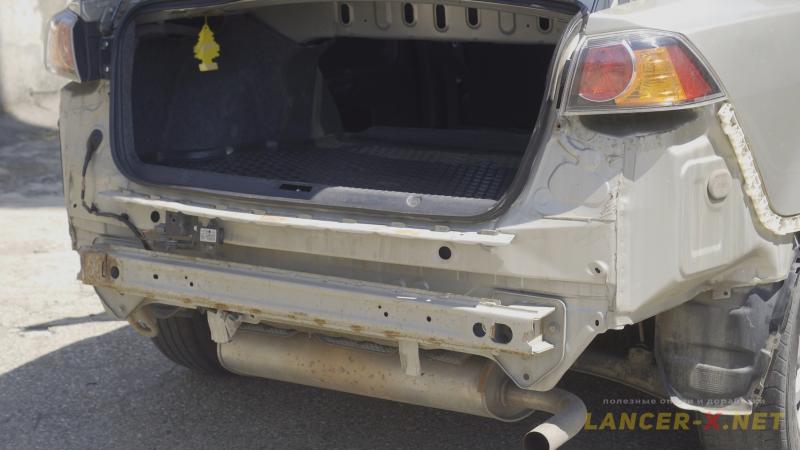 That is all, on given stage almost all antennae are installed, you can install the bumper back.
Wiring for KOS antennae on Mitsubishi Lancer X
If you are an owner of restyled Mitsubishi Lancer X since 2011 year made and you do not have wiring for connection the KOS antennae, then you can lay the wiring independently. The main thing is when you will buy the KOS set, ask the seller to put the donor wiring with antennae connectors.
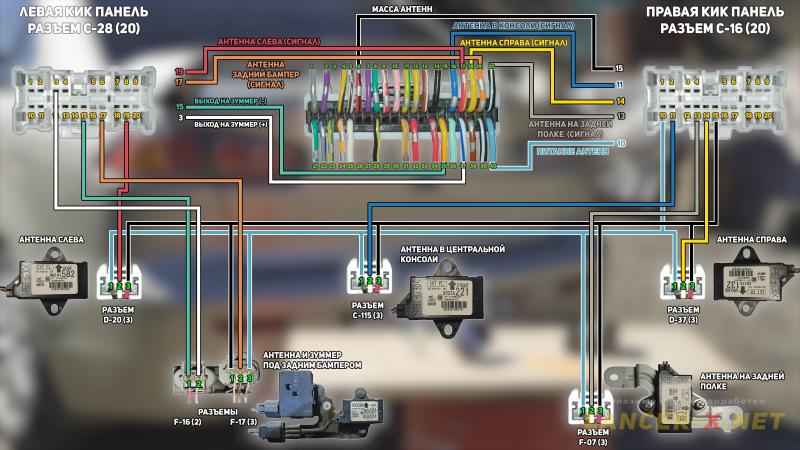 The general connection scheme are as follows. Part 1.
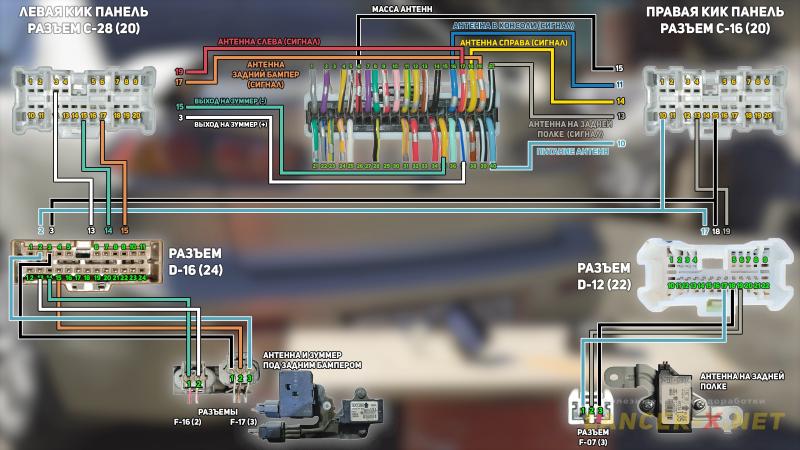 That is the same diagram, but here is shown the connection to the connectors D-16 (24-pin) on the left rear arch and to the connector D-12 (22-pin) on the right rear arch. Part 2.
Antennae, that are installed in the central console, in the central rack from the passenger's side and on the back shelf, are connected from the KOS unit connector C-23 through the connector C-16 (20-pin) of right kick-panel.
Connection of antenna in the central console
The connector of KOS unit C-23 pin 16 is a signal of antenna, which is installed in the central console. Lay that wire up to the right kick-panel to the connector C-16 and connect in pin 11, and next along the standard wiring connect into the connector C-115 pin 2 of antenna in the central console.
Connection of the antenna in the central rack from the passenger's side
Connector of KOS unit C-23 pin 18 is a signal of antenna, which is installed in the central rack from the passenger's side. Lay this wire up to the connector C-16 pin 14 and next connect into the connector D-37 pin 2 of antenna, which is installed from the passenger's side.
Connection of the antenna, which is installed on the back shelf
The connector of KOS unit C-23 pin 20 is a signal of antenna, which is installed on the back shelf. Lay this wire also up to the connector C-16 pin 13, next lay wire up to the rear right arch and connect in pin 19 of connector D-12 (22-pin) and then from this connector connect the wire into the connector F-07 pin 2 of antenna on the back shelf.
Antenna in the central rack from the driver's side and antenna with buzzer from the rear bumper side are connected from the KOS unit connector C-23 through the connector C-28 (20-pin) of left kick-panel.
Connection of the antenna in the central rack from the driver's side
Connector of KOS unit C-23 pin 17 is a signal of antenna, which is installed in the central rack from the driver's side. Lay this wire up to the connector C-28 pin 19 and next connect into the connector D-20 pin 2 of antenna from the driver's side.
Connection of the antenna and buzzer in the area of rear bumper
The connector of KOS unit C-23 pin 19 is a signal of antenna, which is installed in the area of rear bumper. Lay this wire up to the connector C-28 pin 17, next lay wire up to the rear left arch and connect in pin 15 of connector D-16 (24-pin) and then from this connector connect the wire into the connector F-17 pin 2 of antenna in the area of rear bumper.
Connector of KOS unit C-23 pin 35 is an output for the buzzer, minus. Lay this wire up to the connector C-28 pin 15 of left kick-panel, next connect in pin 14 of connector D-16 on the left rear arch and then from this connector connect into the connector F-16 pin 1 of the buzzer.
Connector of KOS unit C-23 pin 37 is an output for the buzzer, plus. Lay this wire up to the connector C-28 pin 3 of left kick-panel, next connect in pin 13 of connector D-16 on the left rear arch and then from this connector connect into the connector F-16 pin 2 of the buzzer.
Also, it is necessary to connect the supply and mass to the all installed antennae.
Connector of KOS unit C-23 pin 6 is a common antennae minus, lay it up to the door connector C-16 pin 15 of the right kick-panel, and next this wire is branched along the floor wiring for all antennae and connect:
- in pin 3 of connector C-115 of the antenna in the central console.
- in pin 3 of connector D-37 of the antenna, which is installed from the passenger's side.
- in pin 3 of connector F-07 of the antenna on the back shelf.
- in pin 3 of connector D-20 of the antenna from the driver's side.
- in pin 1 of connector F-17 of the antenna in the area of rear bumper.
Connector of KOS unit C-23 pin 40 is a common antennae supply, lay it up to the door connector C-16 pin 10 of the right kick-panel, and next this wire is also as a minus, branched along the floor wiring for all antennae and connect:
- in pin 1 of connector C-115 of the antenna in the central console.
- in pin 1 of connector D-37 of the antenna, which is installed from the passenger's side.
- in pin 1 of connector F-07 of the antenna on the back shelf.
- in pin 1 of connector D-20 of the antenna from the driver's side.
- in pin 3 of connector F-17 of the antenna in the area of rear bumper.
Here is how the connection diagram of installed antennae at the given stage looks like. If it is difficult to understand, watch a video.
Electronic latch and trunk open button for KOS on Mitsubishi Lancer X
 For the full operation of keyless operation system, it is necessary to install the electrical lock and trunk open button. I won't describe it in details, as there is a specific article about installation of electrical lock and trunk open button on the website, it's simple enough to use.
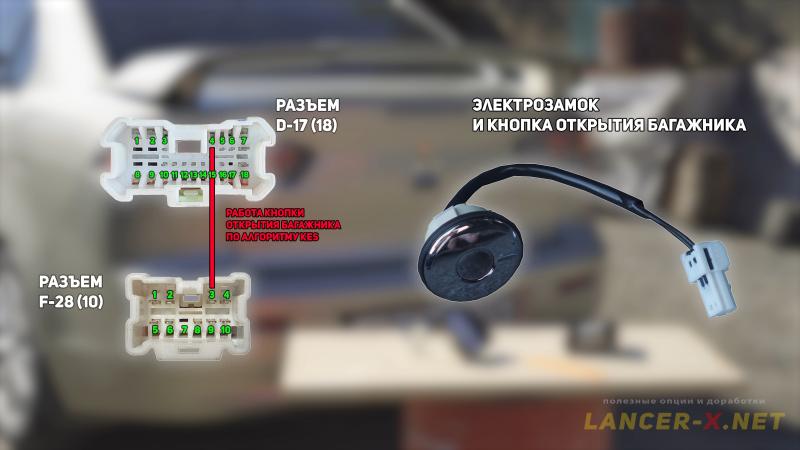 But I would like to remind you about the connection. Almost on all trim levels in Russia it was necessary to build up 1 wire from the connector D-17 pin 4 on the left rear fender from the cabin up to the connector F-28 pin 3 on the left rear fender from the trunk side.
 After that the electrical lock and trunk open button began to operate by the principle of central locking, the central locking is opened, it is possible to open the trunk, the central locking is closed, it is impossible to pen the trunk by the button.
 But when you install the keyless operation system, the algorithm of trunk opening with installed button will change, as it is necessary to lay the separate wire from the KOS unit, that is responsible for trunk lid opening.
Connector of KOS unit C-23 pin 28 is a button of trunk opening. Lay that wire up to the connector C-28 pin 16 of left kick-panel, next connect in the connector D-16 pin 20 on the left rear arch and then from this connector connect in pin 3 of connector F-28 on the left rear fender from the trunk side.
But I remind you, that we have already connected the wire in given pin 3 of connector F-28 for operation of electrical lock and trunk button. If one puts this pin out and put there the wire of trunk opening button from KOS unit. Then the opening of trunk lid will operate on the different logic.
When pressing the button, the antenna in the rear bumper scans whether there is a remote control key near or not, you cannot open the trunk, even if the central locking is opened.
I.e you have a choice between trunk opening on the logic of central locking or on the logic of keyless access, if there is a standard key near. Which is not very convenient.
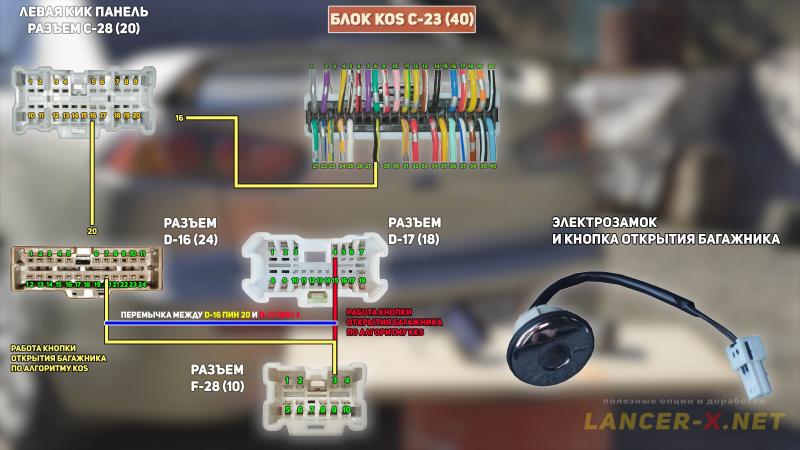 The user KSW-S from Drive2 gave the genius and easy solution of this problem.
 He suggested just connect the jumper between connectors D-16 pin 20 and D-17 pin 4. Therefore, the trunk will be opened by button if there is a standard key near. And in the case of central locking is opened, the trunk will be opened by button without standard key.
You can cut in the jumper using the compression terminals. Was bought on Aliexpress.
Реклама. ООО "АЛИБАБА.КОМ (РУ)", ИНН 7703380158
But I eventually made everything through additional connector J/C, which is again, I took from donor under-torpedo braid. Given connector has joint necessary wires almost by standard way, without cutting-in the wires and violation of their insulation.
Electronic stability control system and KOS on Mitsubishi Lancer X
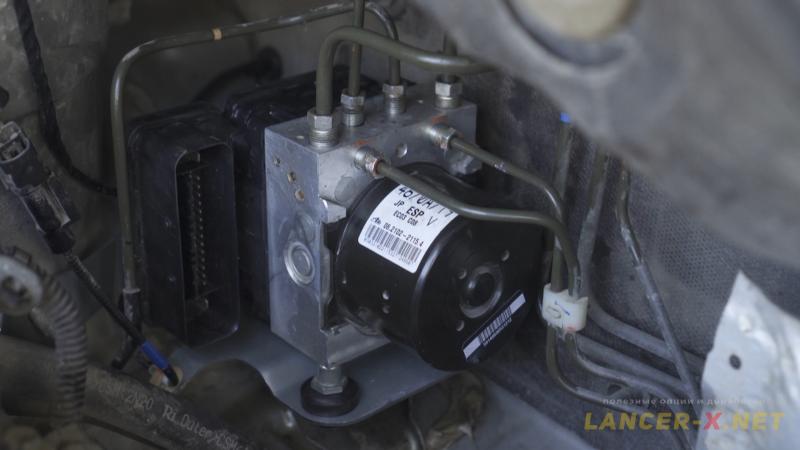 A separate point, regarding the electronic stability control system, which I installed in the article Electronic stability control system on Lancer X.
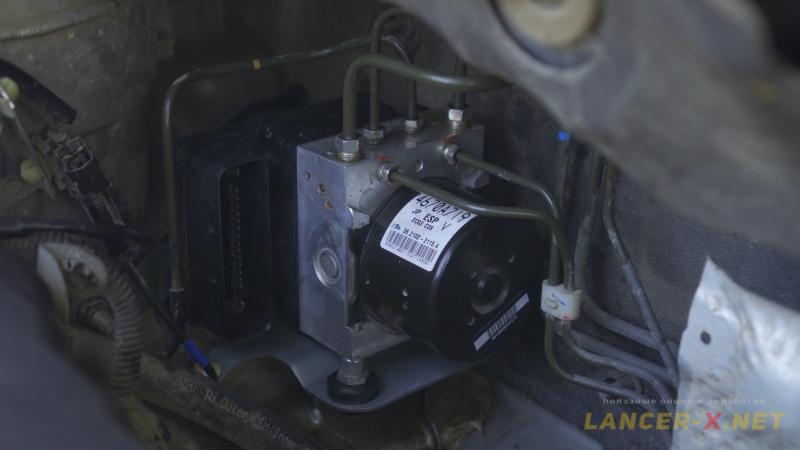
 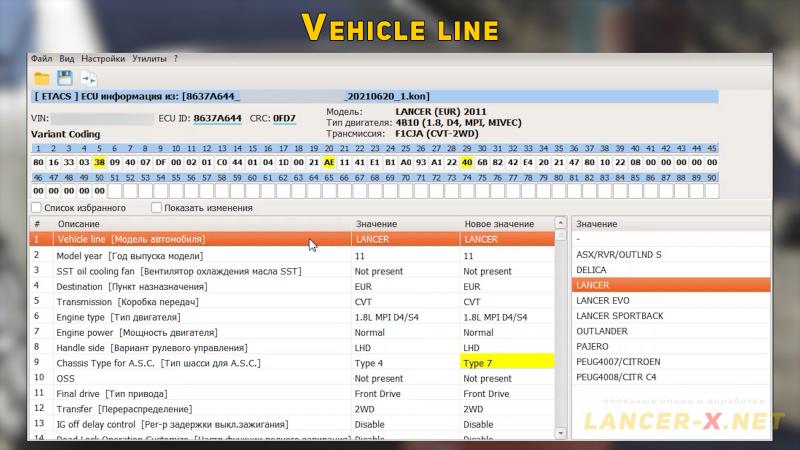 When I installed it, I specifically bought exactly 719 unit (Unit ABS/ASC - 4670A719), which was removed from Lancer X. It allowed not to change the Vehicle Line parameter in the coding.
 And if I have installed the set with ASX or Outlander, I would have to point the ASX or Outlander car in the Vehicle Line parameter, and in this case KOS unit, focusing on this parameter, thought that I had ASX or Outlander and a trunk lid operated on logic of 5 doors, and there was a mistake of one from additional antenna, that is installed on ASX or Outlander, in ETACS unit. Many people, as I understood, do not even bother about it and do not notice these problems. But keep in mind this moment.
Installation of new ignition lock with KOS receiving antenna on Mitsubishi Lancer X
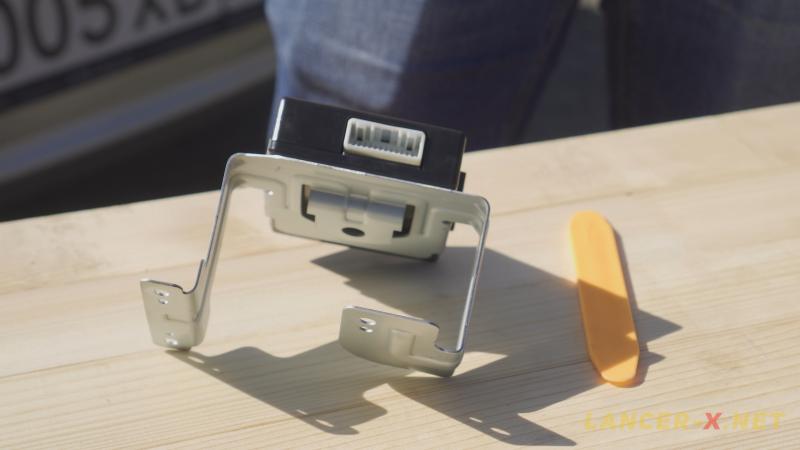
There is one of the final installation stages left, this is an installation of new ignition lock with receiving antenna-immobilizer.
But before that, let us lay the missing under-torpedo wiring from connector C-23 of KOS unit up to connector C-07 (12-pin) of receiving antenna (immobilizer) and connector C-213 (12-pin) of ignition lock blocker.
On before restyling Lancer X these wires are present from the factory.
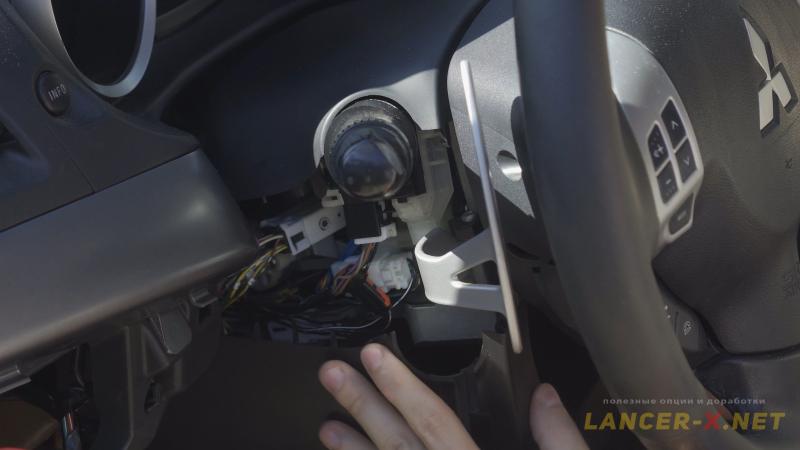 Unscrew and remove a plastic facing of the steering tube, it is fastened with 2 screws below.
 Also remove a dash panel at once for more convenient access to the twist-off bolts, which fasten a single structure of ignition lock to the steering tube.
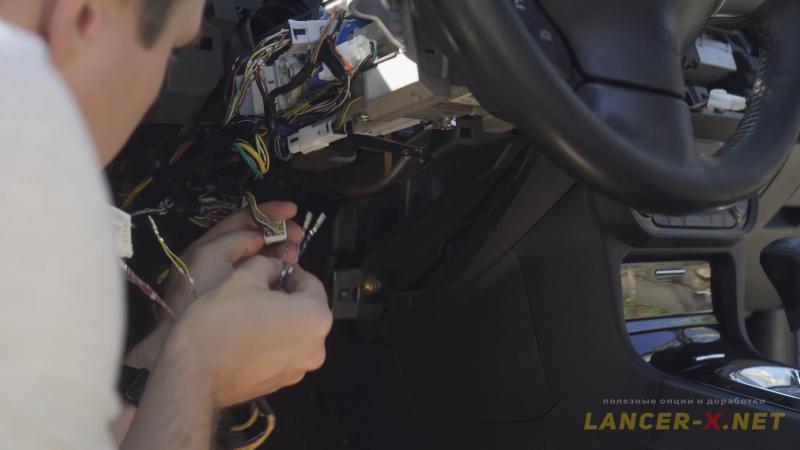 I have decided to begin with addition of wires in the connector C-07 (12-pin) of receiving antenna (immobilizer).
And here I had a problem, for which, to be honest, I was not ready. When trying to add wires in given connector, pins did not to put in.
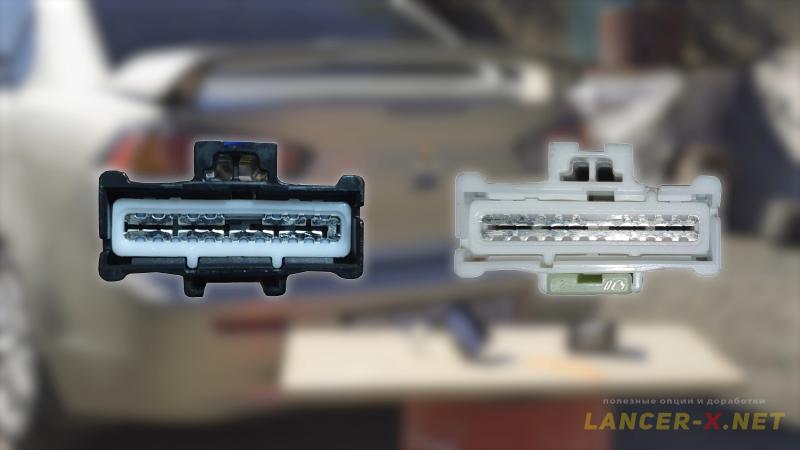
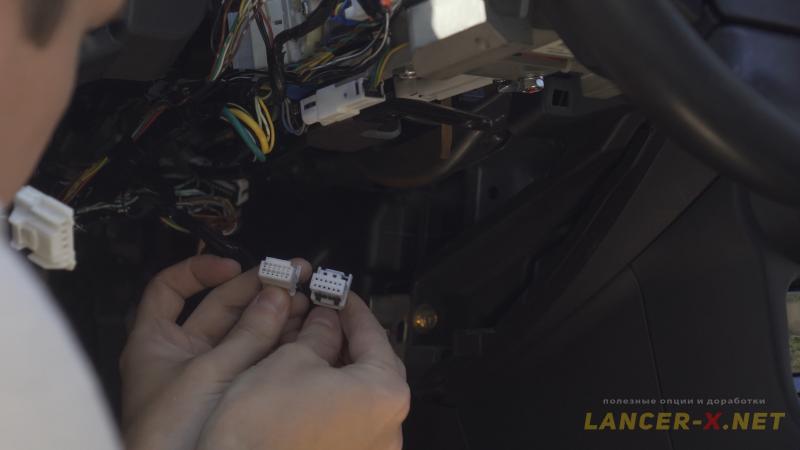 On closer examination, it turned out, that a connector and pins of standard immobilizer on my restyled auto differ in comparison with new immobilizer, which was removed from before restyling auto.
These connectors are very similar, and I would even say, that both connectors pin into the connector of immobilizer, without any problems, but exactly pins are different in them and are not interchangeable.
I did not really want to cut or cut in the standard wires. That is why I have decided to make a transitional wiring from my connector on before restyling.
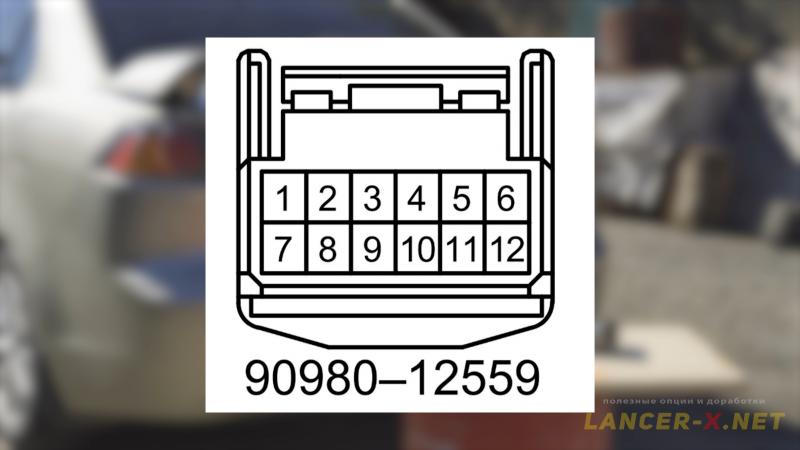 You just need to find a mating connector of given connector. By searching through catalogs, I have found, that my standard connector is a Toyota connector 90980-12559, but I have not found a mating connector, even on AliExpress.
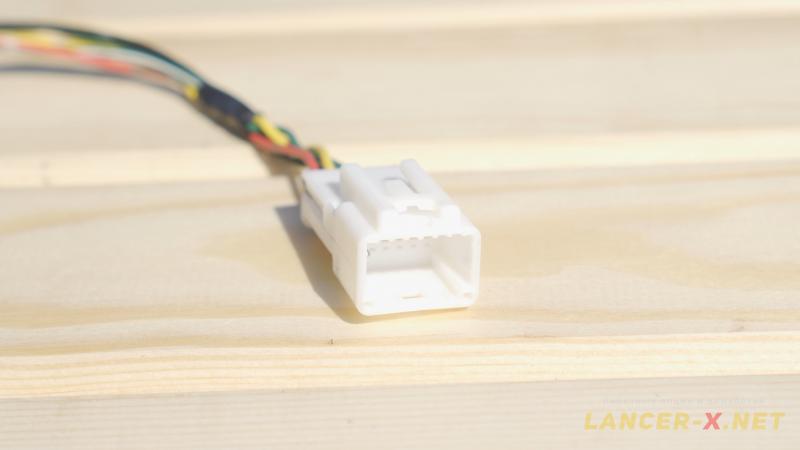 That is why I have found in a local announcement boards a man, who sells all these connectors, and he has just a necessary for me connector.
 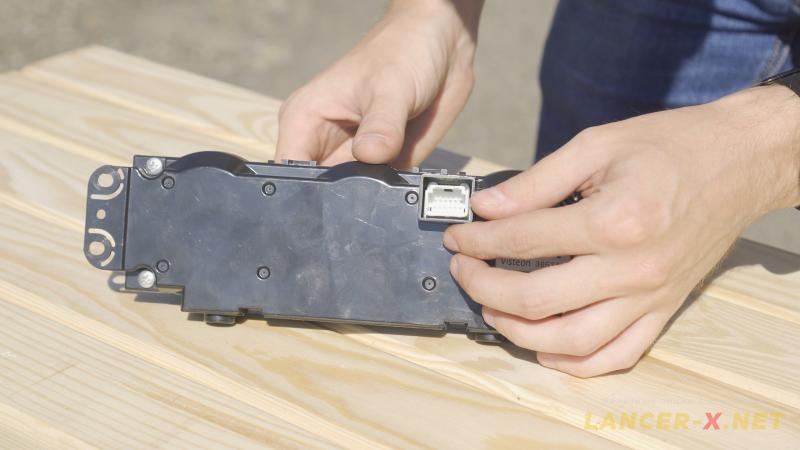 By the way, you can unsolder a mating part for making an adaptor from an old climate control unit, there are similar connectors as on immobilizer.
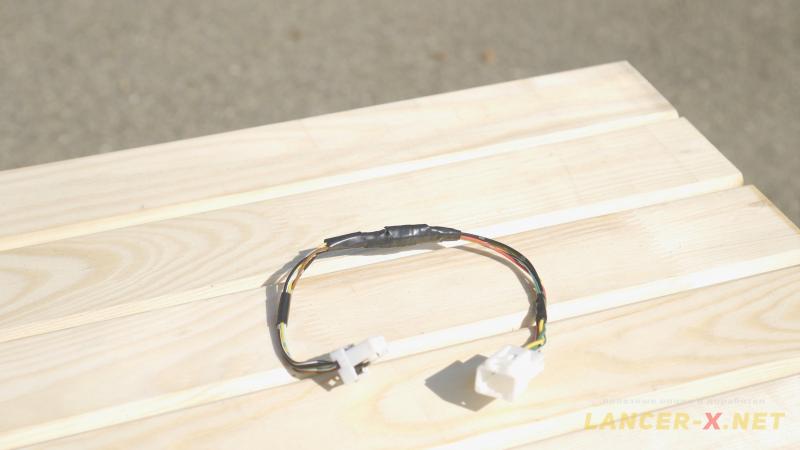 Next I made such an adaptor from restyled connector on before restyling, and already in before restyling connector I added missing wires.
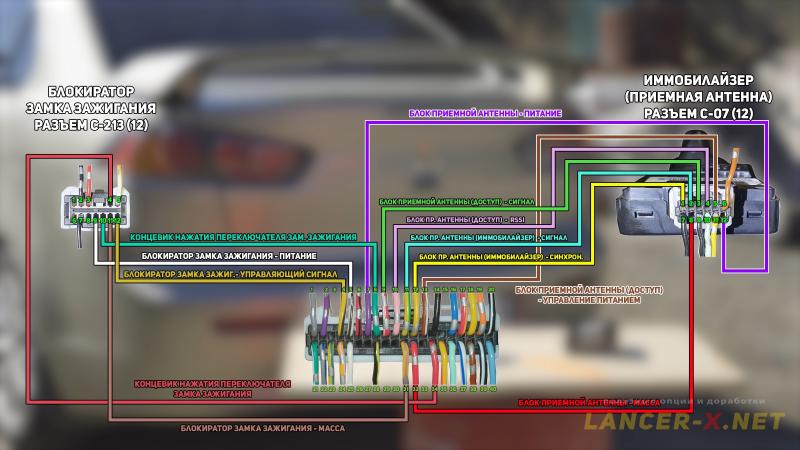 The connection scheme of missing wires is as follows.
 Connector of KOS unit C-23 pin 12 is a synchronization of receiving antenna (immobilizer) unit. Lay this wire up to the connector C-07 pin 1 of receiving antenna.
Connector of KOS unit C-23 pin 11 is a signal of receiving antenna (immobilizer) unit. Lay this wire up to the connector C-07 pin 2 of receiving antenna.
Connector of KOS unit C-23 pin 9 is a signal of receiving antenna (access) unit. Lay this wire up to the connector C-07 pin 3 of receiving antenna.
Connector of KOS unit C-23 pin 10 is a power level of receiving signal of antenna (access) unit -RSSI. Lay this wire up to the connector C-07 pin 4 of receiving antenna.
Connector of KOS unit C-23 pin 13 is a supply management of receiving antenna (access) unit. Lay this wire up to the connector C-07 pin 5 of receiving antenna.
Connector of KOS unit C-23 pin 32 is a mass of unit receiving antenna. Lay this wire up to the connector C-07 pin 8 of receiving antenna.
Connector of KOS unit C-23 pin 7 is a mass of unit receiving antenna. Lay this wire up to the connector C-07 pin 12 of receiving antenna.
Next similarly connect the missing wires in the connector C-213 (12 pin) of ignition lock blocker:
Connector of KOS unit C-23 pin 34 is a limit switch for ignition lock switcher pressing. Lay this wire up to the connector C-213 pin 4 of ignition lock blocker.
Connector of KOS unit C-23 pin 5 is a supply of ignition lock blocker. Lay this wire up to the connector C-213 pin 9 of ignition lock blocker.
Connector of KOS unit C-23 pin 8 is a limit switch for ignition lock switcher pressing, when the limit switch is pressed. Lay this wire up to the connector C-213 pin 10 of ignition lock blocker.
Connector of KOS unit C-23 pin 31 is a mass of ignition lock blocker. Lay this wire up to the connector C-213 pin 11 of ignition lock blocker.
Connector of KOS unit C-23 pin 4 is a command signal of ignition lock blocker. Lay this wire up to the connector C-213 pin 12 of ignition lock blocker.
Also in the connector C-213 of ignition lock blocker and to the KOS unit it is necessary to add supply and mass, as well as to connect CAN bar to the KOS unit.
And here you have two ways of connection the missing wire, the first way is quick, and the second way is slow, by in my opinion is more correct.
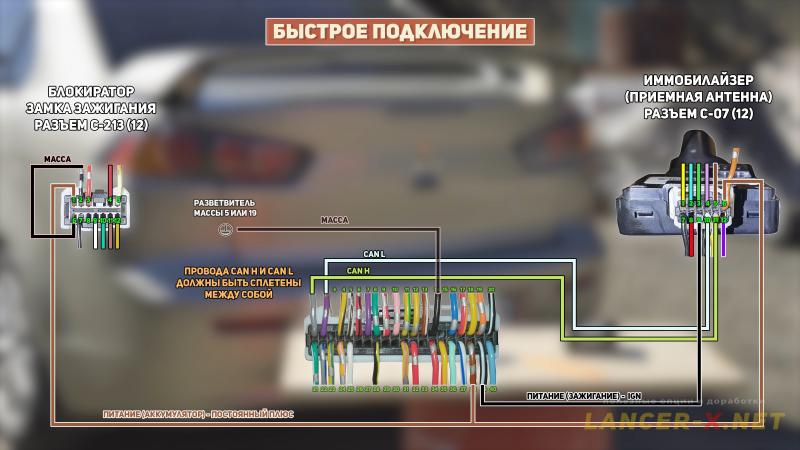 The quick way consists of that we take all missing wires from connector C-07 of receiving antenna-immobilizer, which is which is literally right next to it. But the minus is that one has to cut in the present wiring, for example using special compression terminals.
The scheme of quick connection way is as follow:
Connector of KOS unit C-23 pin 1 is a CAN H. Lay this wire up to the connector C-07 and connect in pin 11 of receiving antenna-immobilizer.
Connector of KOS unit C-23 pin 2 is a CAN L. Lay this wire up to the connector C-07 and connect in pin 10 of receiving antenna-immobilizer.
Wires of CAN bar must be obligatory plaited between each other.
KOS unit connector C-23 pin 39 is a supply of ignition. Lay this wire up to the connector C-07 and connect in pin 9 of receiving antenna-immobilizer.
KOS unit connector C-23 pin 38 is a supply-battery. Lay this wire up to the connector C-07 and connect in pin 6 of receiving antenna-immobilizer. From the same branching lay the wire to the connector C-213 of ignition lock blocker and connect in pin 1.
It is also necessary to add mass in the connector C-213 of ignition lock blocker in pin 6, take it from pin 2 of the same connector.
And then we have add a mass in the connector C-23 pin 14 of KOS unit, take it from any mass branching or from car's body.
I will connect using the second way, more correct, without cutting in the standard wires.
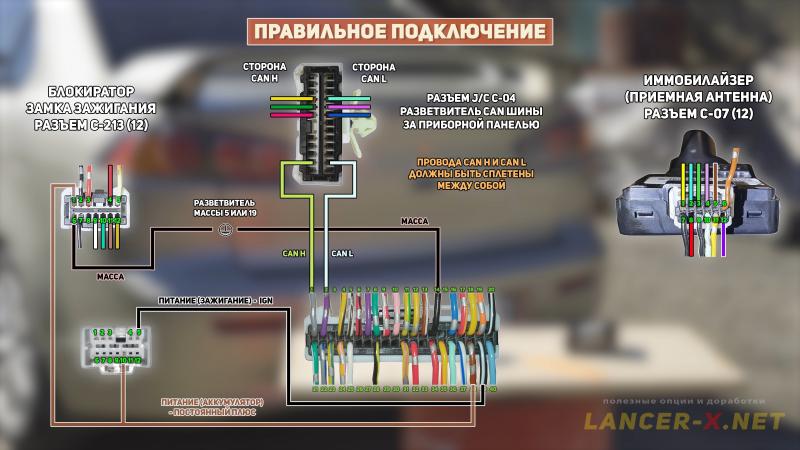 The scheme of correct connection way is as follow:
I will take the mass for connector C-23 pin 14 of KOS unit and mass for connector C-213 pin 6 of ignition lock blocker from the mass branching or from the body. In my case a mass branching is behind the dash panel.
 I will connect the CAN bar to the CAN bar in the connector C-04, which is also behind the dash panel.
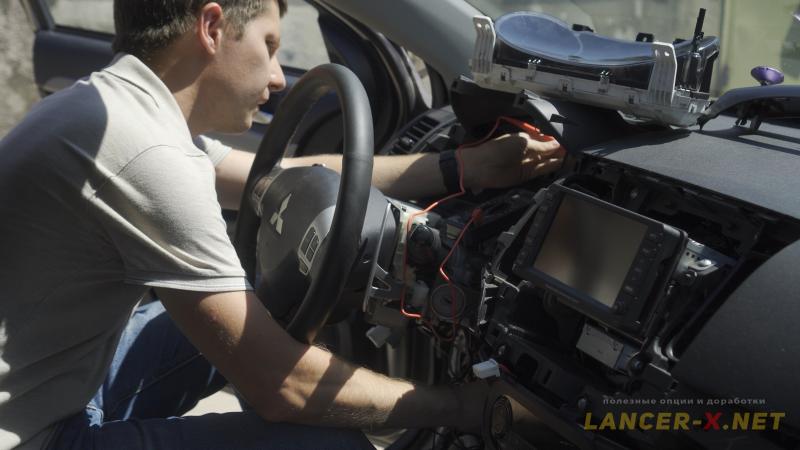 By the way, by the continuity test, I have found that from this branching the CAN bar is laud immediately to the connector C-07 of receiving antenna immobilizer.
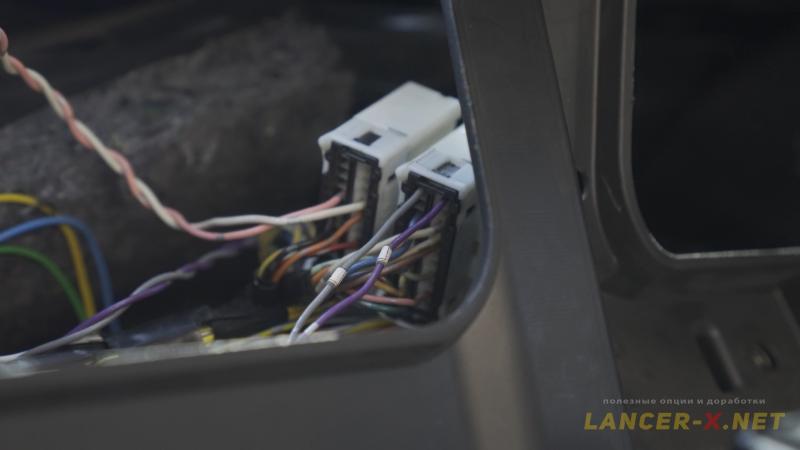
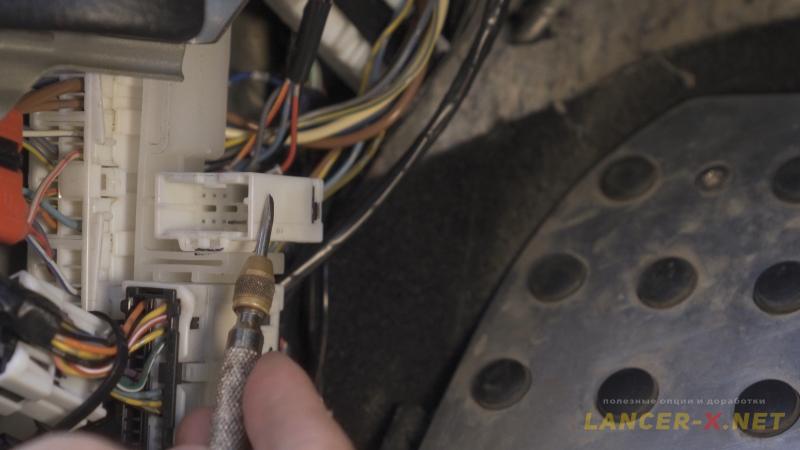 Next I began to find connectors, in which I can take the ignition supply and battery supply. By the continuity test I have found an unused connector in the left kick-panel, in which were the found wires. Unfortunately, I did not understand by schemes what is the number of given connector.
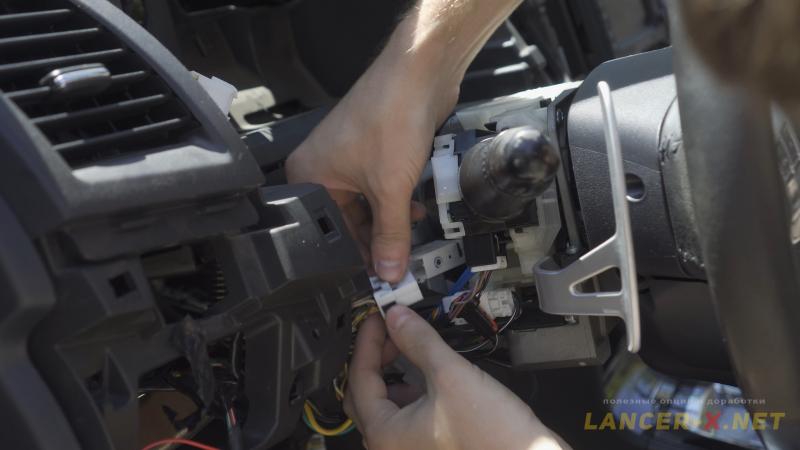 I have also found, that a mating connector is ideally match in the given connector, which is laid to the ignition lock blocker.
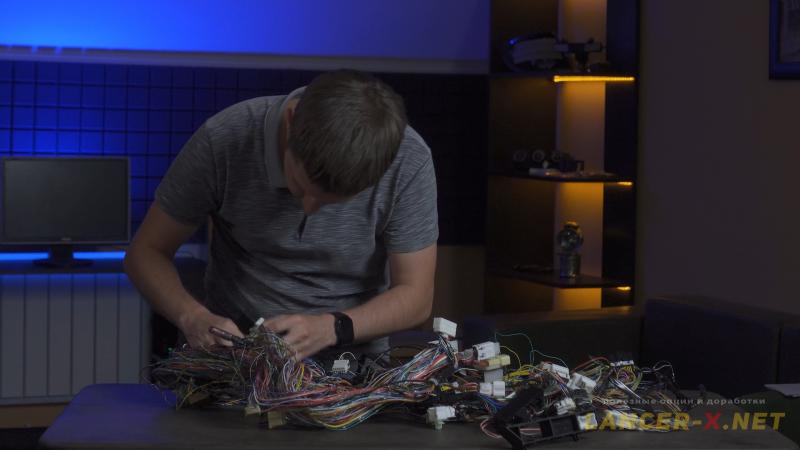 And here again the donor under-torpedo wiring helps us, I find the given connector and unplait it in order to connect in my connector.
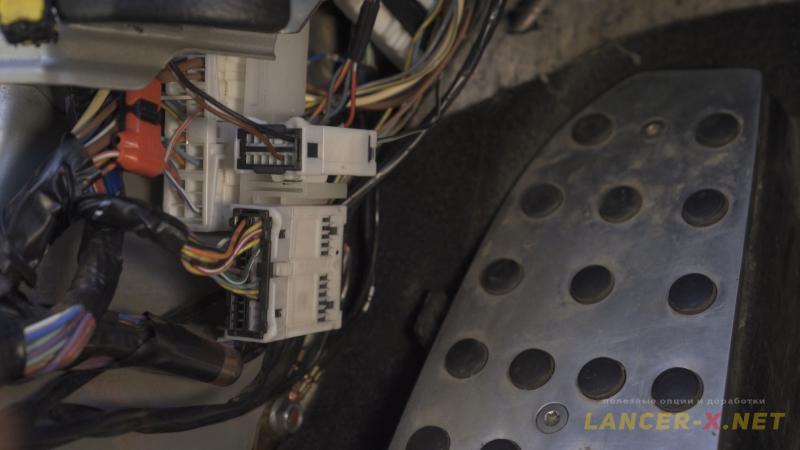 By the continuity test I have found, that pin 5 is an ignition supply (black with white stripe wire), I connect here pin 39 of connector C-23 of KOS unit.
And pin 10 is a battery supply (brown wire), here I connect pin 38 of connector C-23 of KOS unit and pin 1 of connector C-213 of ignition lock blocker.
If someone is confused, then look carefully at the schemes and reread or better watch video, it is better for understand what and how connect.
Replacement of ignition lock for KOS on Mitsubishi Lancer X
 Next let us start to replace an ignition lock with receiving antenna.
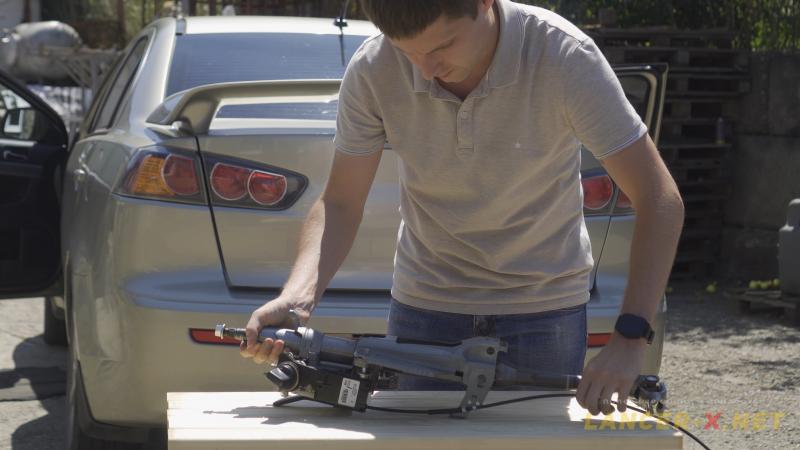
 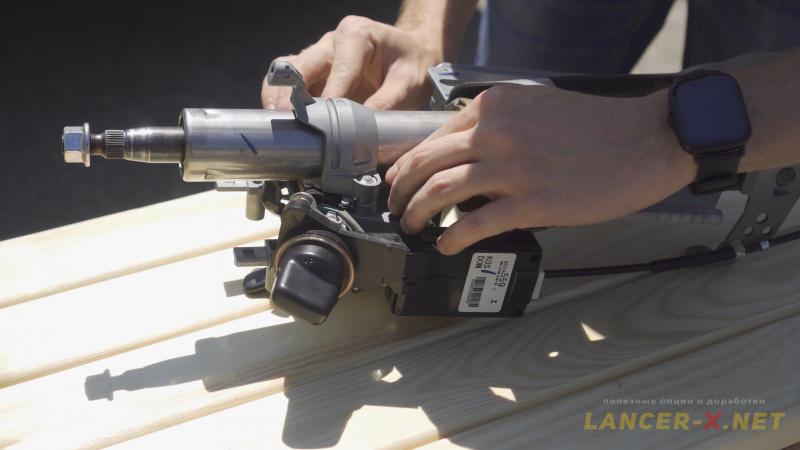 Initially, I planned to change a steering tube assembled with a new ignition lock and receiving antenna, but many of you probably will have a lock and receiving antenna separately and you will have to change it by unscrewing twist-off bolts. That is why we will do this.
Unscrew everything in 2 stages, first of all disconnect a cable from the lock, to do this unlatch lower plastic bracket, after that unscrew 2 screws.
 When you will remove this plastic cap, pay attention, that there will be a metallic bracket, which is compressed by a small spring, this spring strives to jump out and get lost.
 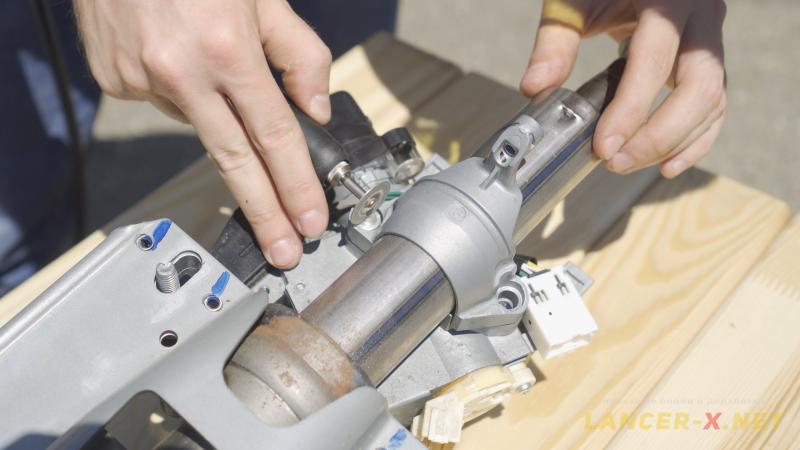 We will dismount twist-off bolts using an electrical graver, our task is to make notches under flat screw and unscrew everything.
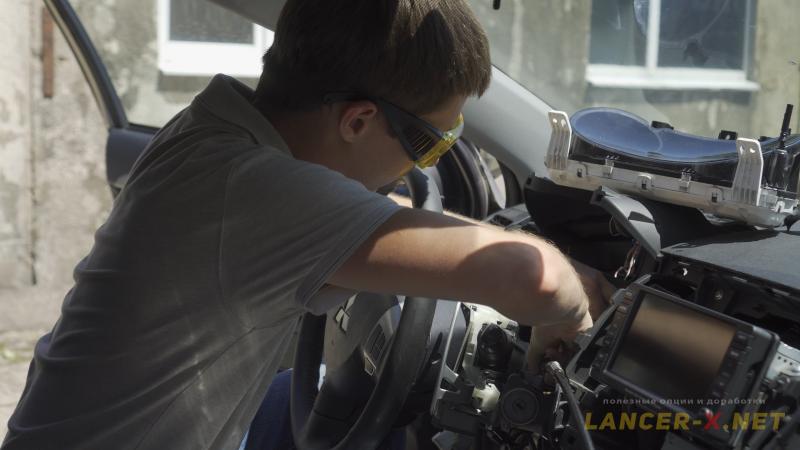 On the same principle, dismount twist-off bolts on the car.
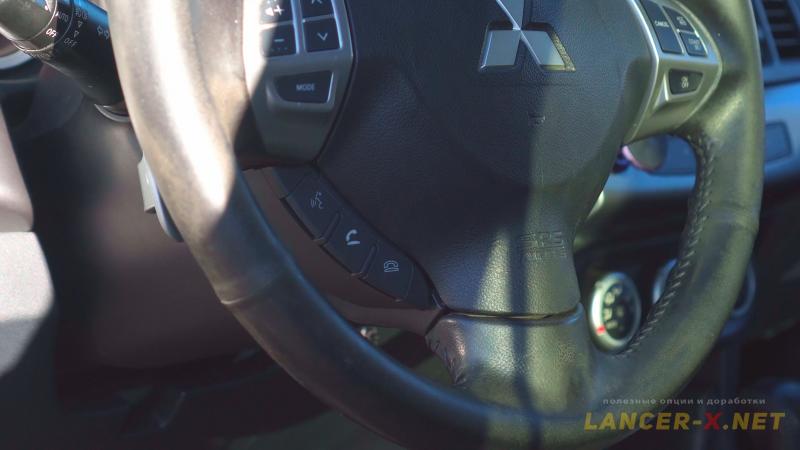
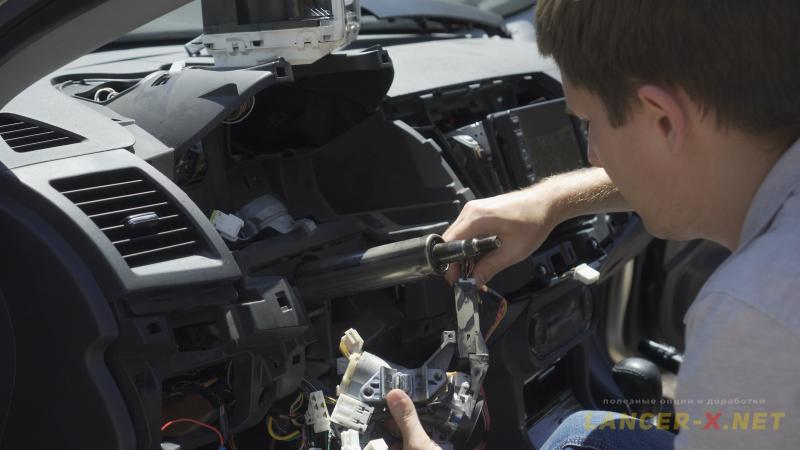 I tried to unscrew a lock without steering wheel removing, but it was inconvenient, it is better to remove the steering wheel.
Disconnect terminals from the battery and next unscrew airbags, steering wheel, shift paddles and the base with understeering switch.
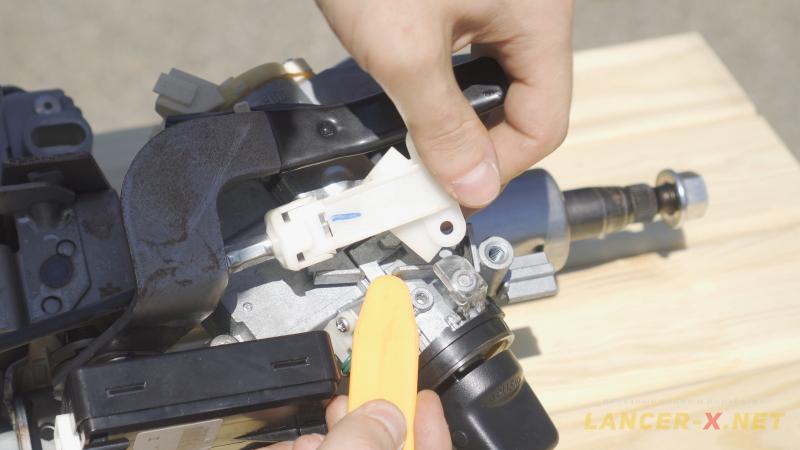
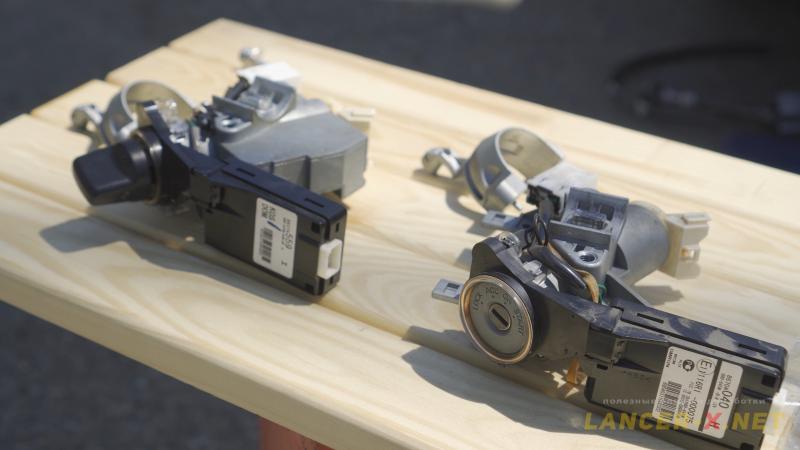 Remove the standard lock, the difference between locks became immediately obvious.
 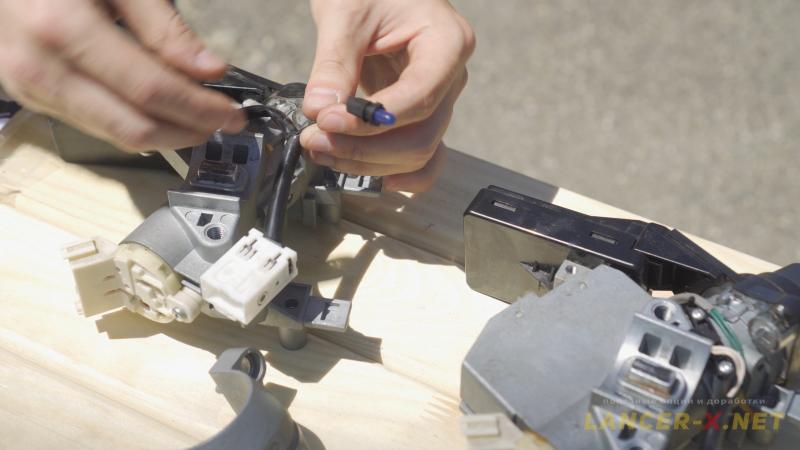 Pay attention that there is no lighting on a new lock, I have decided to replace it from my old lock to the new one, it is connected the same as with an old lock, pin 5 and 7of connector C-213, these are pins of lighting.
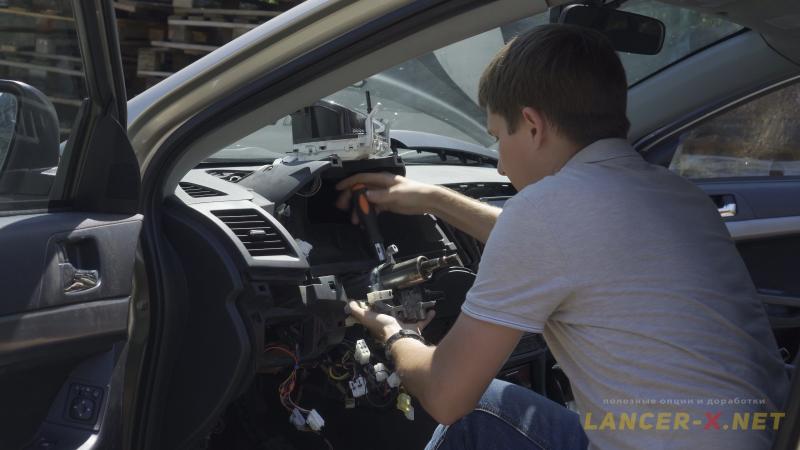 Install the new lock in the reverse manner, the only thing is that I fasten it temporally on the old twist-off bolts, in order it will be possible to return the old lock with immobilizer, in case if it will be impossible to activate everything for the first time.
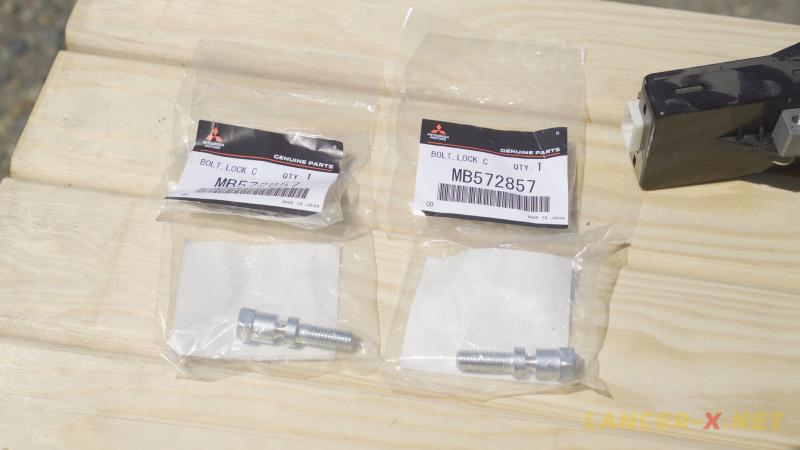 And when the system will be fully activated, I will screw new twist-off bolts MB572857, which were bought more than enough.
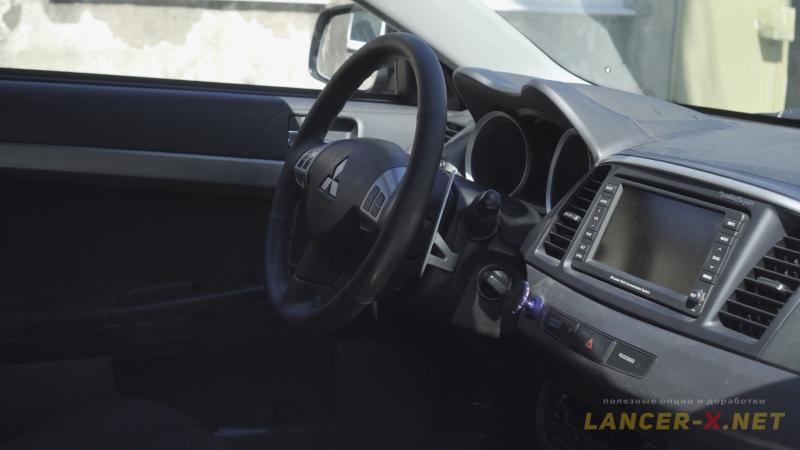 At the given stage all wiring has been restored and all necessary components are installed. I remind you, that I won't do manipulations with writing my VIN number in KOS unit and receiving antenna-immobilizer, as Evgeniy, who has sold me the whole KOS set, already written everything.
Activating KOS on Mitsubishi Lancer X
Before activating, I advise you to read the article where discussed in detail how to activate the hidden functions and options on Mitsubishi Lancer X.
For activating the keyless operation system on Lancer X we need:
1. J2534 compatible adapter. Bought here: Аliexpress
Реклама. ООО "АЛИБАБА.КОМ (РУ)", ИНН 7703380158
2. MMCodingWriter, the program for downloading and coding recording.
3. MUT Coding Mitsubishi, the program for coding editing.
4. Laptop.
Since 2021, the MUT Coding Mitsubishi program has become paid, or you can buy it from the developer, or use the built-in editor in the MMCoding Writer program.
Always do backup copies for original Variant and Custom codings!!!!!!!!!!
Find and activate the following points in the Variant:
- Smart Entry System - - > Present (Type C).
- RKE Keyless entry - - > Present.
- WCM - - > Present.
- Multi mode RKE - - > Enable.
- KOS function customize by Display - - > Enable.
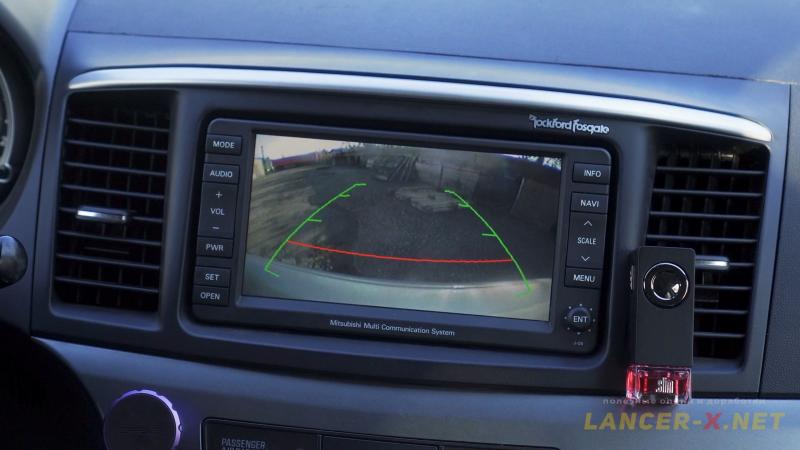
As I have a standard MMCC car stereo installed, I activate also the point, which will be show in the standard car stereo some functions of keyless access customization.
- KOS Door entry type - - > Switch or Sensor and Switch.
You can choose in this point the type of your door handles: button or sensor and button. But the sensor in my handles operated all the same, regardless of chosen mode, that is why I have not changed this point.
Find and activate the following points in the Custom:
- Hazard answer back - - > Lock:1, Unlock:2.
Without activation of that point, the custom coding did not wrote, there was a writing error.
- Auto fold mirror - - > OPN/CLS Keyless.
As I have mirrors with powerfold installed, I want the mirrors to fold out when the car is opened, and fold in when the car is closed. For this function choose this mode in this point.
- Buzzer Aswer Back - - > At Both.
Also you can choose variants of sound confirmation of KOS, pressing the buttons on door handles, pressing the buttons on the key or both variants. I have chosen both variants.
- KOS key detect out from window - - > Disable.
This point is responsible for detection of KOS key through the window, by default this setting is disable, I have not changed it.
- KOS feature - - > Both enable.
This point allows to adjust the door unlocking and starting the engine without a key, and exactly for security purposes to switch off/on the function of unlocking and starting the engine without a key. The same setting is available in the standard MMCS car stereo.
- KOS unlock disable time - - > 3 sec.
In this point you can adjust time, how many seconds the KOS will be inactive after closing. Given setting is also available in the standard MMCS car stereo.
- Outer buzzer volume - - >
In this point you can adjust the loud of outer buzzer.
After that the standard keyless operation system is switched on, handles began to operate.
For the full KOS operation, it is necessary to register some units (about them below) in the car, you can do it using the special diagnostics equipment MUT-3 or program MUT-3 and paid driver from Nikolai, the author of MMCoding Writer program.
There is also a possibility to write an additional keys for KOS system through program MUT-3.
Link on paid driver for MUT-3 from Nikolai. I use a simple version Simple.
For download you need a registration on the forum.
 Run the program, press button STV and wait until all data about car will load.
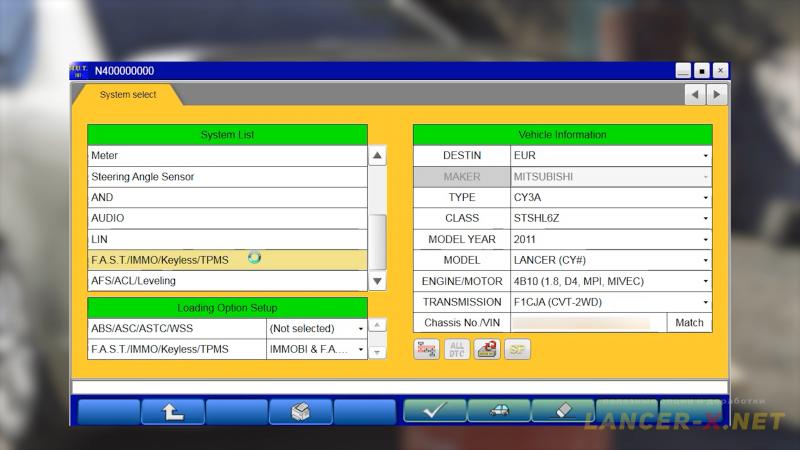 Choose a setting F.A.S.T (KOS)/IMMO/Keyless/TPMS, next Special Function, and press button Steering lock unit Registration.
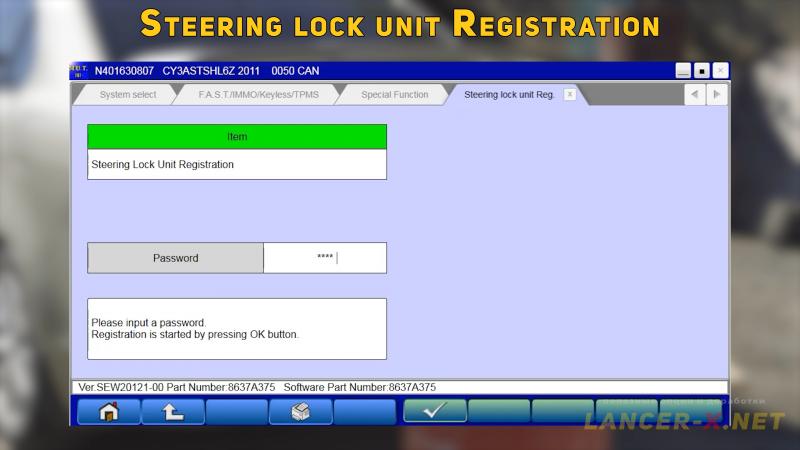 Enter the PIN code of your car and confirm. Block registration is completed.
You can find your PIN code in the program MMCoding Writer, on many cars it is similar.
 Next, the same in the special functions, go to the point Chassis No/VIN Reg. (chassis and VIN code).
Here you VIN code must load automatically, but in case of an error, you can write it manually.
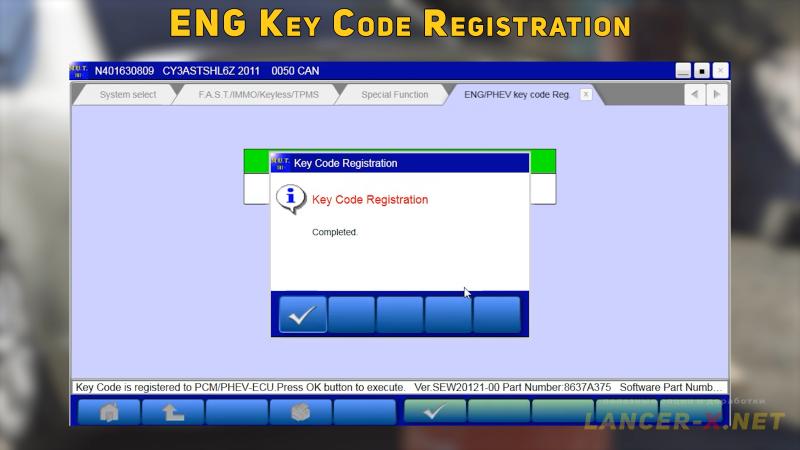 Return to the special functions and press button ENG Key Code Registration (registration of immobilizer in ECU engine) and confirm an action.
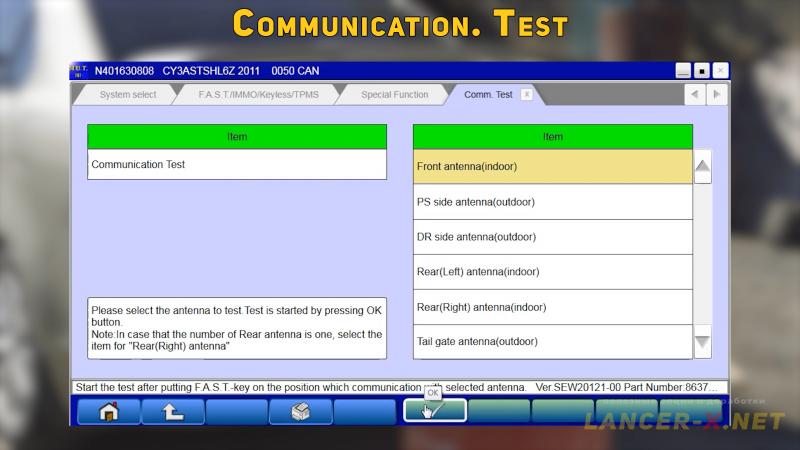 Also, if you want, you can test every installed antenna of keyless access in the special function, in the point Communication Test.
And in conclusion, I really recommend you change your PIN code of immobilizer in the given program MUT-3 or program MMCoding Writer.
That is all, keyless operation system activation is completed.
How the keyless operation system operates on Mitsubishi Lancer X
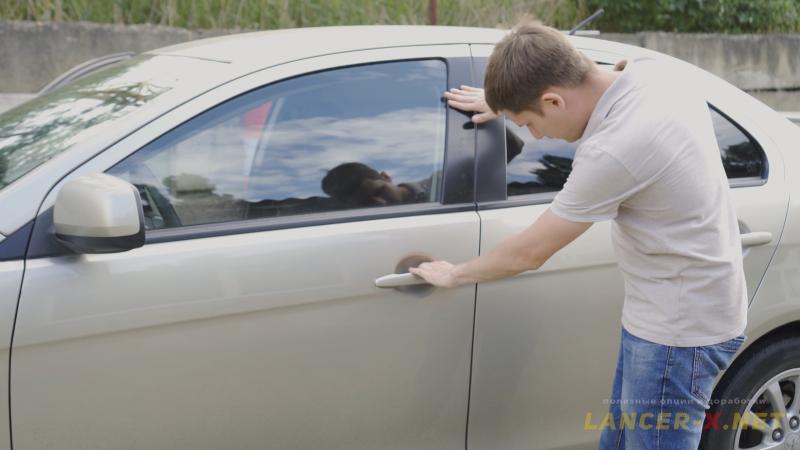
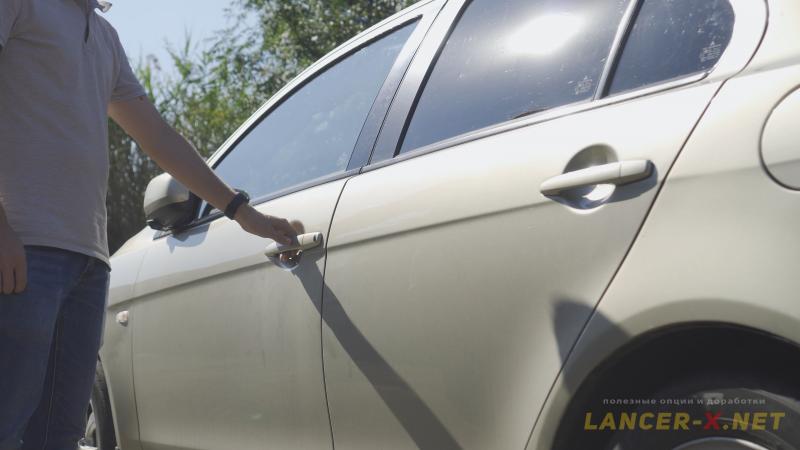 The main idea of standard keyless operation system on Mitsubishi Lancer X is an operation of car without a key, i.e you put a key down in your pocket and act with a car without physical usage of the key.
Open and close doors using sensors and buttons on the door handles, and start the engine using handles on the ignition lock.
Trunk lid is opened also with a button. While the trunk lid can be opened by the owner when the CL is closed. To do that, hold the trunk button, until the trunk lid opens, at the same time the car the car is not removed from protection.
Of course, you can open and close a car, as well as trunk lid, using buttons on the standard remote control key.
Operation of keyless access (KOS) on Mitsubishi Lancer X
Now let us discuss different situations, which could be in the operation process of keyless access.
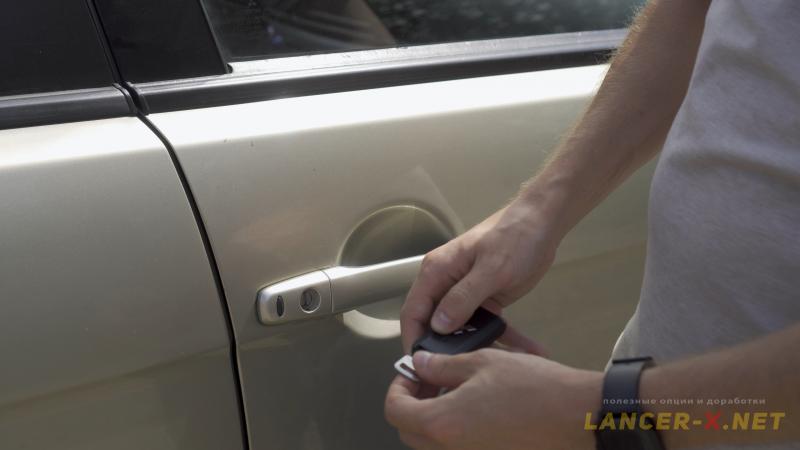 If for some reasons, your battery is discharged, you can open the car using an emergency key, which is hidden in the remote control key.
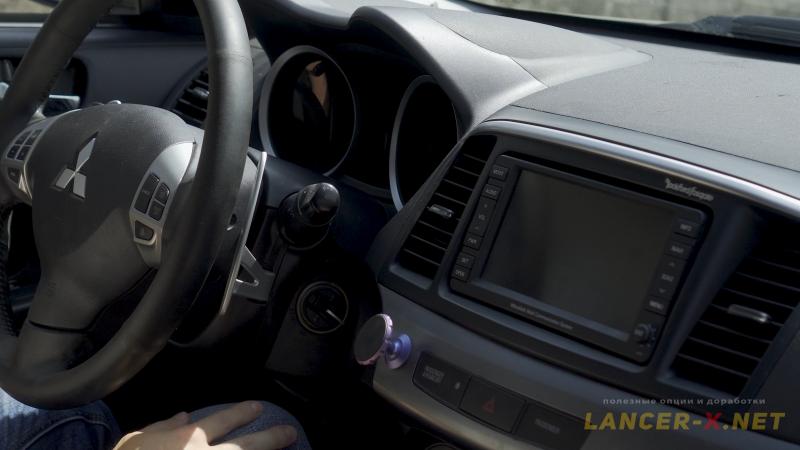 Using the same emergency key, you can start the car, if, for example, the battery is uncharged in the remote control key and key stopped to be seen, to do that remove the handle and put an emergency key in.
 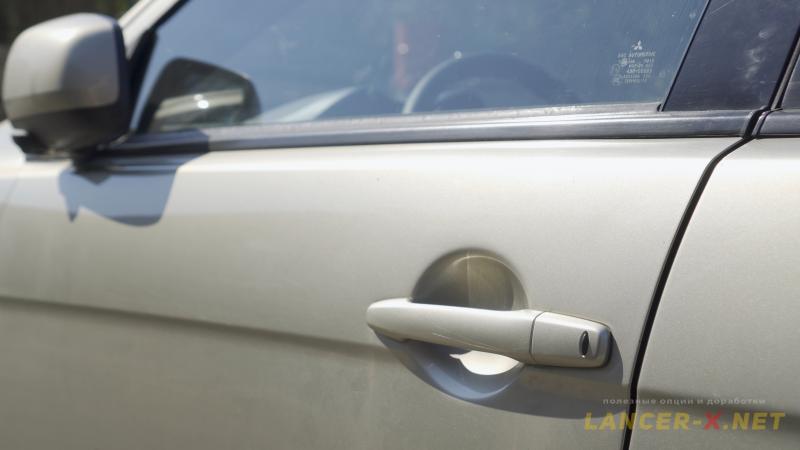 If one opens a car by touching sensor, but not open a door, then the central locking will lock automatically after 30 seconds.
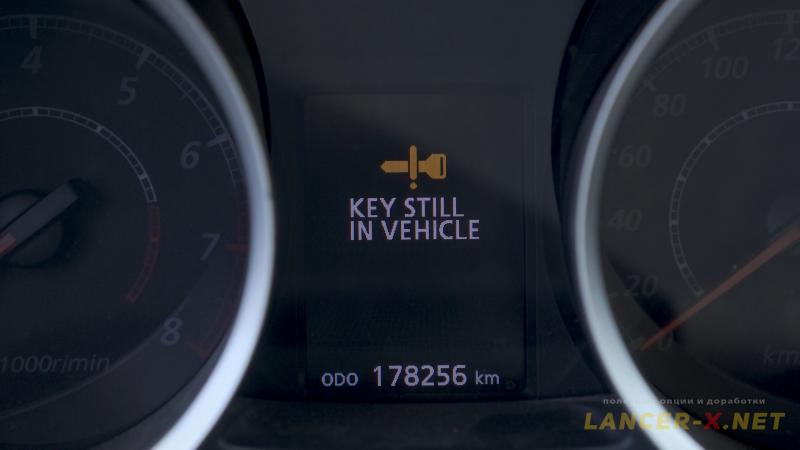 Now let us examine the situation, when we left a key in the cabin and try close a car outside, the system won't allow to do that and will inform by the buzzer and a sign on the dash panel.
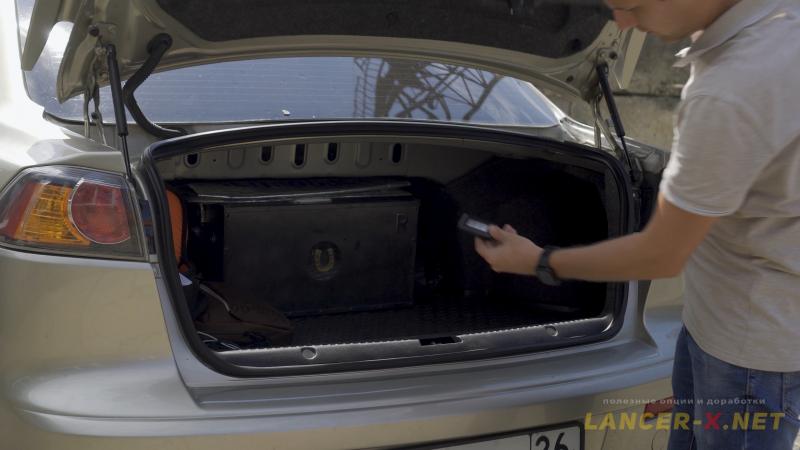 The system also won't allow to close a car, if you left key in the trunk and try to close the car outside.
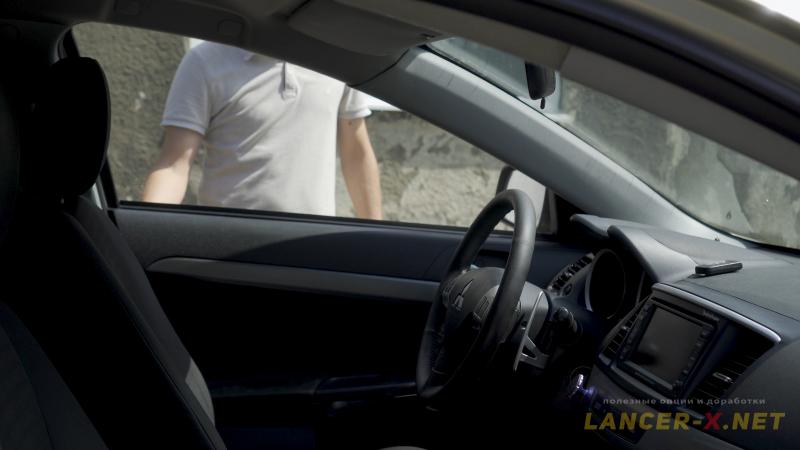 If you start the car and left key in the cabin, when trying close a car outside, the system also won't allow to do that, you won't be able to close a car.
 If you left a car started and take a key out, the car won't close outside from the button of door handle and from the button of remote control key.
 You won't be able to start an opened car without remote control key, the handle won't just turn around.
Adjustment of KOS through the standard MMCS car stereo on Mitsubishi Lancer X
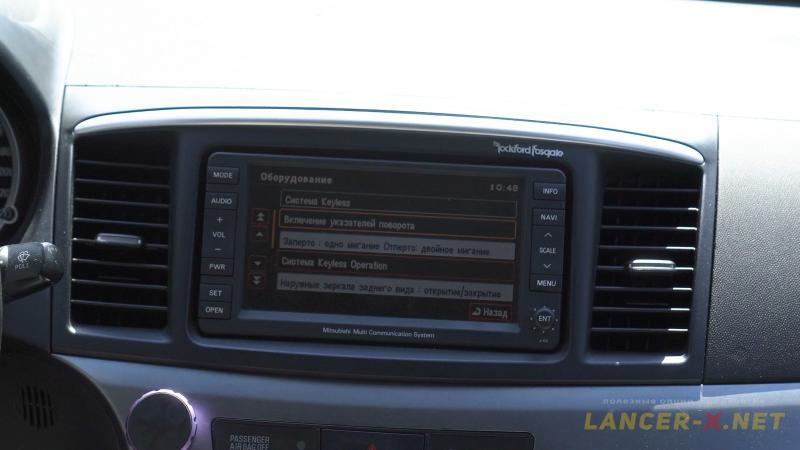 The car owners, who have the standard MMCS car stereo installed, can adjust some functions of standard keyless operation system in the car stereo menu, exactly:
- adjust switching on of turn indicators when operating a keyless access.
- switch on/off an automatic mirrors folding.
- adjust the door unlocking and starting the engine without a key, and exactly for security purposes to switch off/on the function of unlocking and starting the engine without a key.
- adjust a sound signal of keyless operation system.
- adjust time, how many seconds the KOS will be inactive after closing.
Additional KOS functions on Mitsubishi Lancer X
You can activate another useful functions with keyless operation system, in case, that your ETACS unit supports given functions.
- Door Unlock Mode (Step-by-step opening of central locking) on Mitsubishi Lancer X.
- Welcome Light on Mitsubishi Lancer X.
- Multi Mode (Adjustment of key buttons Lock Unlock) on Mitsubishi Lancer X.
Therefore, keyless operation system turned out to be rather convenient option, to which I quickly got used. But despite the fact that the manufacturer provides for all kinds of protection, I recommend you using keyless access paired with a modern alarm system and additional protections.
My alarm system has synchronized with keyless operation system without any problems. Autorun also operates by CAN bar.
In this instruction you can check out the main principles of interaction with KOS system.
The only thing is the range of standard remote control key is not so far, that is why I have bought additional keys with long range of operation, but we will write them in one of further article.
Video instruction for KOS activating and installation on Mitsubishi Lancer X
Related links: