Standard options and upgrades for Lancer X
I have returned bi-xenon headlights on Lancer X
Let us return and install the standard bi-xenon headlights with DCR marking, as well as restore an auto-corrector and headlights washer on Mitsubishi Lancer X.

Lancer-X.net
A few years ago, after installation of standard bi-xenon headlights on my Mitsubishi Lancer X, I have decided to sell headlights, as there was Japanese HCR xenon marking, but I need Russian DCR marking.
 As far as I can see, many Lancer X owners, who has installed headlights with Japanese marking, drive without any problems, but I would like that everything to be perfect and the most important within the law.
Searching of headlights with Russian DCR marking were unsuccessful at that time, as headlights were in a very bad condition, or in rather good, but the price was in order of magnitude greater.
That is why I have decided to put off the headlights searching until better times and along the way, I sold almost every installed earlier auto-corrector components with AFS and headlights washer, as these options do not operate without standard bi-xenon headlights.
 Today, we are going to return and install on Lancer X the auto-corrector with advanced cornering frontlighting system (AFS) in turns, standard headlights washer and the most important- finalize bi-xenon headlights and change glasses on headlights for glasses with Russian DCR marking.
For easy reference, this article is represented in 2 versions: text and video at the end.
Criteria of legal xenon on Lancer X
 According to the technical regulations of the Customs Union TR CU 018/2011 "On safety of wheel transport facilities", namely section 3, which is dedicated to the requirements to lighting installations and light alarms, I won't recite the text, but will give a brief excerpt.
On a car with installed lamps with a rated luminous flux of more than 2000 lumens, which just include gas-discharge lamps, a working headlights washer, auto-corrector must be installed, and a marking must be made on the headlight itself with the type of lamps used in this headlight.
More information about technical regulations you can get on link below.
tr_ts_018-2011_transport.pdf
(Скачали 709)
2.64 Mb
Посмотреть онлайн файл: tr_ts_018-2011_transport.pdf
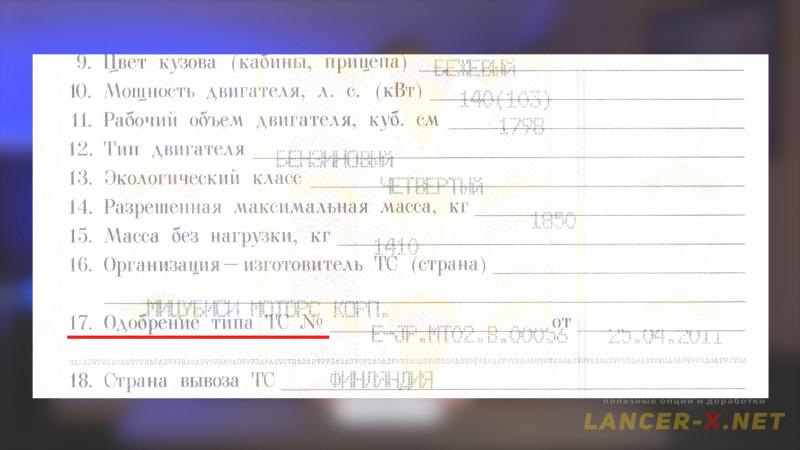 There is another condition, that many people forget. If you look in your motor vehicle certificate of title, you will see the line about vehicle type approval (VTA), where it must be indicated, that on your vehicle could be installed headlights with gas-discharge light source.
Making a request in Mitsubishi Motors, I have got a VTA decoding for my car VIN and in the section of vehicle equipment is indicated the possibility of installation the headlights with gas-discharge (xenon) lamps and headlights washer. As well as a hatch, rear spoiler, which I have also installed, and other interesting things. You can familiarize with this VTA on link below.
VTA E-JP.MT02.B.00056 for Mitsubishi Lancer X.
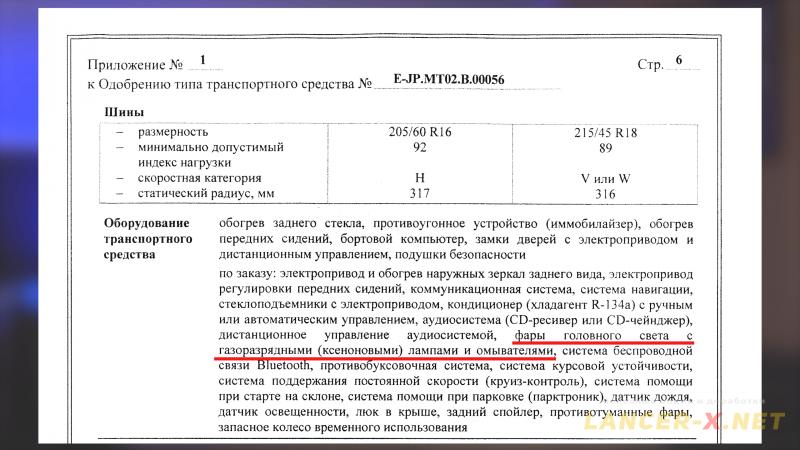 So, as a possibility of installation the headlights with gas-discharge light sources is indicated in VTA of my car, then for legal xenon on Mitsubishi Lancer X it is necessary to follow the requirements of technical regulations of the Customs Union TR CU 018/2011 "On safety of wheel transport facilities":
1. Install an operating auto-corrector.
2. Install an operating headlights washer.
3. Install bi-xenon headlights with Russian DCR marking.
In other cases, if in VTA of your car the possibility of installation headlights with gas-discharge lamps is not indicated, you have to pass examination and legalization procedure of xenon with subsequent mark in vehicle title in road police.
Installation of auto-corrector and AFS on Lancer X
A few years ago, I have already installed the standard auto-corrector on my Lancer 10, more detailed you can read in the article Auto-corrector for standard xenon headlights on Lancer X.
But let me remind you in short, how to install the auto-corrector.
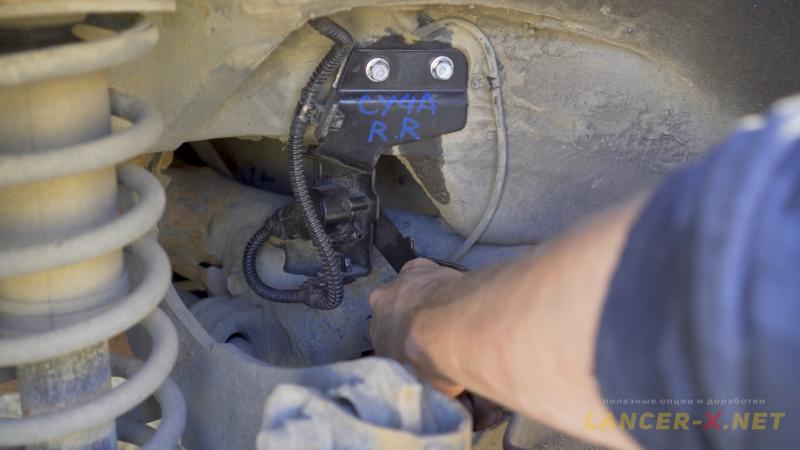 Remove rear right wheel and attach rear sensor in the standard place to the car body. It is fastened with 2 bolts, but be careful, do not tighten them, or else you could strip the bolt head.
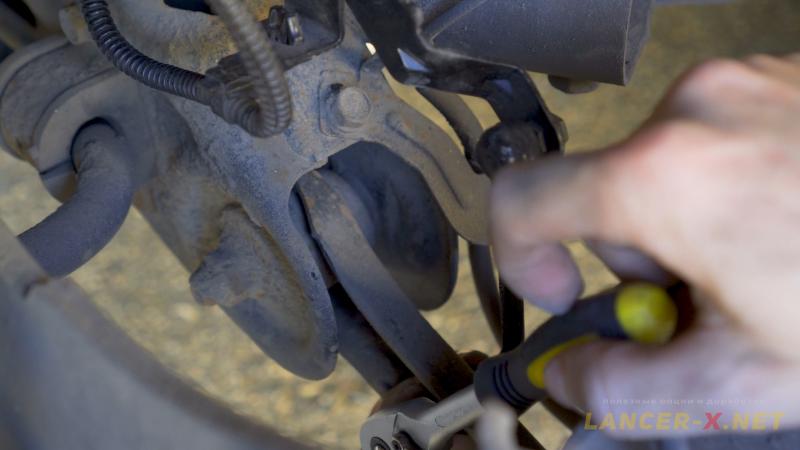 Sensor bones are fastened to the lever.
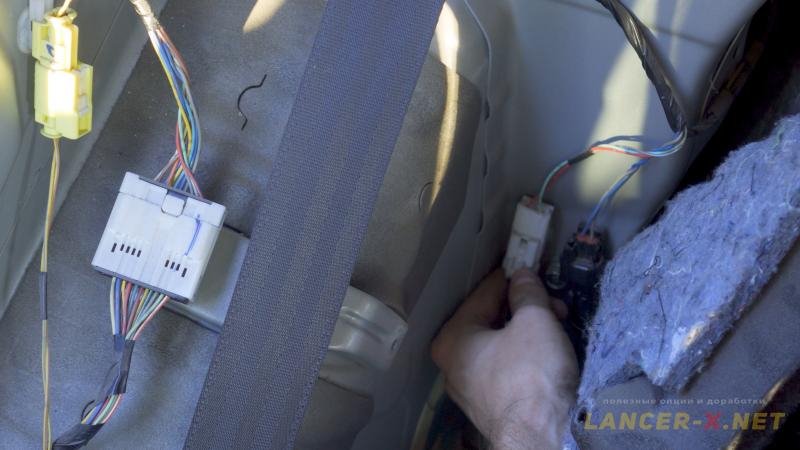 Sensor wiring is laid through standard hole in the car body, it is closed by rubber blind plug. We lay the wiring and connect in the standard connector on the rear right arc from interior side.
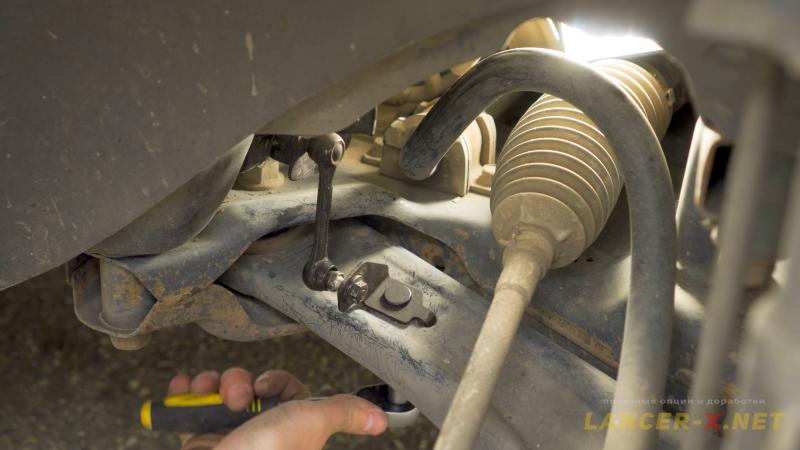 The front sensor is fastened also standard to the car body and to the lever. But everything is installed a little bit harder, as it is necessary to fasten wiring cover to the car body, there is much less place, but everything is possible.
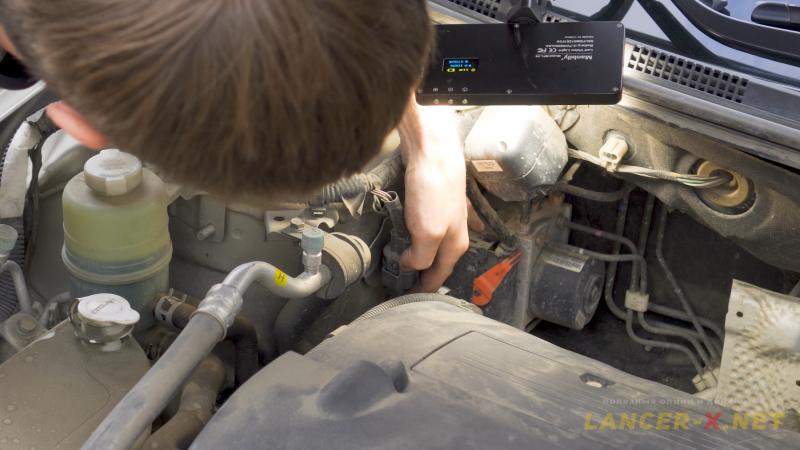 After installation, connect the front sensor in the standard connector under the hood.
It remains to install and connect an auto-corrector unit and AFS. On before restyling cars, it will be 2 separate units.
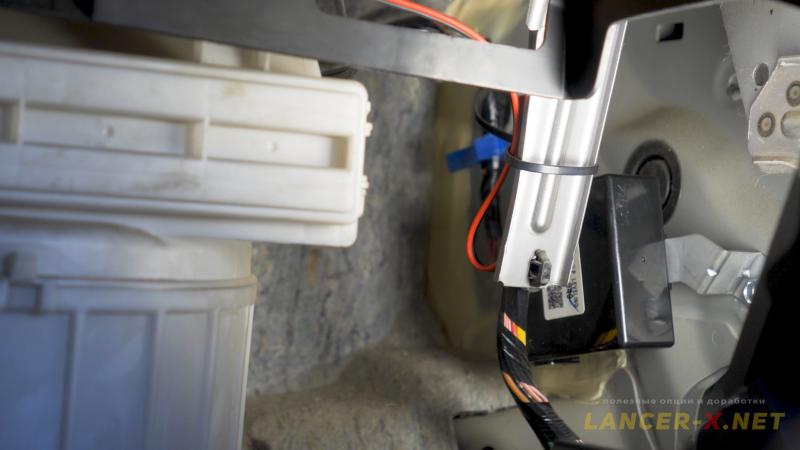 And on restyled car, in given unit will be combined an auto-corrector and advanced cornering frontlighting system (AFS). Together with the unit one has a special bracket, the unit is fastened with a bolt in the standard place behind the glove box. Fasten and connect.
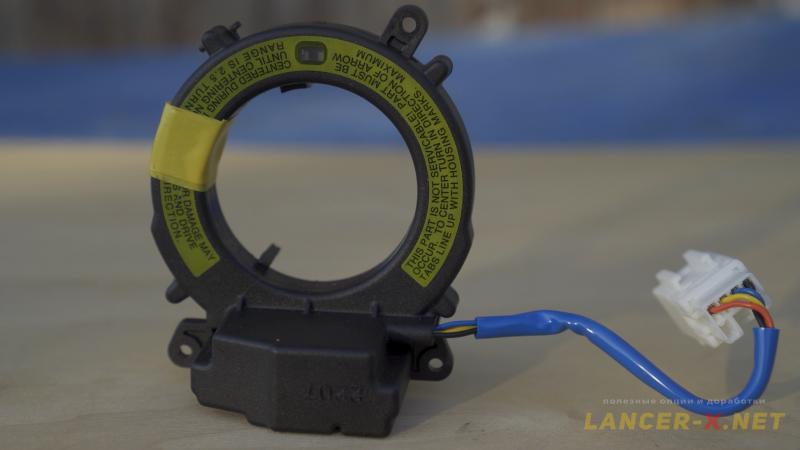 Also, it is necessary to install a steering position sensor for advanced cornering frontlighting system (AFS), I have it installed, as it is necessary for operation of electronic stability control system, which we were installing in the article about Electronic stability control system on Lancer X.
You can read in detail about installation of steering position sensor in the article about installation of standard xenon headlights and AFS on Lancer X.
A few years ago, when I install an auto-corrector and AFS for the first time, I have decided not to connect the button of disconnection the advanced cornering frontlighting system, as I have restyled car and there is not a wiring for button connection. The wiring is present only on before restyling Lancer X, before 2011 year made.
Now I have decided to restore wiring and install a button.
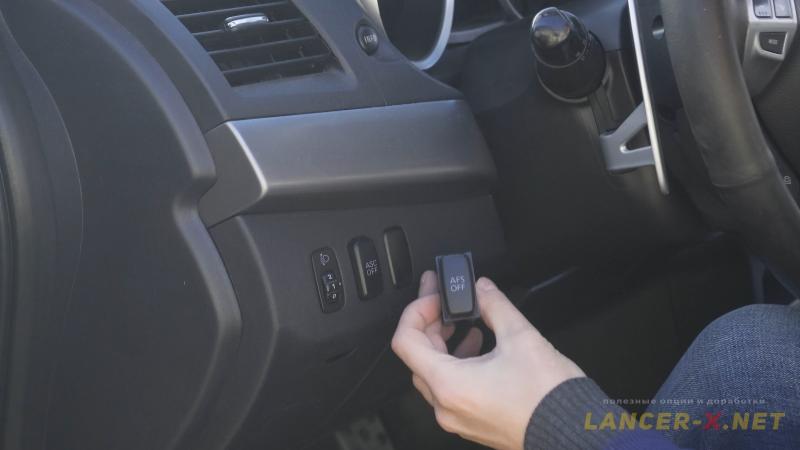 But I have decided to install the button not in the area of headlights corrector manual controller, here I am going to install a parktronic button.
 I will install the AFS disconnection button in the central tunnel. For that purpose, I have bought a special panel for buttons, on which the parktronic and all-wheel drive controller buttons are standard installed.
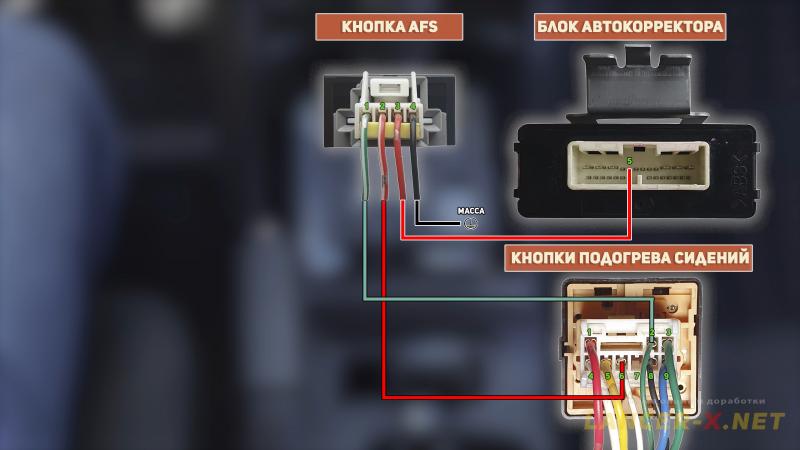 The button is connect in accordance with the following scheme:
Pin 1 and 2 are illumination wiring, you can take them from any button, for example from headlights corrector manual controller. But in my case, the closest thing will be to connect to the connector of heated seats buttons.
Pin 4 is a mass, take it from the car's body.
Pin 3 of the button, it is a switching-on. It is necessary to connect here a wire with pin 5 of auto-corrector and AFS unit connector, one can connect it immediately to the button.
 But I had this wire in the connector of auto-corrector and AFS unit, it means, that it is necessary to find, where it ends, as I remind you, I have restyled car and do not have a connector for button connection.
 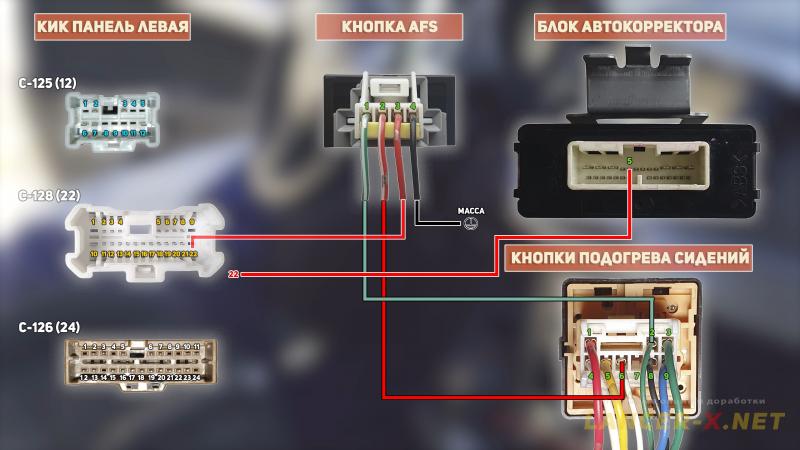 Using a multimeter, I detected given wire in the C-28 connector pin 22 of left kick-panel. I have decided not to cut into given wire, and do everything standard, unplaited necessary wire from donor under-torpedo wiring and laid and connected to the button through mating connector C-28.
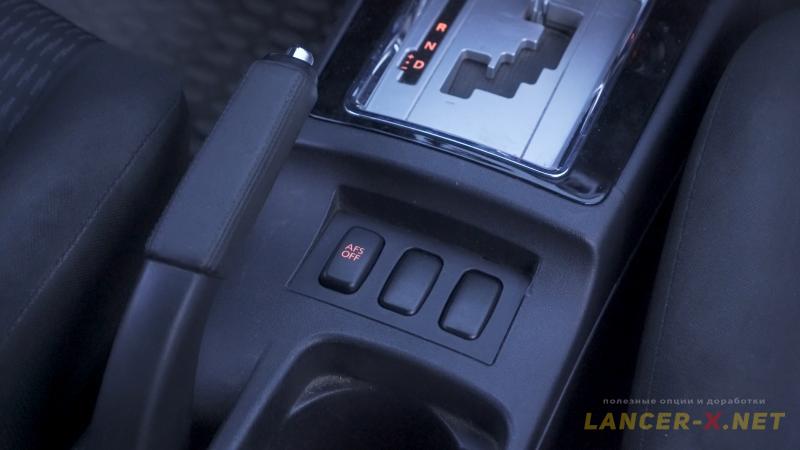 Done, auto-corrector and advanced cornering frontlighting system are installed. Now there is on 1 button with illumination more in the interior.
Activation of headlights automatic corrector and AFS on Lancer X
For auto-corrector operability, it is necessary to activate it. But it is better to perform activating after standard xenon headlights installation. If you activate it now, the error of auto-corrector and AFS may appear on the dash panel.
For activating you need:
1. J2534 compatible adapter. Bought here: Аliexpress
Реклама. ООО "АЛИБАБА.КОМ (РУ)", ИНН 7703380158
2. MMCodingWriter, the program for downloading and coding recording.
3. MUT Coding Mitsubishi, the program for coding editing.
4. Laptop.
Since 2021, the MUT Coding Mitsubishi program has become paid, or you can buy it from the developer, or use the built-in editor in the MMCoding Writer program.
Always do backup copies for original Variant and Custom codings!!!!!!!!!!
With detailed activation procedure you can acquaint in this article: Activation of hidden functions on Lancer X.
For auto-corrector operability on this unit will be necessary the activation of 2 points in Variant coding of ETACS unit:
- Head lamp auto leveling device - -> Present
- H/L auto leveling type --> CAN communication and dynamic type
For advanced cornering frontlighting system operability will be necessary the actvation of 3 points in Variant coding of ETACS unit:
- SAS - -> Present
- AFS type - -> Fixed bending lamp type
- AFS/Leveling CAN ECU - -> Present
But it is better to activate AFS after installation of standard bi-xenon headlights, so there is no error on the dash panel.
Installation of headlights washer on Lancer X
A few years ago, I have already installed the standard headlights washer on my Lancer 10, more detailed you can read in the article Standard headlights washer on Lancer X. But I remind you, that I have sold all headlights washer components together with the headlights, that is why I have to restore them.
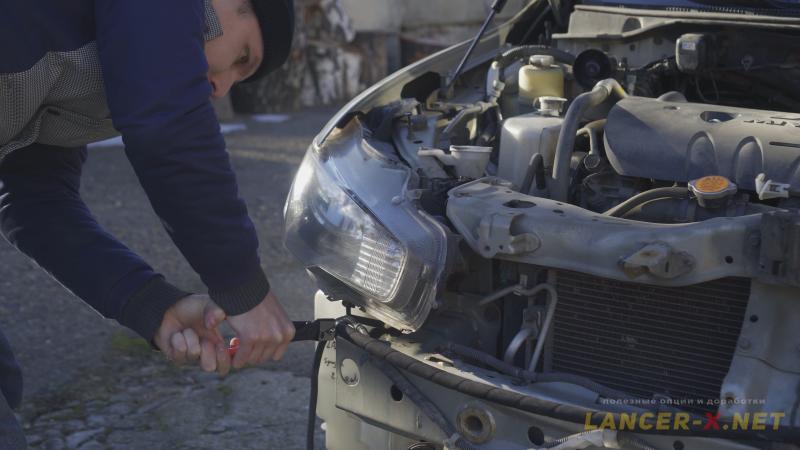
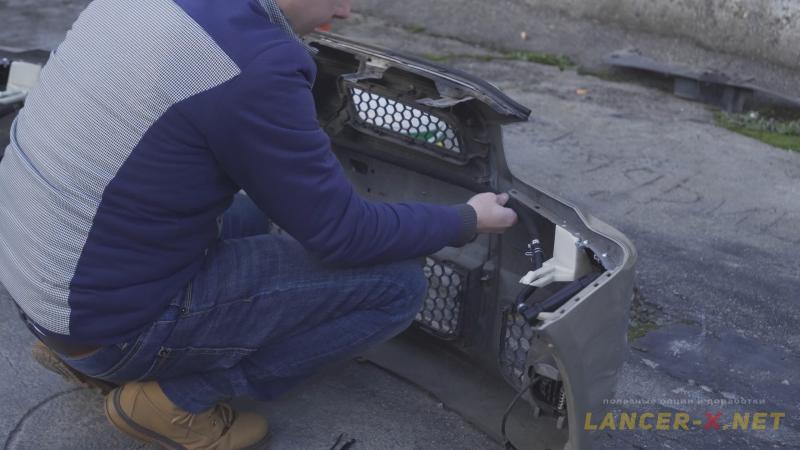
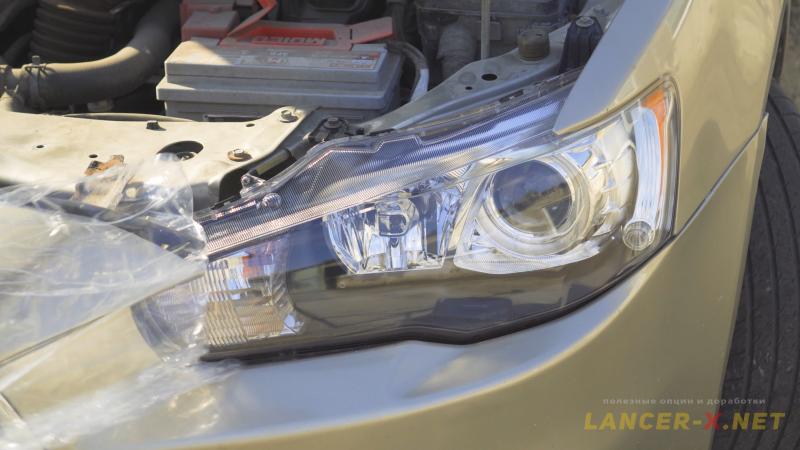
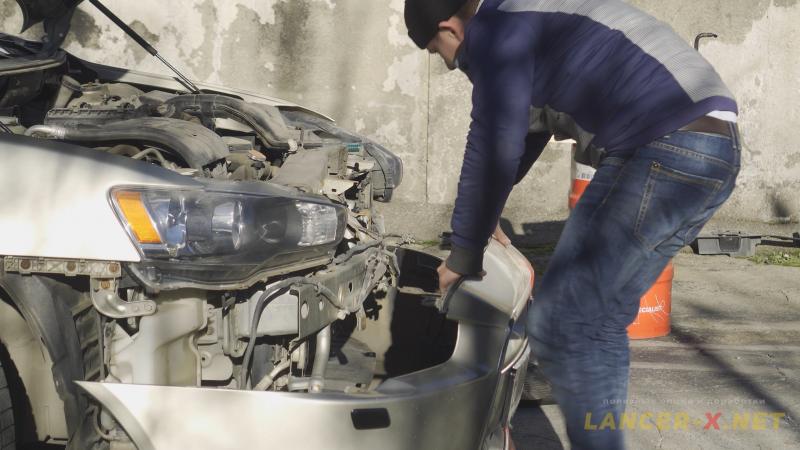 Remove the front bumper fully, as we need to change headlights washer tank, fasten headlights washer nozzles and lay all necessary hose pipes.
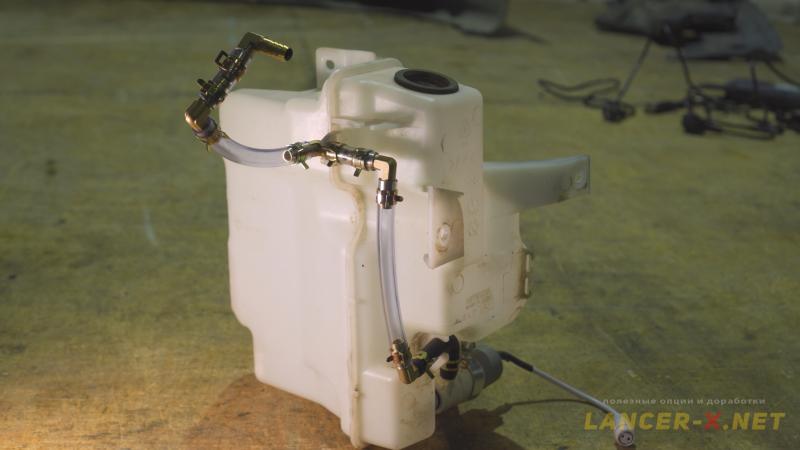 In previous time, in order not to overpay, I have installed non-original headlights washer motor by Kortex on the tank and using brass fittings and a hose from plumbing shop gathered such a construction on the headlights washer tank, which was operating rather well.
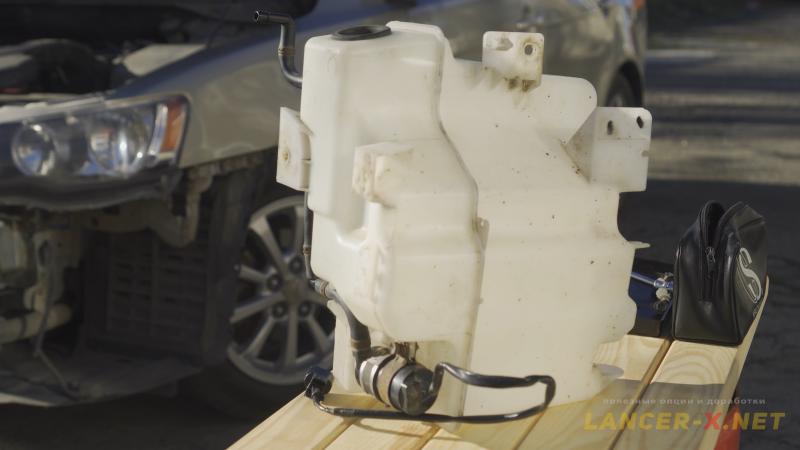 This time I managed to find at a flea market drive 2 the tank with original headlights washer motor, original fittings and tubes up to the amplifier, that I will just install.
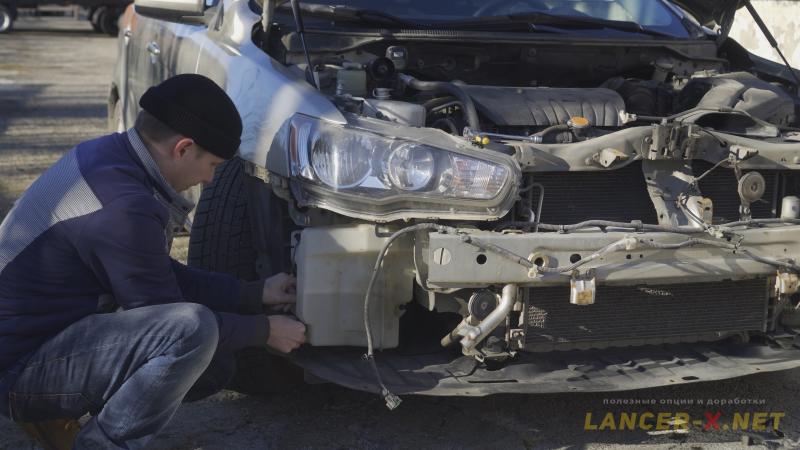 Unfasten filler neck, and then the washer tank itself, it is fastened with 3 bolts.
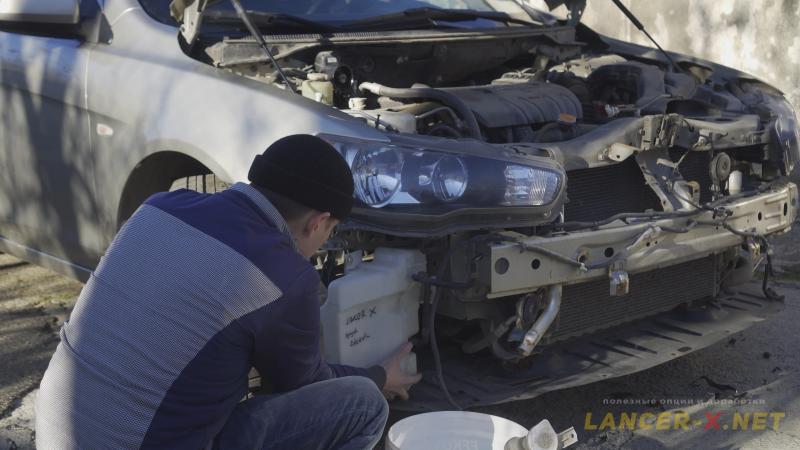 We install new tank, fasten the standard headlights washer motor of wind screen on it and connect the headlights washer motor, connector for its connection is from the factory, you do not need to lay anything in addition. I additionally processed the connector contacts with a pin purifier.
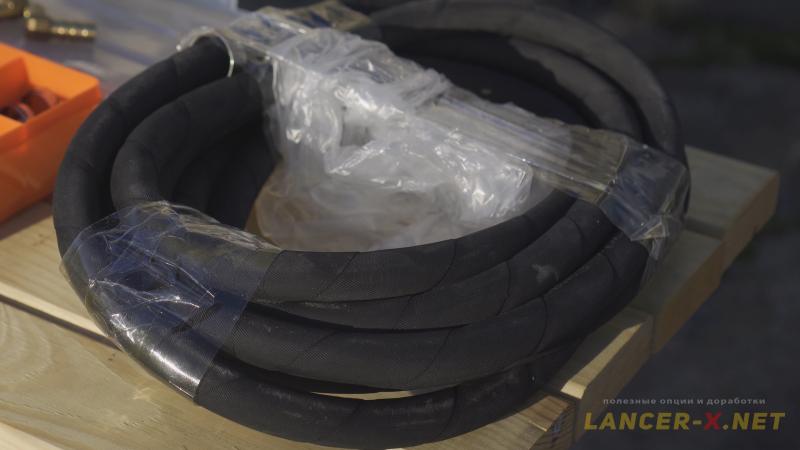 Next, we lay hoses, but instead silicone one, I have decided to lay a fuel hose (oil-and-petrol resistant) with inside diameter 10 mm.
 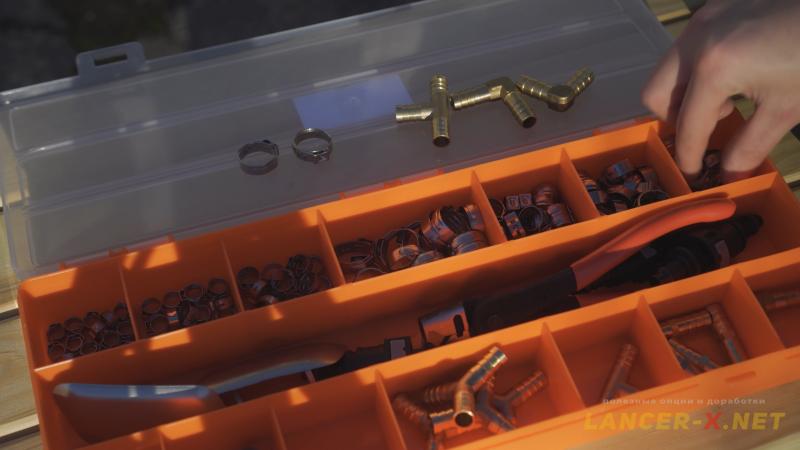 I will connect hoses, as a previous time, using the brass fittings under the 10 mm hose, and will compress using the set of special clamping bracket made of stainless steel from Aliexpress.
Реклама. ООО "АЛИБАБА.КОМ (РУ)", ИНН 7703380158
 We try on and lay the hose along the amplifier. I start the hose compression with the fittings from washer tank.
 In accordance with the original scheme, the connection of a hose on the amplifier and a hose on a bumper goes through the fluid connector, which is not currently available for purchase. There are 2 possible ways, just connect hoses using the tee-joint brass fittings, but in this case it won't be convenient to remove bumper where necessary.
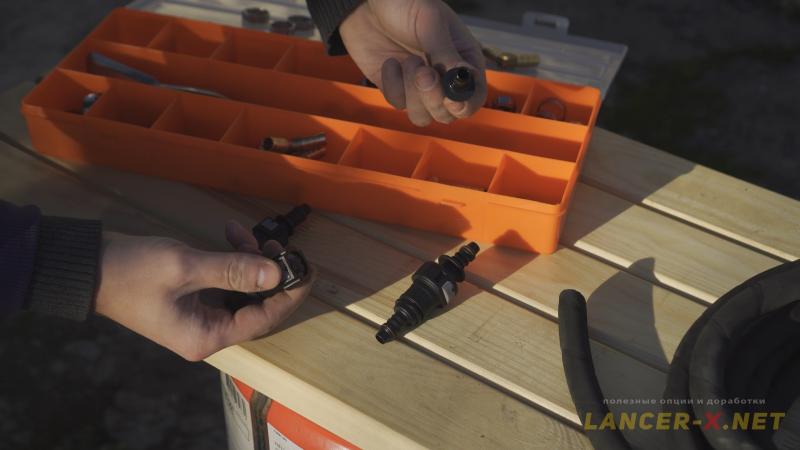 And the second way, I bought quick-connect fuel connectors of different sizes on Aliexpress, I will install one of them (ID 11.8), this will allow you to quickly disconnect the hoses and remove the bumper if necessary.
 Реклама. ООО "АЛИБАБА.КОМ (РУ)", ИНН 7703380158
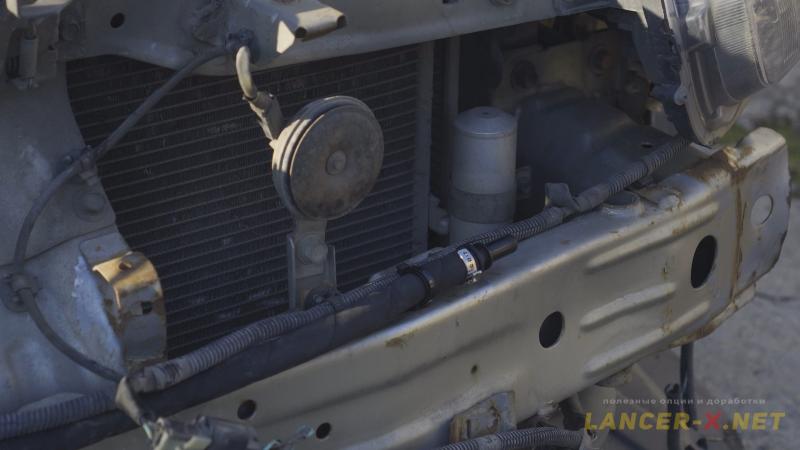 Compress and fasten a hose on the clamps to the amplifier.
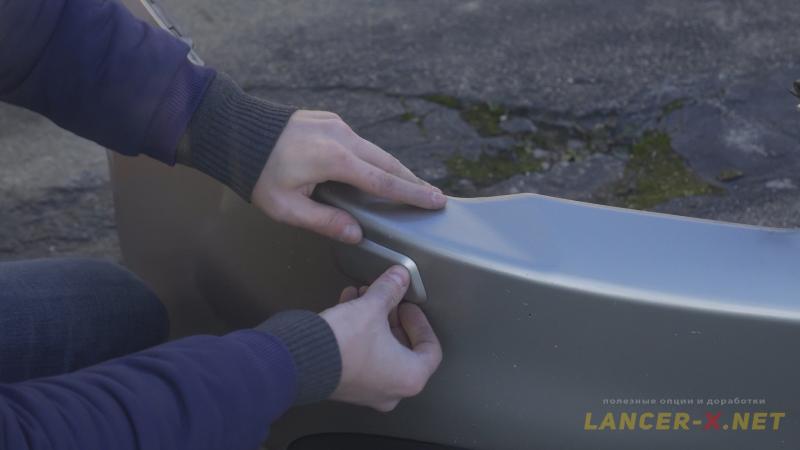
 Now let us start an installation of headlights washer nozzles, remove old nozzles covers, as they perform an aesthetic function in my case, hiding the holes in a bumper.
 I install the standard headlights washer nozzles, as in previous time, which were bought on Aliexpress.
Реклама. ООО "АЛИБАБА.КОМ (РУ)", ИНН 7703380158
 I change the lids of headlights washer nozzles for new ones, which were painted in a car body color along with the door handles, when I installed the standard keyless access.
Реклама. ООО "АЛИБАБА.КОМ (РУ)", ИНН 7703380158
 Then we lay a hose between nozzles.
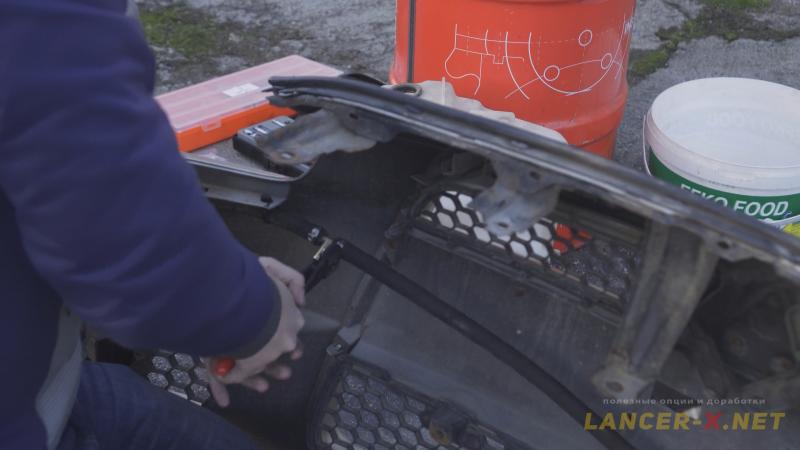 After that, here in this place we cut the hose and insert a brass tee, from the side of the left nozzle. To that, using a small piece of a hose, fasten an angular fitting. In the result, we have such a design.
 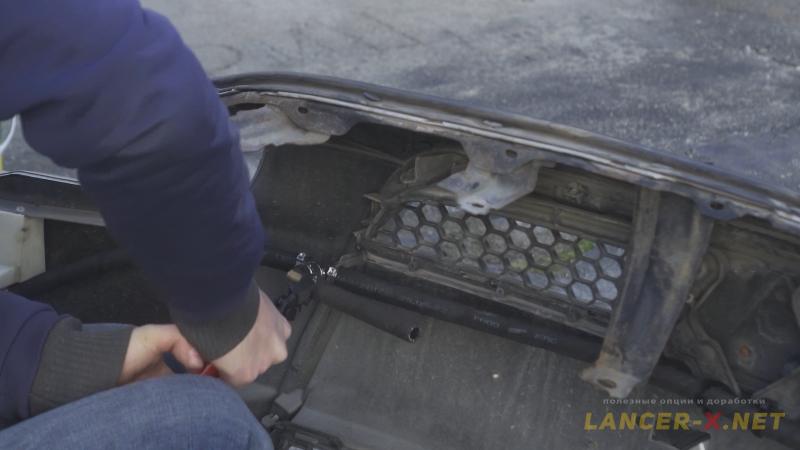 And already on the angular fitting I fastened the hose with a margin, in order to cut away the overmuch and fasten a mating quick-connect fuel connectors after trying on.
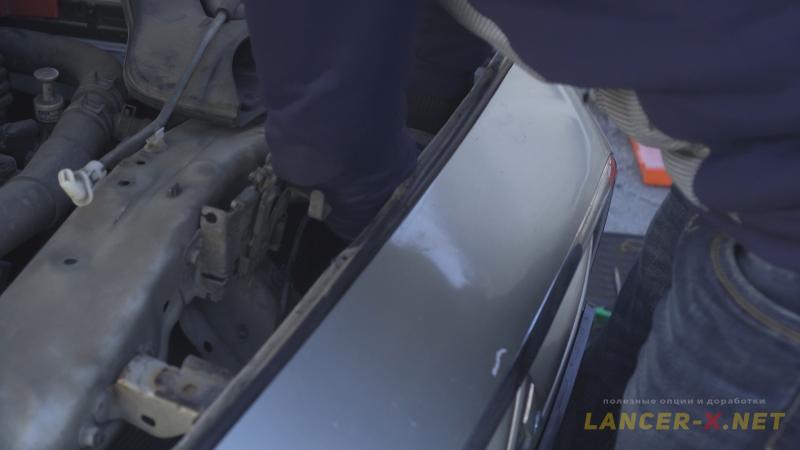 We connect hoses and it is possible to install a bumper back.
 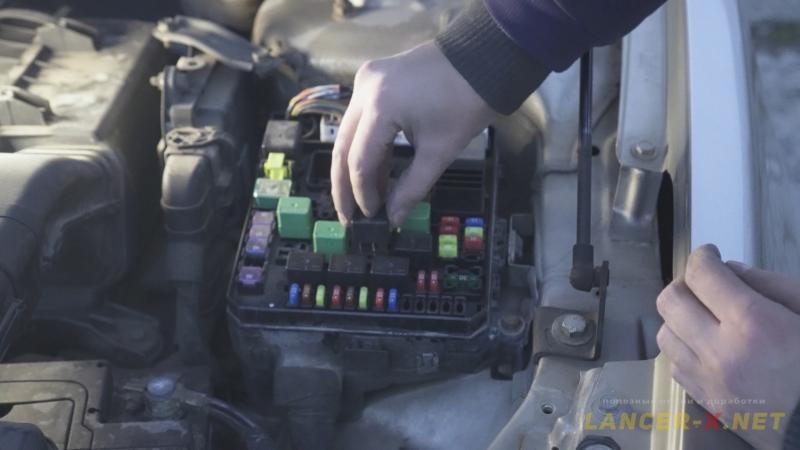 Install a relay 8627A030 into the relay unit under the hood for headlights washer operation.
 Finally the painted, back in the summer, lids of headlights washer nozzles in its rightful place.
As before, I wanted to install an understeering switch with headlights washer button on the side and auto mode for the light.
But the fact is that this switch with button on the side is relatively rare and second-handed are sold in average for 4-5 thousand rubles.
 But I managed to buy such a design, together with an understeering switch for 2000 rubles. But the fact is that all of these were removed from Peugeot 4007 and fully fit for Lancer X without any upgrades.
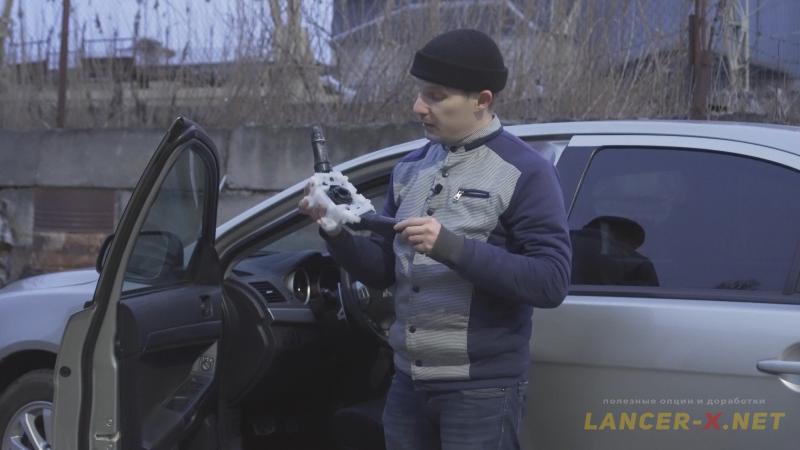
  We remove a plastic cover of steering tube, it is fastened with 2 screws from below.
 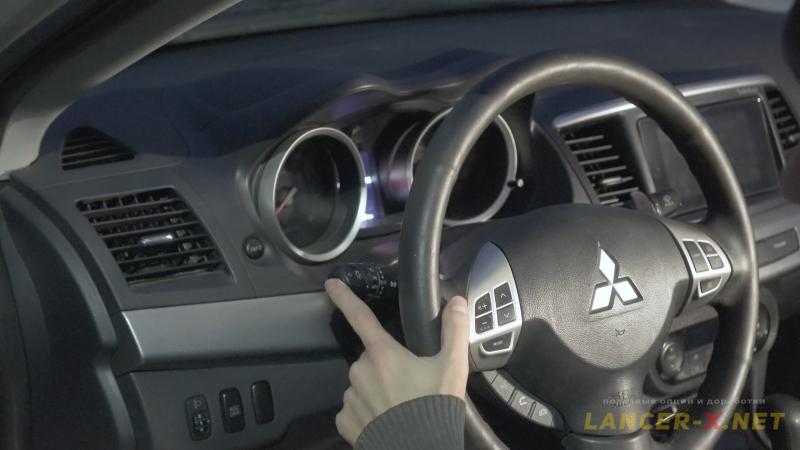 Unfasten an old understeering switch and install the new one with headlights washer button on the side.
 At this stage all headlights washer components are installed, it remains to activate the headlights washer in ETACS unit.
Standard headlights washer activating on Lancer X
For activating you need:
1. J2534 compatible adapter. Bought here: Аliexpress
Реклама. ООО "АЛИБАБА.КОМ (РУ)", ИНН 7703380158
2. MMCodingWriter, the program for downloading and coding recording.
3. MUT Coding Mitsubishi, the program for coding editing.
4. Laptop.
Since 2021, the MUT Coding Mitsubishi program has become paid, or you can buy it from the developer, or use the built-in editor in the MMCoding Writer program.
Always do backup copies for original Variant and Custom codings!!!!!!!!!!
With detailed activation procedure you can acquaint in this article: Activation of hidden functions on Lancer X.
For the headlight washer operation, you will need to activate 1 point in the ETACS Variant coding:
- Head lamp washer - -> Popup 1.
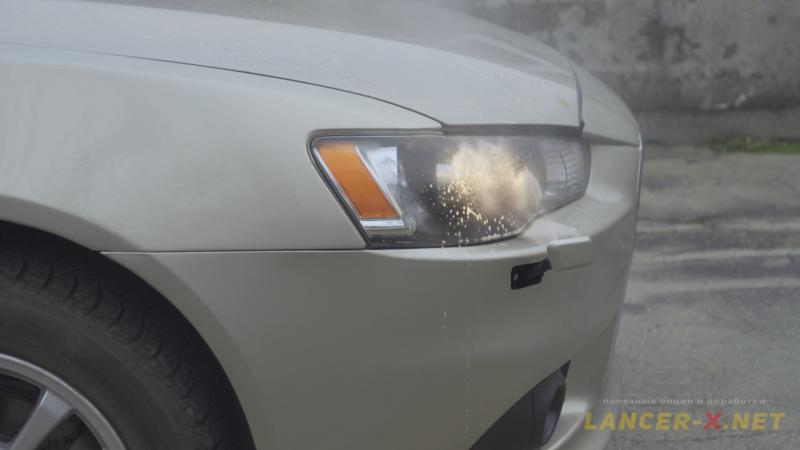 After that, let us implement a couple of trial runs, in order to get the all air out from the system. And if your system is sealed, the nozzles will start to wash the headlights. 1 button pressing and 1 operation of headlights washer nozzles.
Standard bi-xenon headlights on Lancer X.
 Last time, I bought bi-xenon headlights from right-hand drive Lancer X (Galant Fortis) from Zhenya in a group LancerX26, which are adopted for our right-hand traffic and fully ready to installation.
 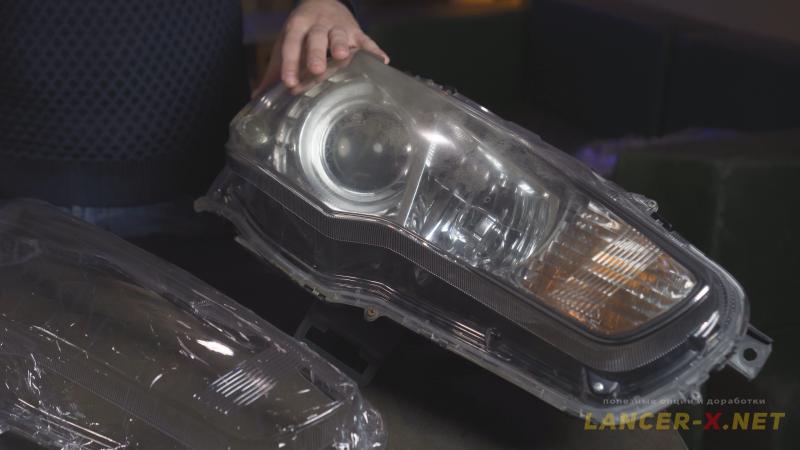 This time I have decided to buy headlights from Galant Fortis and adopt headlights independently by changing shutters on lenses.
 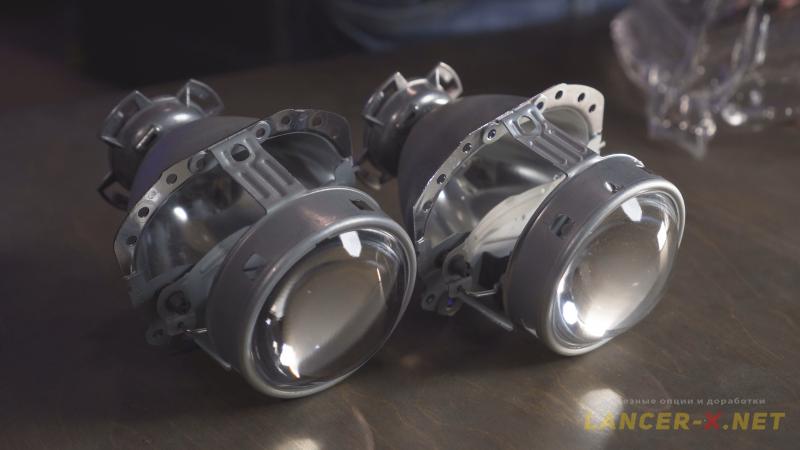 For that purpose I bought second-handed European lenses Hella 2 Classic on Avito, which have a shutter with an influx on the right.
If the reflectors in Japanese headlights will be excellent, then we will only replace the shutter in the lenses. If the reflectors will be in a bad condition, then we will install European lenses with shutters fully.
I also considered an option for buying Chinese headlights, for example Depo or a similar analogue, and their further refinement: lenses changing, buying xenon ignition unit, inhibitors, lamps.
And ideally, one would have to change the wiring in the headlight, since the original wiring is much more better than the Chinese one. But counting all the costs, I understood, that it is better to buy standard headlights from Galant Fortis and refine them.
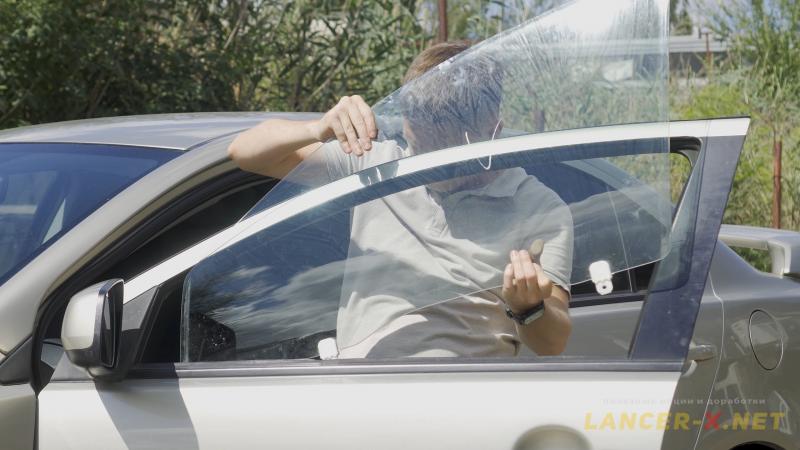
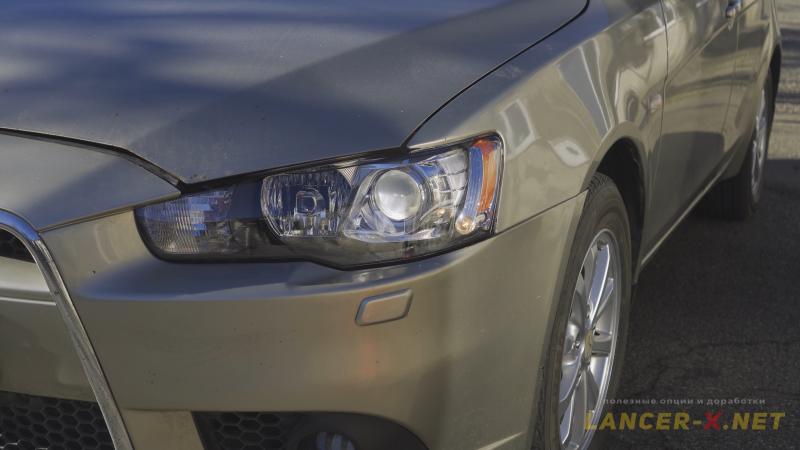
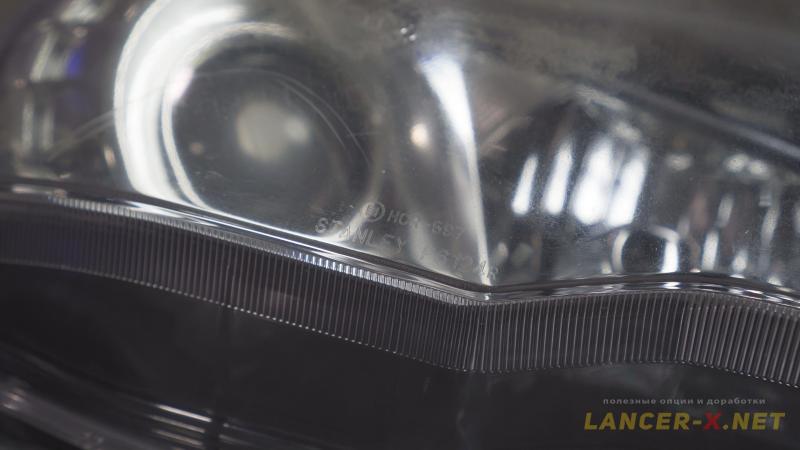 And the most important, marking. Headlights from Galant Fortis, which were removed from right-hand drive car, have Japanese HCR xenon marking, this marking is not for us, I will remove these glasses from the headlights. And install new glasses with laser engraved Russian DCR marking for lensed headlights Stanley.
I will glue glasses with special sealant for headlights and glasses ABRO WS-904-R (ABRO tape, made by vulcanized polyisobutylene).
Dismantling of standard headlights on Lancer X
 In general, the process of headlights dismantling on Mitsubishi Lancer 10 is not so hard, but requires time and carefulness.
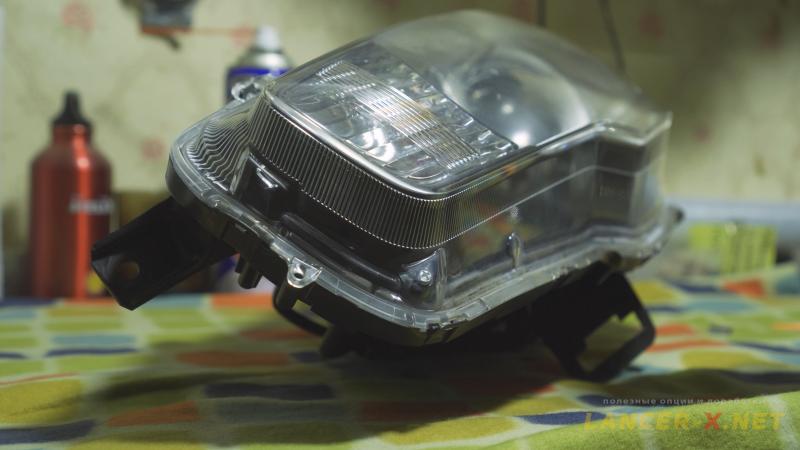 Remove metal bracket and unscrew self-tapping screws, which fasten glass to the headlights housing.
 It is necessary to heat sealant, in order to remove glass from the headlight. Here you can use a household hairdryer and heat the headlight fully in the box, or using an industrial dryer heat the seam and bit by bit remove the glass from the headlight. I chose the second way.
Be careful in any ways, in order not to melt the headlight.
 After first heating, plastic brackets, which additionally hold the glass, unbent easily.
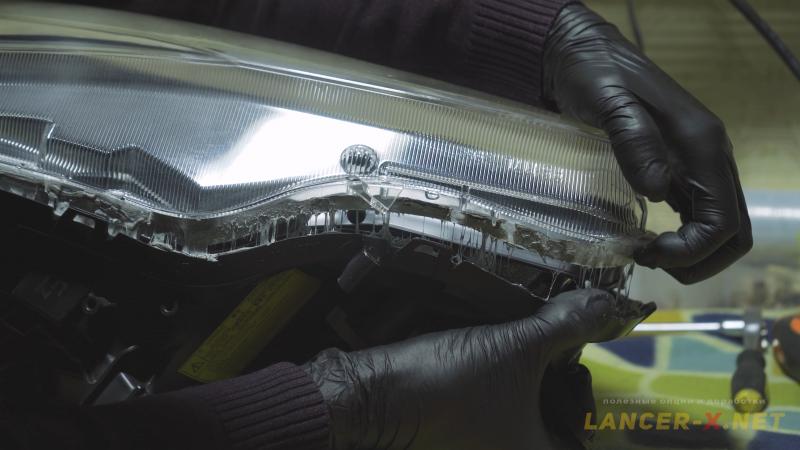 We start to remove the glass from the blinker side.
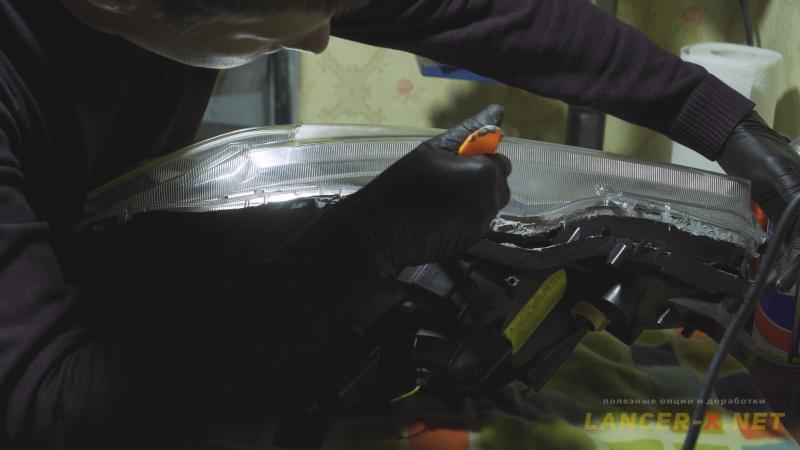 In the process of glass removing, it is necessary to clean the stretching sealant, so that it does not get on the inside of the headlight. If anything, the sealant is easily purified from the plastic with a petrol for lighters fueling. But if this sealant get on chrome, then it will be quite difficult to clean without stains.
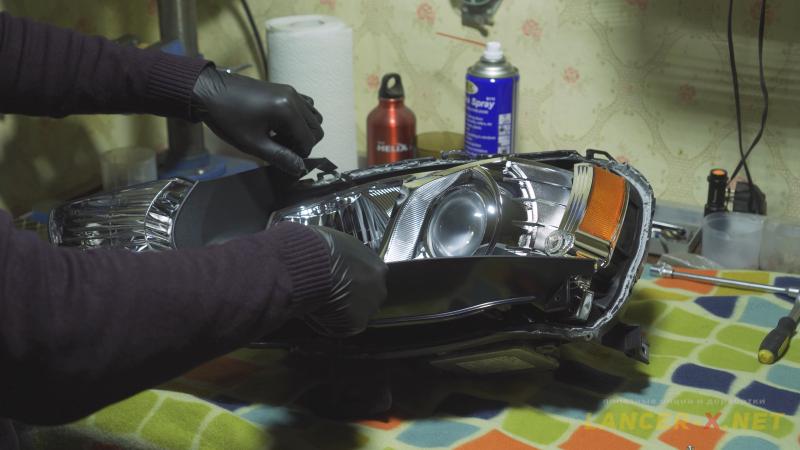 Unscrew the black mask with the reflector section. It is fastened with 4 self-tapping screws around the edges.
 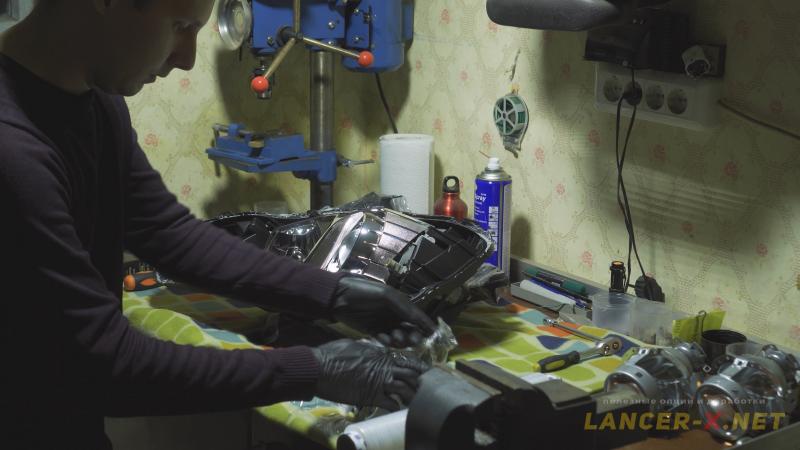 All removed plastic from the headlight, especially chrome, I wrapped in stretch film for safety.
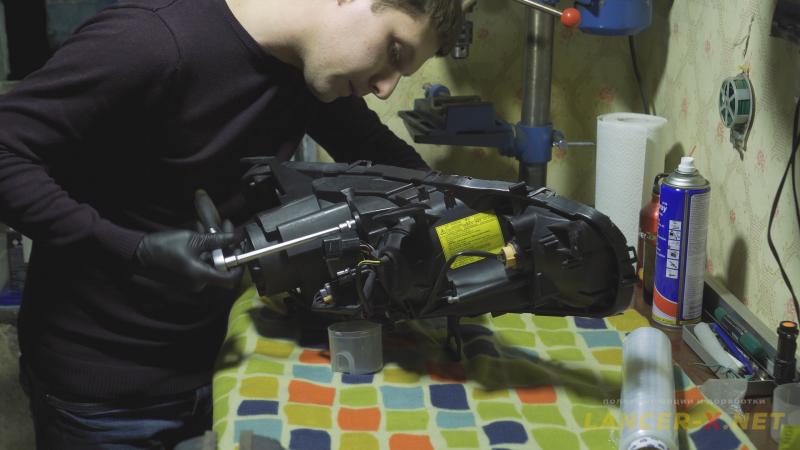 The chrome mask with a lens is fastened with two bolts behind. Bolts are rather long, unscrew slowly.
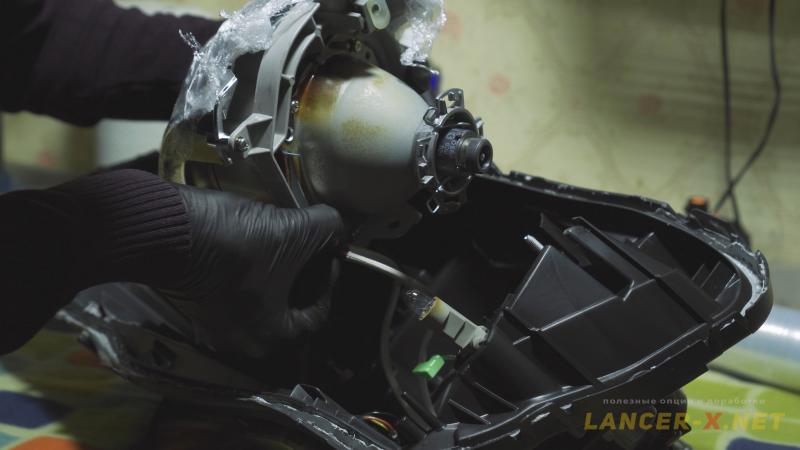 Unlatch a mask from auto-corrector. Unfasten all connectors from the lamps. And also disconnect terminal mass and shutter connector from the lens.
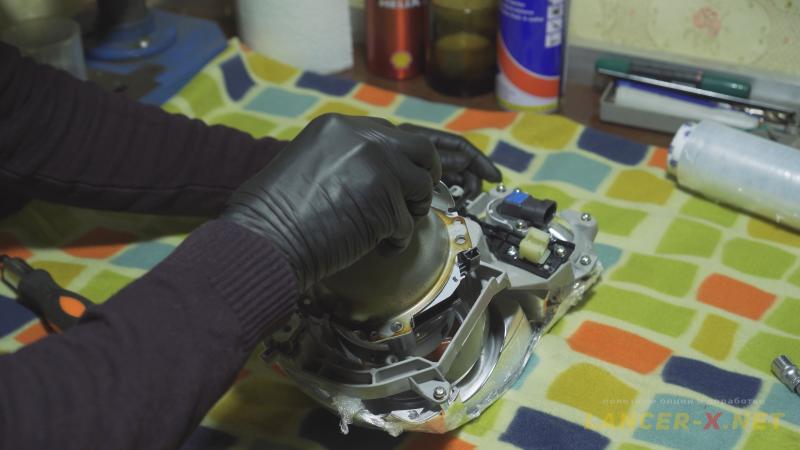 Unscrew and remove a lens from the mask.
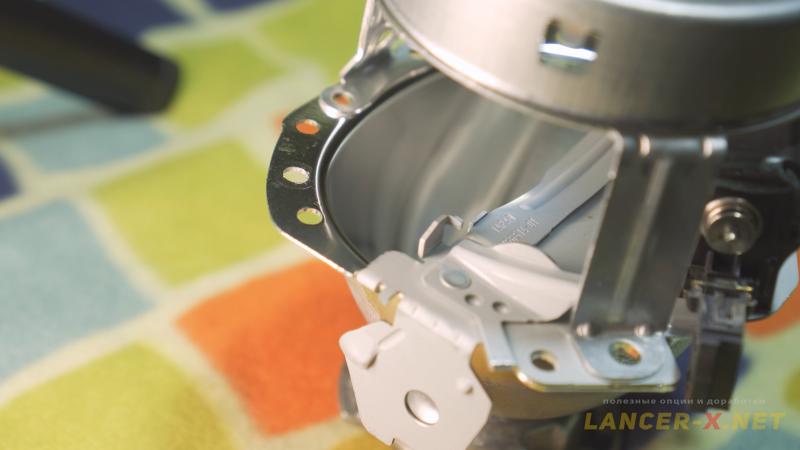 The examination of a lens showed, the reflector is in an ideal condition, there is even no coating, and it means, that the headlight mileage is short.
Replacement of shutters on lenses on Lancer X
 To remove the shutters from the lenses, it is necessary to drill 2 holes, since the lenses are riveted with a reflector, and there is a shutter between them.
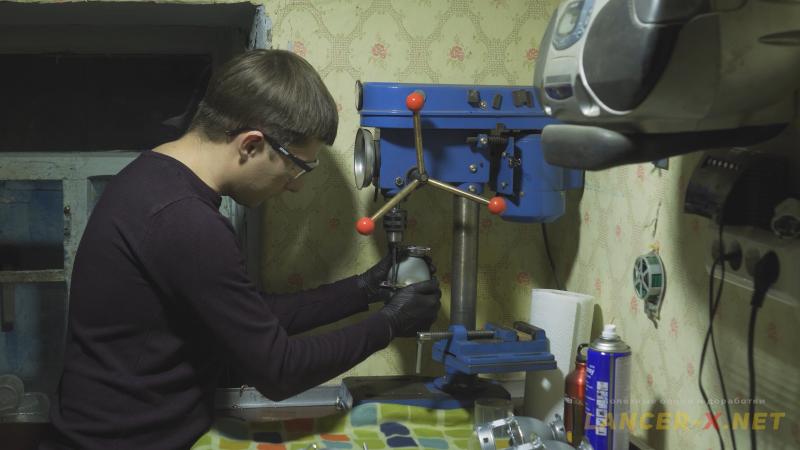 Carefully drill European donor and Japanese lenses.
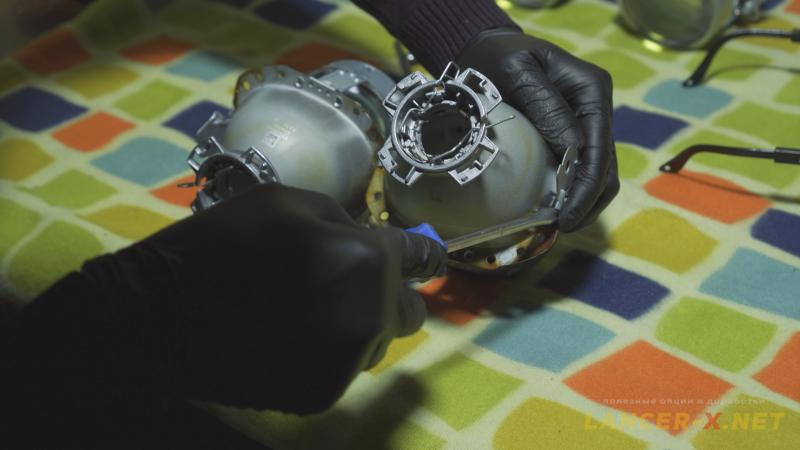 We unbent the retainers along the edges, which additionally fasten a shutter to the lens and shutters are removed.
 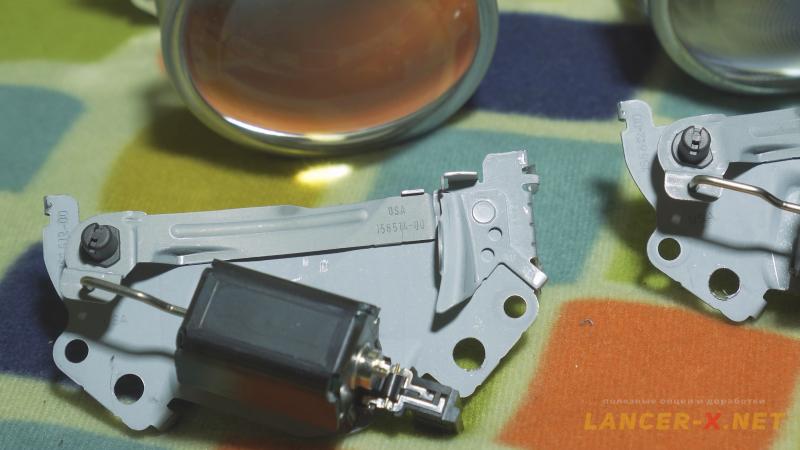 These are European shutters, which I will install in the lenses, removed from the headlights.
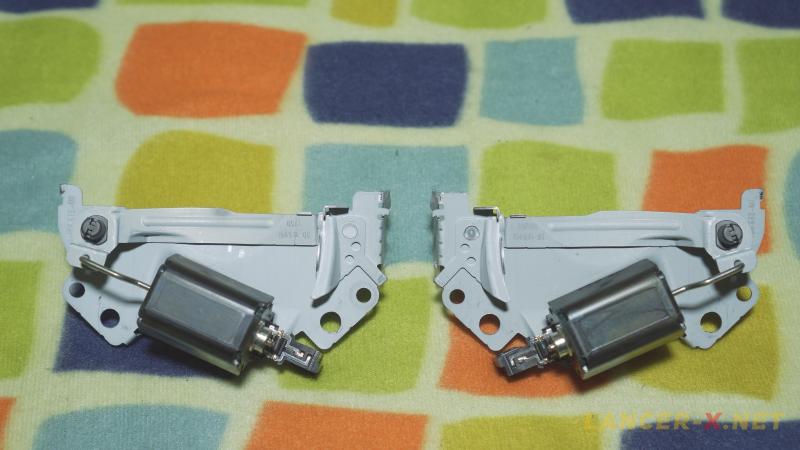 And this is how the European and Japanese shutters look in comparison. Some people try to grind a right-hand drive shutter under European, but it is very hard to do it carefully.
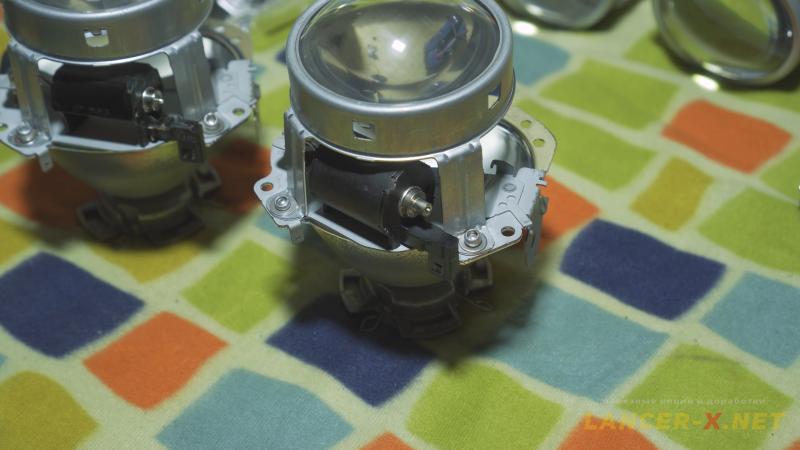 We install the European shutters in the lenses, I will fasten everything using aluminium rivets. Or you can fasten everything using screws with clamp nuts. The choice is up to you.
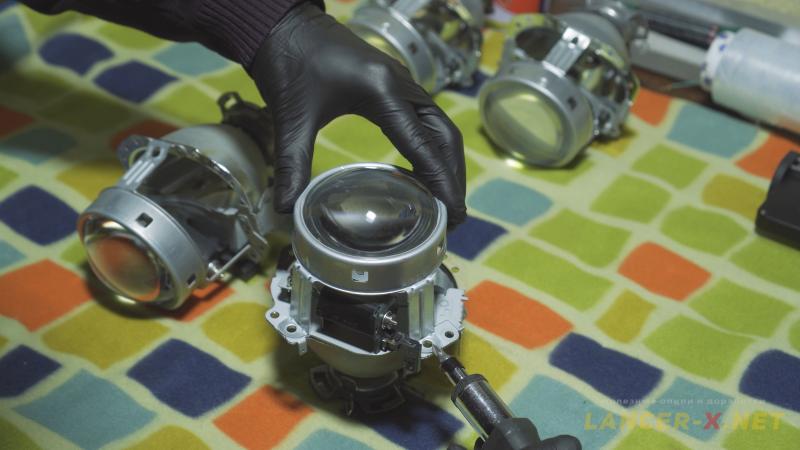
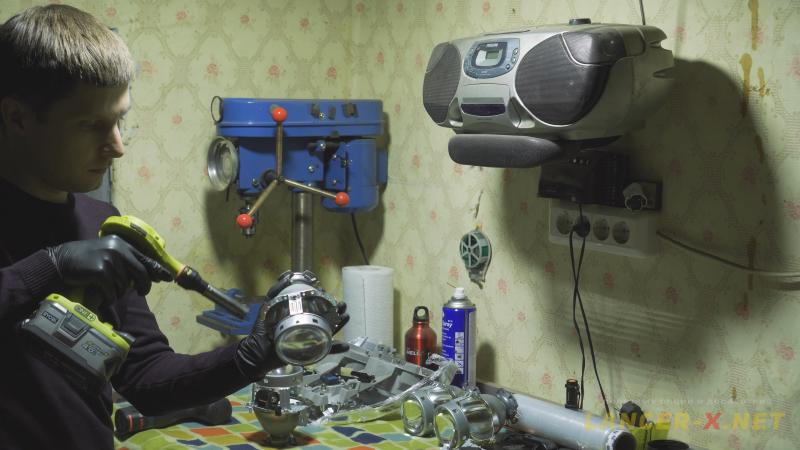 After that necessarily blow lenses from dust. And install it back in the masks.
 In my case 1 of rivets leaned into the mask, but using a rasp I sharpened a rivet and the lens took its place.
Now one of the laborious procedures remains, it is necessary to clean the headlight housing from the old sealant. As I am going to glue new glasses on the ABRO tape, made by vulcanized polyisobutylene.
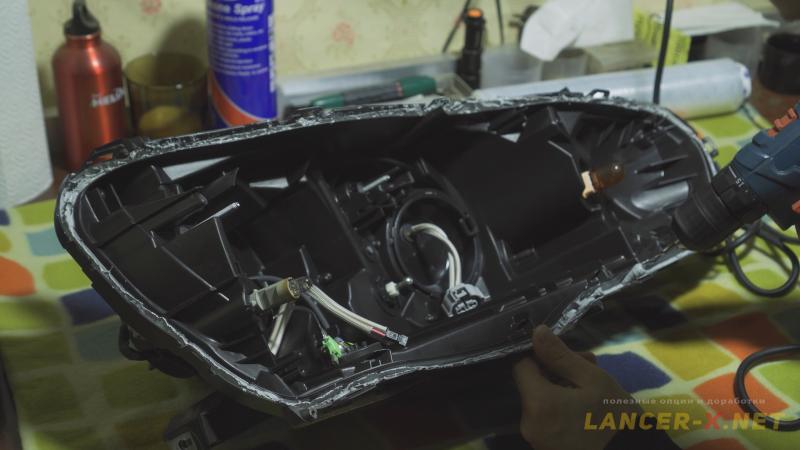 Here I used a way from the Internet, we heat a sealant and using a screw gun and a drill, at low speeds, we wind the sealant on the drill. Using this way, I removed a sealant rather quickly, I did not clean everything ideally, as there is no any sense.
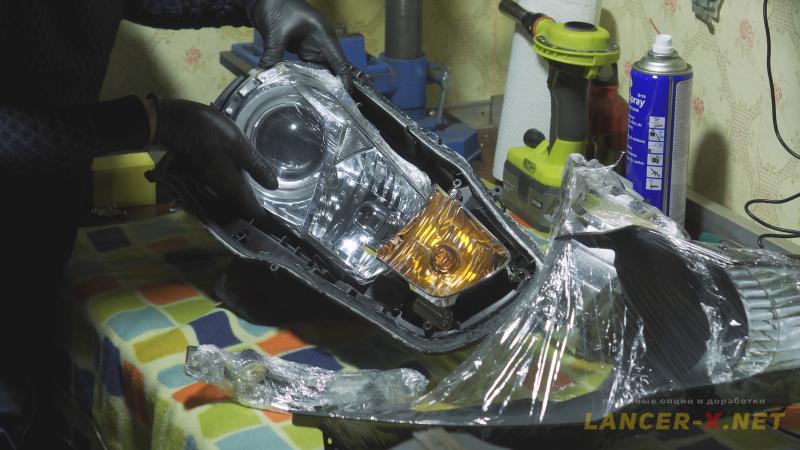 Next, install all parts back in the headlights, connect wires to the lens and check that given chrome mask with a lens obligatory latched on auto-corrector rod. You can verify this by unscrewing a rear round lid for lamp replacement in AFS section.
 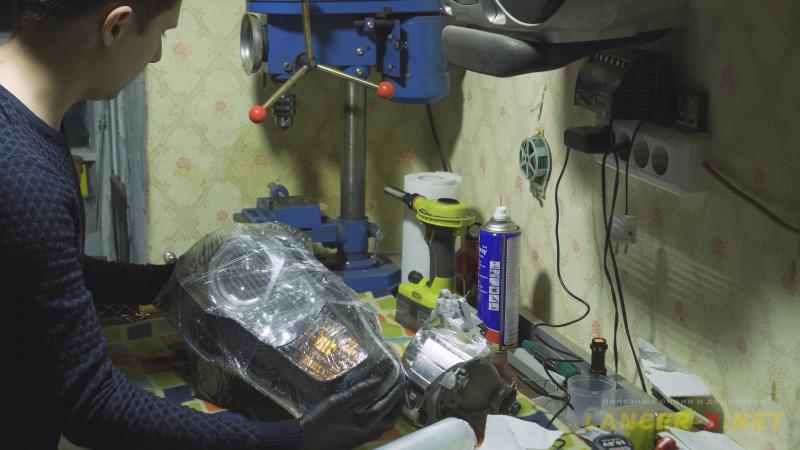 Before gluing new glasses, I have decided to check the shutters operation. And for the purpose of avoiding dust and dirt on the headlight, I wrapped the headlights fully in stretch tape.
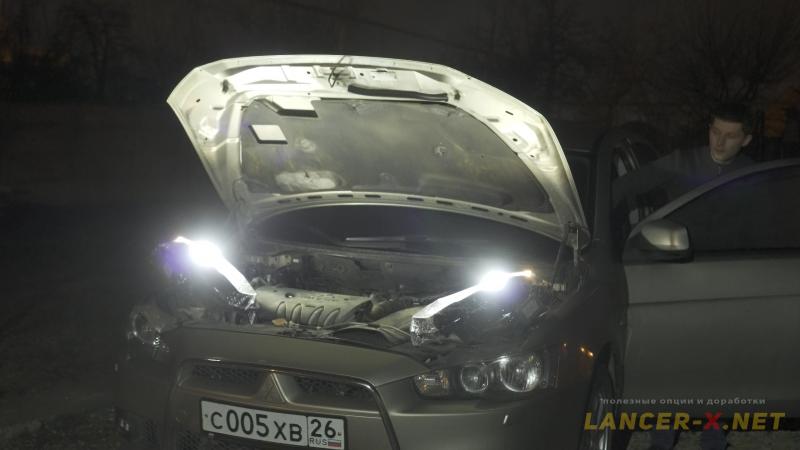 Connecting headlights to the car, I made sure that shutters operate perfectly, switching light from low for far and vice versa.
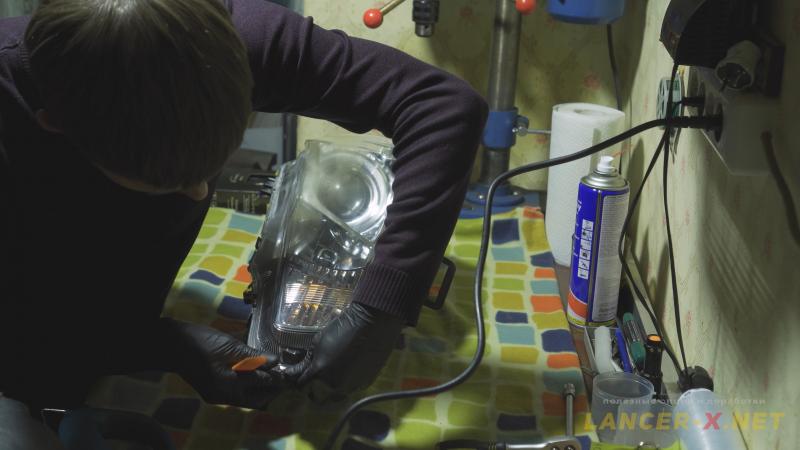
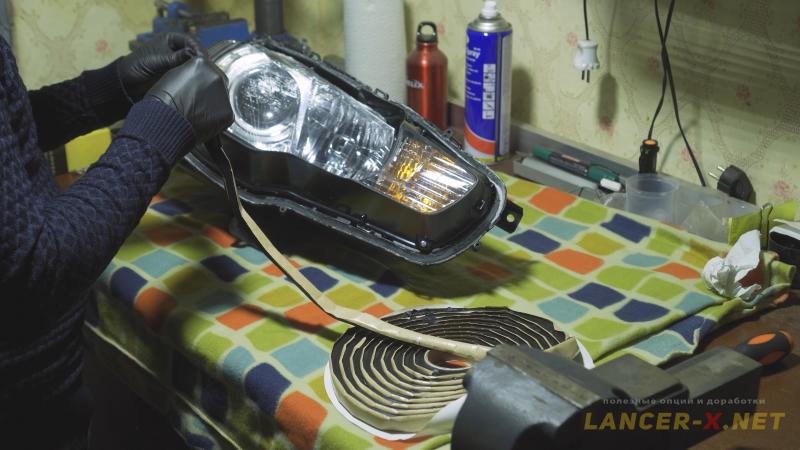 I will glue new glasses with Russian DCR marking on ABRO tape, made by vulcanized polyisobutylene. We degrease a groove and lay a sealant along the all contour.
 Fix the glass and push a little. Next heat a sealant and plastic retainers of the glass on the headlights housing using a dryer and carefully push a glass. The glass sealed in the headlight housing in several stages.
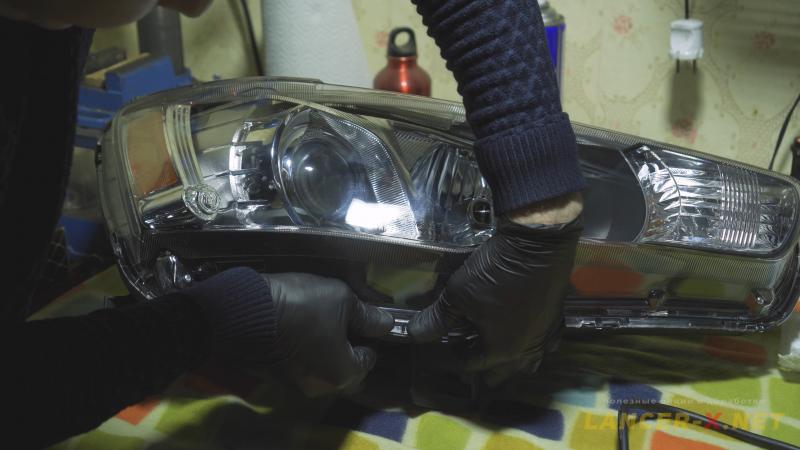 Screw all the self-tapping screws and put the metal bracket back.
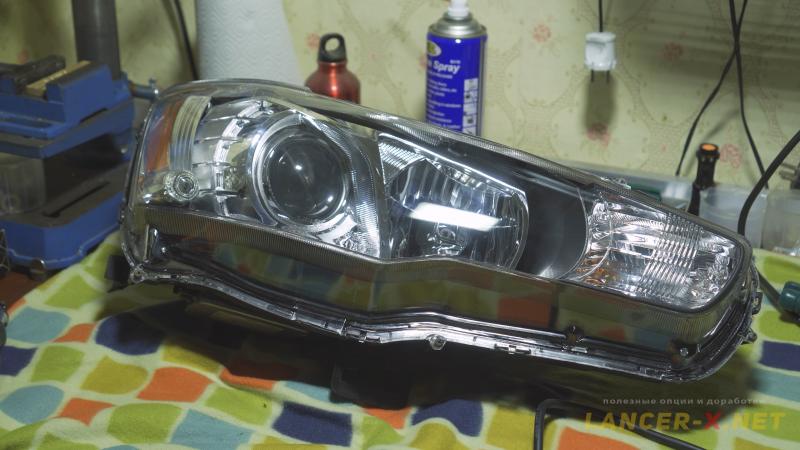 Now the headlights are adopted for our right-handed traffic and ready for an installation on the car.
Installation of bi-xenon headlights with DCR marking on Lancer X
Now, before installation of new headlights with DCR marking on Mitsubishi Lancer X, we activate an auto-corrector and advanced cornering frontlighting system (AFS) in ETACS unit in accordance with the instruction above.
 Also, I will disconnect a dimming mode, in which my reflex headlights were operating during the day-time, as DRL, as this mode does not operate on xenon headlights.
To do that, find given point in Variant coding of ETACS unit and choose:
- DRL type - - > Normal DRL
In this mode, after engine starting, the marker lights and low beam switch-on, even in that case, if the light switch is in switch-off position.
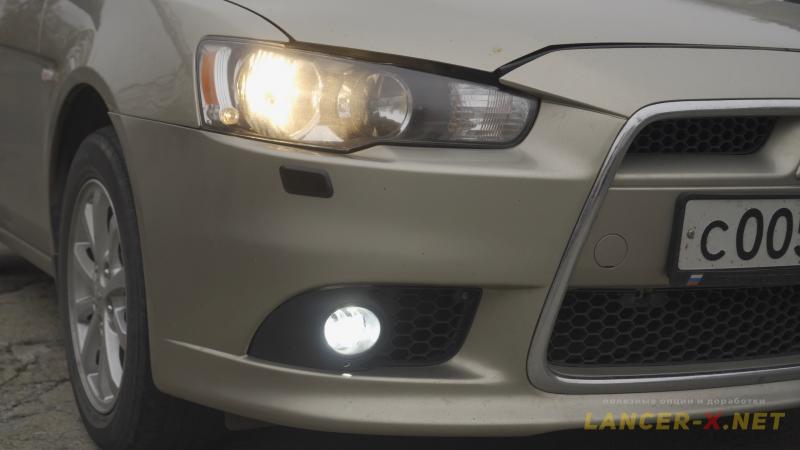
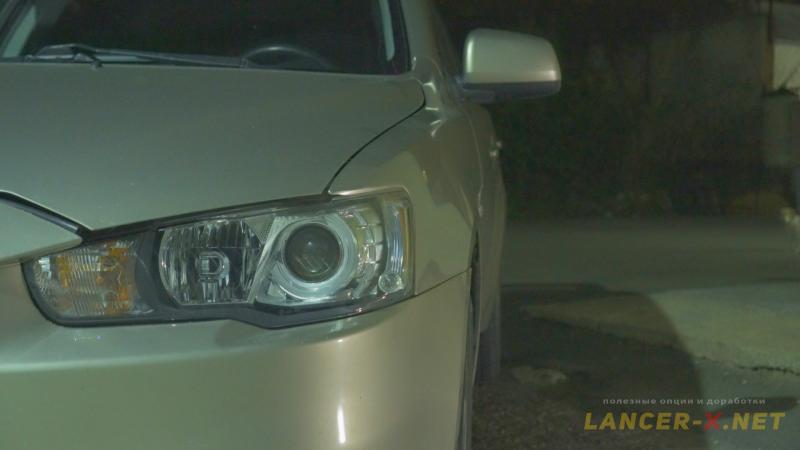
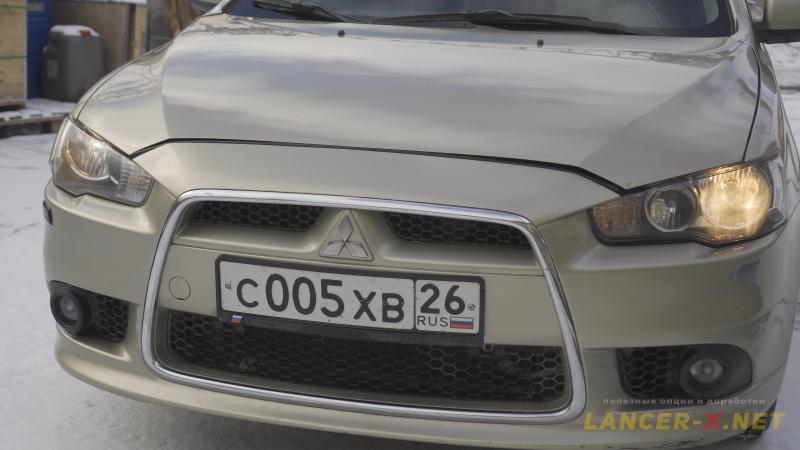
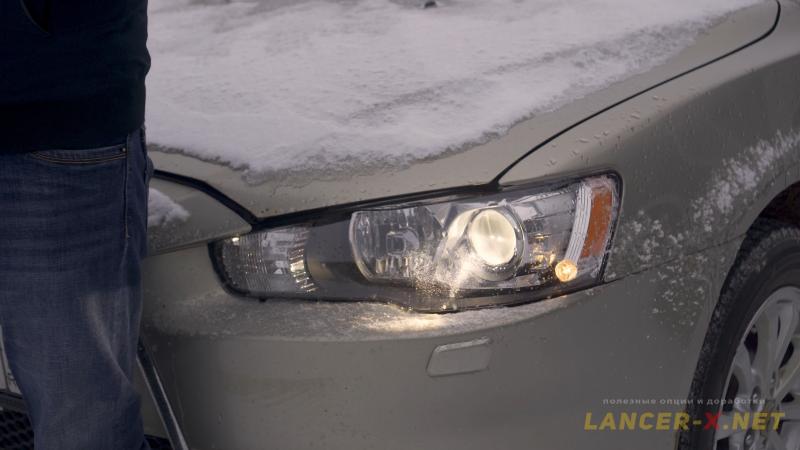
 Let us install new bi-xenon headlights with DCR marking on Mitsubishi Lancer X.
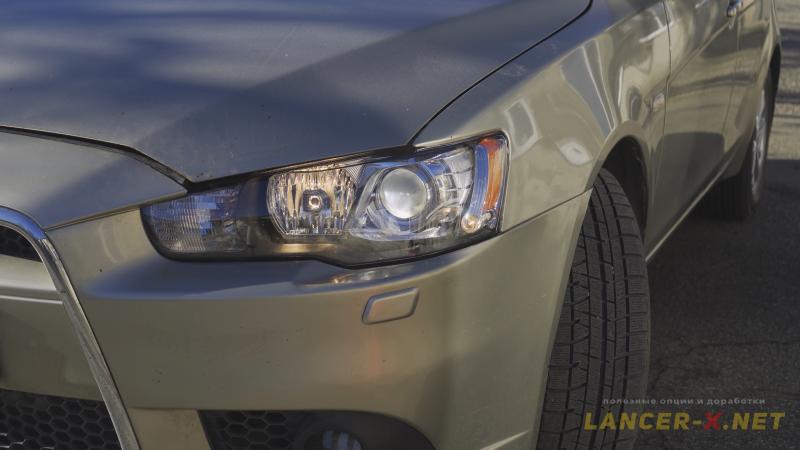 Check, how new headlights operate and flash, as well as test an advanced cornering frontlighting system, when turning the wheel left, a left section flashes, when turning the wheel right, a right section flashes.
Additionally, I also corrected a light sensor operation in ETACS unit, earlier when it began to get dark, I had the marker lights turned on, and when it got darker even more, the low beam turned on.
Now I adjusted both the marker lights and low beam switching on in this point of ETACS unit Variant coding:
- Auto Light Control - - > High threshold (analog) (cannot change)
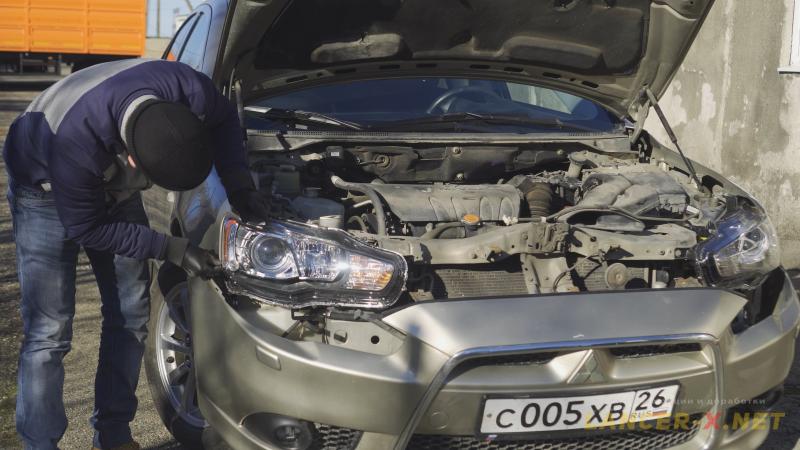
 I did not adjust headlights independently, and rode to the repair shop, when all was done with help of special equipment.
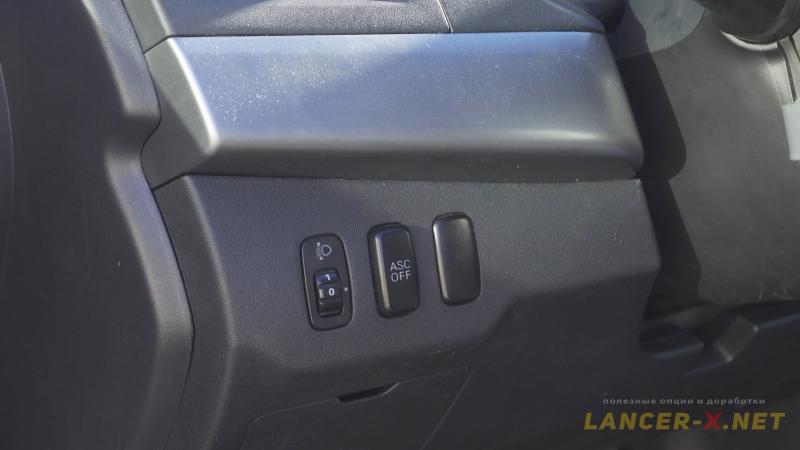 Also, I will remove the headlights corrector manual controller, as it has not any sense now, instead, I will install a blind plug or parktronic button.
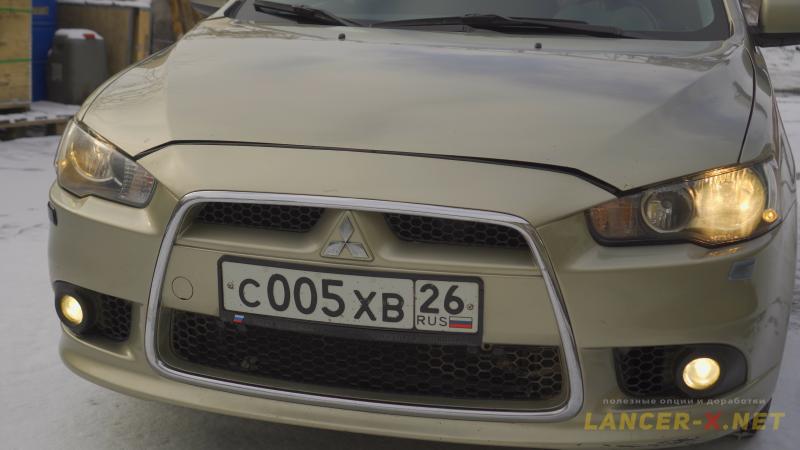
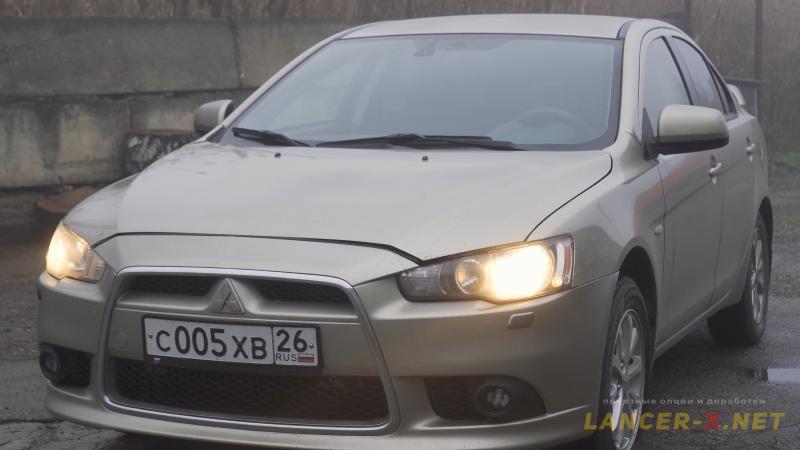
 Now, after headlights adjustment, we can compare how reflex headlights were flashing and how bi-xenon headlights are flashing now with new glasses.
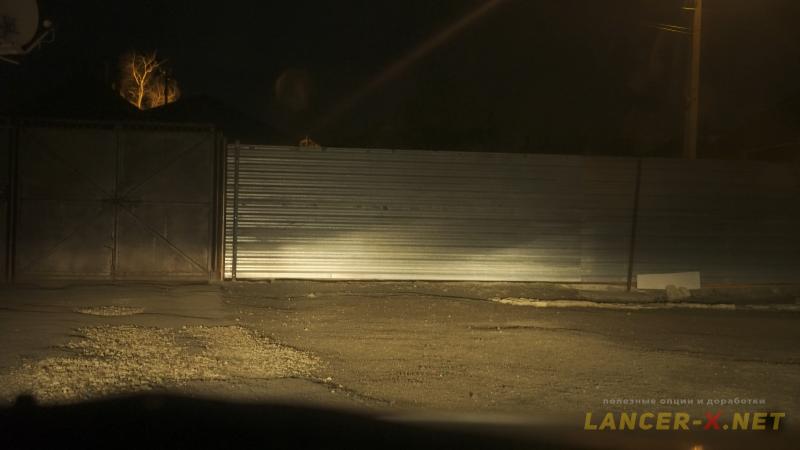 This is how reflex headlights were flashing - low beam.
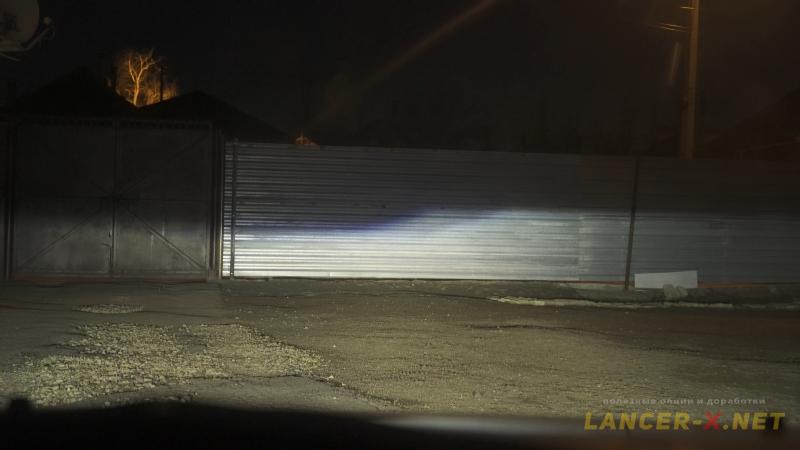 This is how new bi-xenon headlights are flashing - low beam.
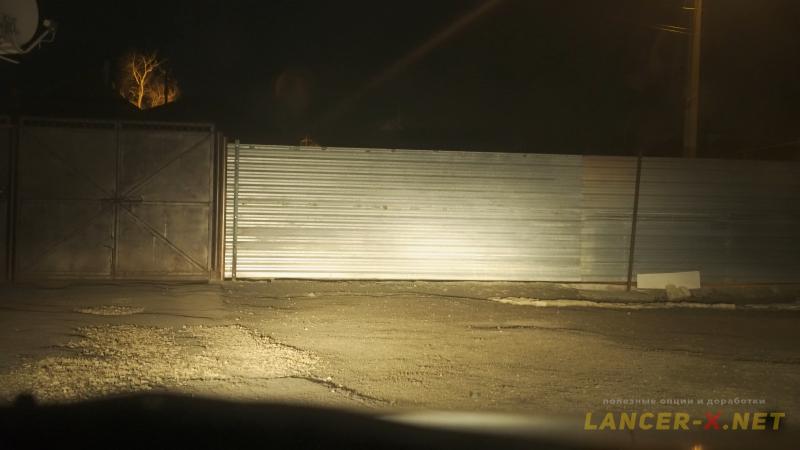 This is how reflex headlights were flashing - far light.
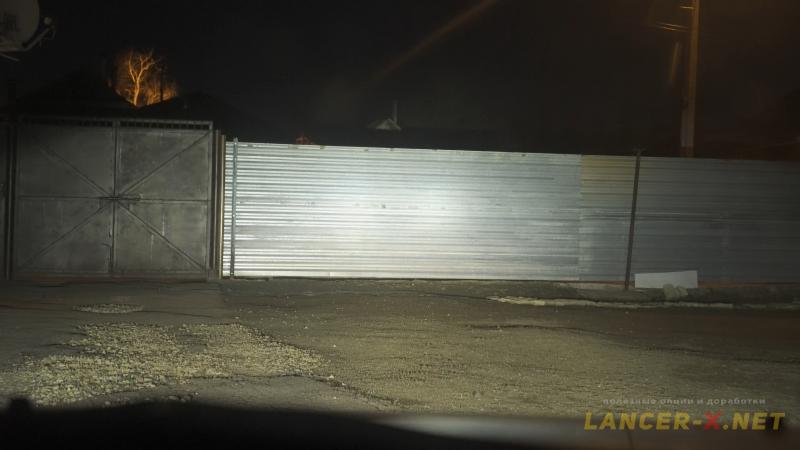 This is how new bi-xenon headlights are flashing - far light.
 This is how AFS sections are flashing on bi-xenon headlights.
With these headlights, I drove for a couple of weeks, observing whether there would be fogging in the headlights and how the laser marking would behave. This time they were excellent.
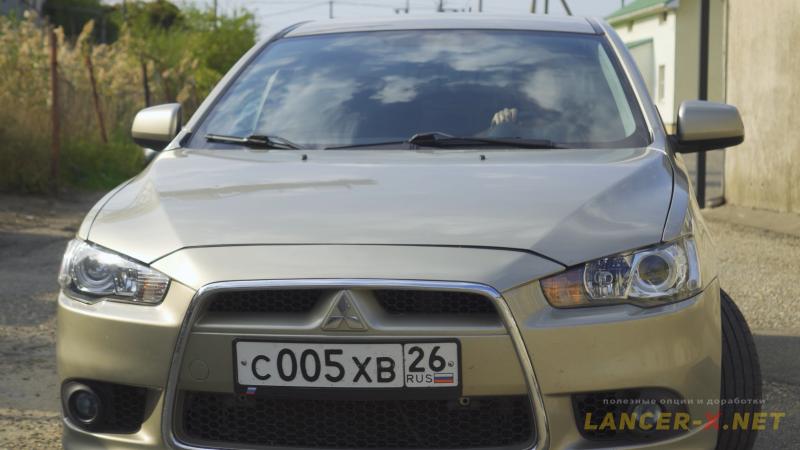
 To sum up, I like the headlights light, with these headlights, the appearance of the car changes dramatically, and at night it became much more comfortable to drive. And most important, now I have fully legal xenon with Russian marking, auto-corrector and headlights washer installed on my Mitsubishi Lancer X.
Maybe, in the future, I will consider an option with lenses changing for modern LED. It is necessary just to learn which lenses will be suitable for given headlights. But that's a thing for the future.
Video of installation and upgrade of bi-xenon headlights on Lancer X
Related links: