Standard options and upgrades for Lancer X
Mitsubishi Connect installation on Lancer X
Let us install the Mitsubishi Connect, using CAN adapter on Mitsubishi Lancer X.

Lancer-X.net
Last year, I had installed the standard car stereo MMCS J-05 on my Mitsubishi Lancer 10 and additionally equipped it with standard loudspeaker mode set with Bluetooth and USB, as well as installed the standard rear view camera.
 I am still totally fine with that set and its continuous operation.
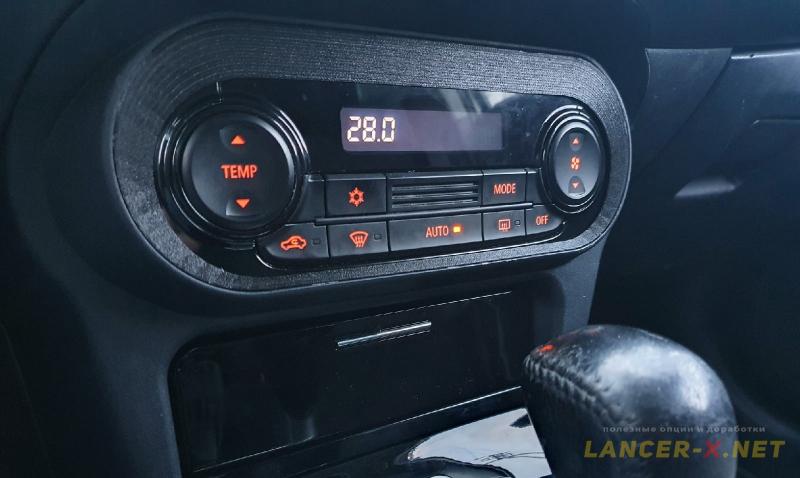
 But last winter, I had installed the new climate control unit from Outlander 3, which was started to operate on Lancer X due to CAN adapter by Nikolay, the developer of MMCoding Writer.
 It is possible to install not only the new climate control unit from Outlander 3 with this CAN adapter, but also newer Mitsubishi Connect car stereo, which I have decided to install instead of the car stereo MMCS J-05.
For easy reference, this article is represented in 2 versions: text and video at the end.
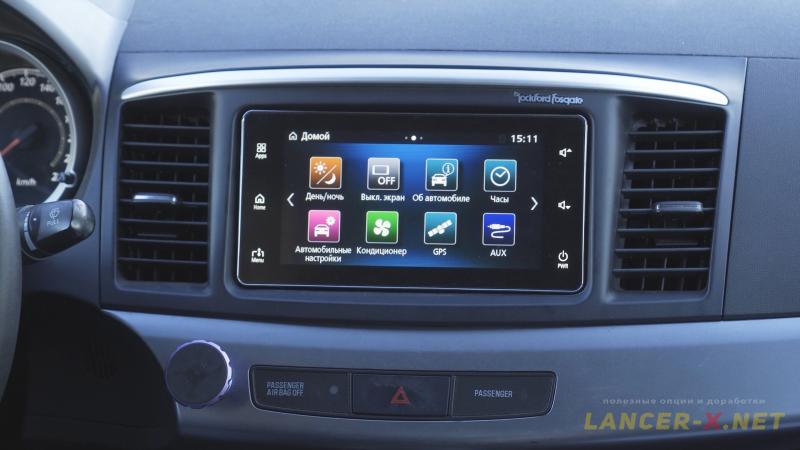
What version of Mitsubishi Connect to install on Lancer X
 There are many versions of Mitsubishi Connect car stereos, if anyone is interested in it, you can get the details in given article.
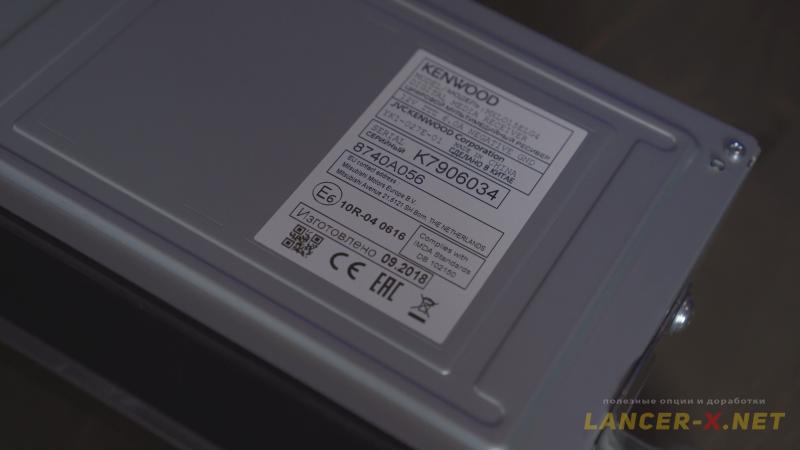 But we are interested in such versions of car stereo as 8740A022 or 8740A056 from Outlander 3, with CAN support, in order it will be not only the car stereos, but car stereos that are able to communicate with the car via car's CAN bus due to CAN adapter by Nikolay.
 I bought the car stereo 8740A056. I was lucky, as given car stereo has HDMI connector.
There is no HDMI connector in later 8740A056 versions, but if you wish, you can restore given connector.
 After receiving the car stereo, I sent it to Aleksey Zaigard for reflashing, at the same time, buying the original USB and HDMI cables from him for this car stereo. You can see in detail what the modified firmware fixes in the video below, or read from Aleksey on the website.
Реклама. ООО "АЛИБАБА.КОМ (РУ)", ИНН 7703380158
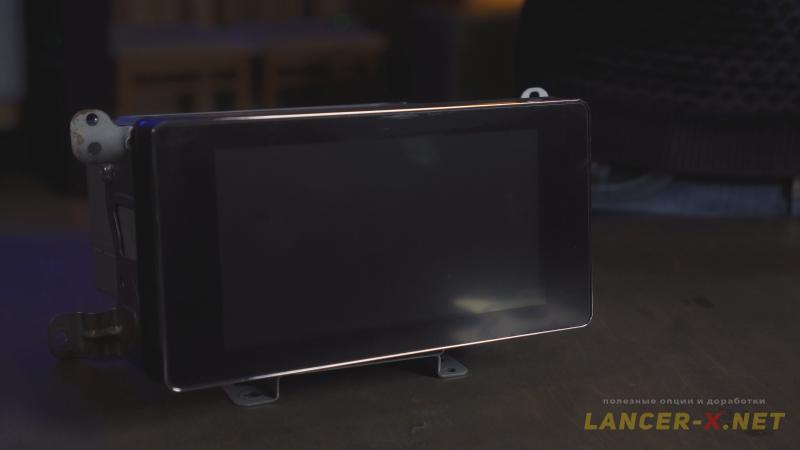
Brackets for Mitsubishi Connect installation on Lancer X
As Mitsubishi Connect was removed from Outlander 3, the brackets, installed on the car stereo, are not suitable for installation on Lancer X, due to the different angle.
Brackets from the MMSS J-05 car stereo in theory can fit, but their angle is also slightly different, you will install the car stereo, but it will be recessed deep into the frame, which in my opinion will not look very nice.
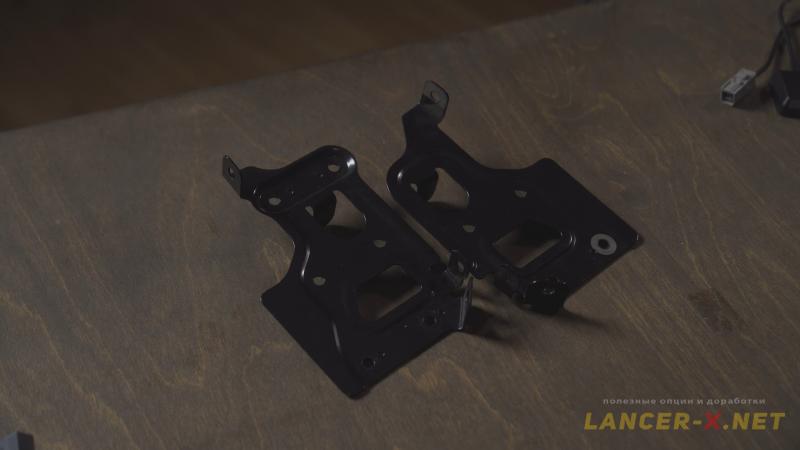 For installation of Mitsubishi Connect in Lancer X, one needs the standard brackets from restyled car stereo, I have found them on Avito, buying them separately from the restyled car stereo owner on Lancer X in my city.
CAN adapter for connection the Mitsubishi Connect to the Lancer X
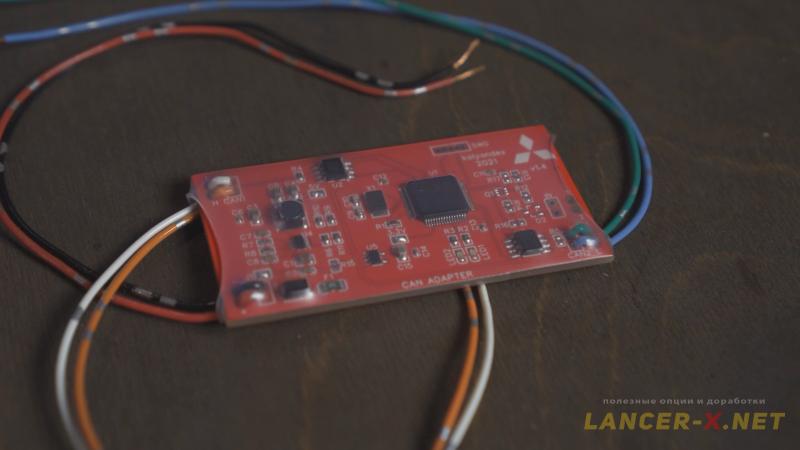 In order to have a connection along the CAN bus between car and Mitsubishi Connect, it is necessary to connect everything via CAN adapter. You can get more details about CAN adapter and accordingly buy it on the official forum.
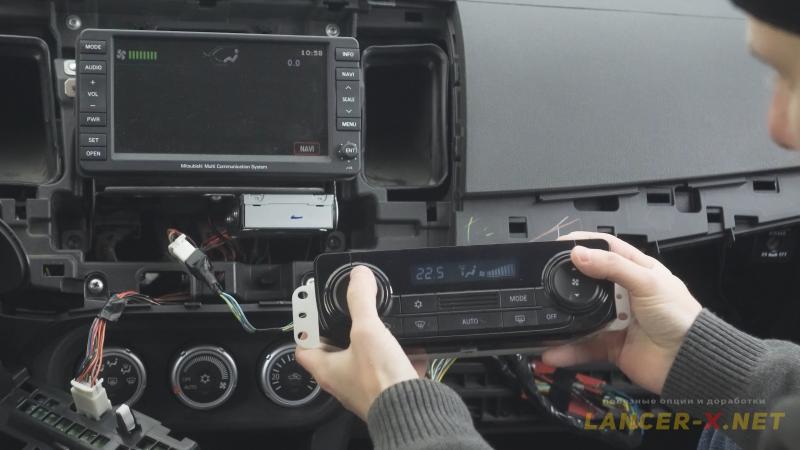 Buy CAN adapter separately, or if you have already the installed CAN adapter, for example, for climate control unit from Outlander 3, it is possible to save money. Make additional payment to Nikolay for the new firmware and your CAN adapter will support a simultaneous operation with several devices: with climate control unit, Mitsubishi Connect and even with dash panel from Outlander 3.
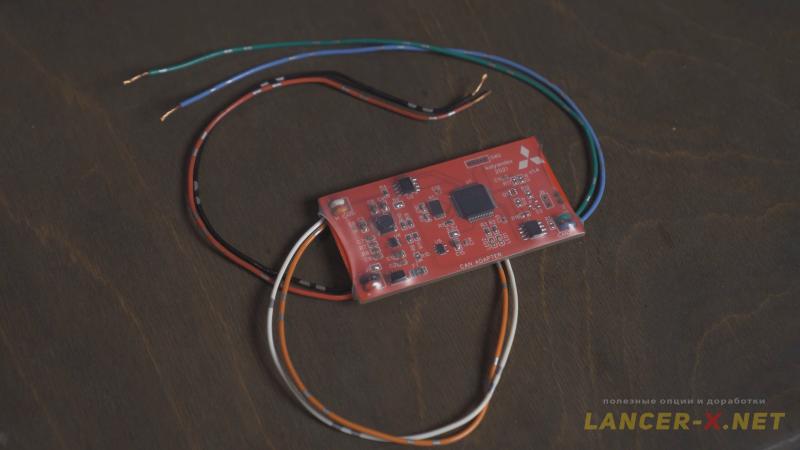 I bought the second CAN adapter, as I am going to make the separate transitional wiring, specially for Mitsubishi Connect.
Connection of Mitsubishi Connect to the Lancer X
 In the article about installation of standard car stereo MMCS J-05, I built up the absent wires and added the absent connector for connection the camera to the car stereo, as I have the restyled auto.
 On before restyling auto until 2011 year made, all wiring and connectors are present.
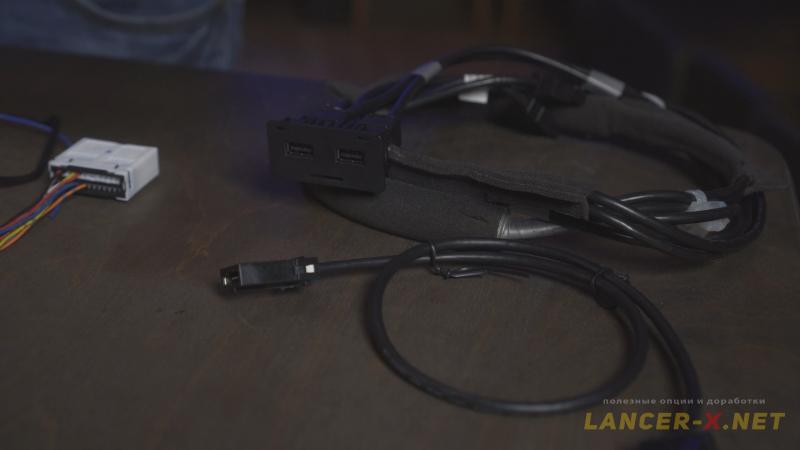
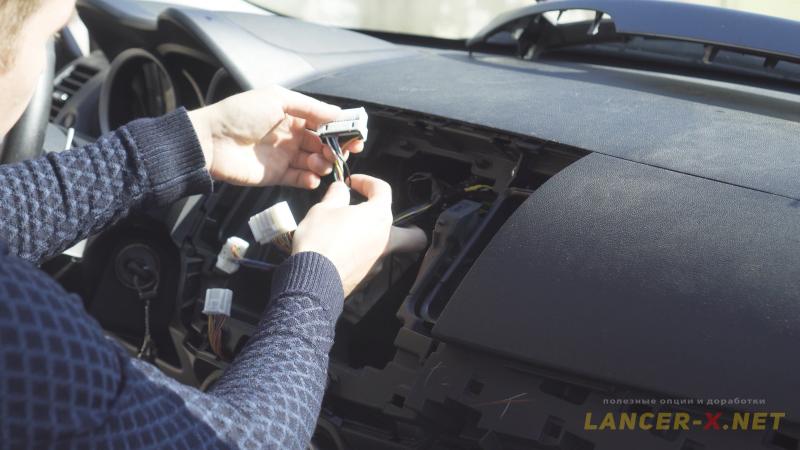
For connection the Mitsubishi Connect, one needs the re-pinning or transitional wiring, in order to connect the rear view camera and microphone.
 I have decided to connect everything via transitional wiring, in order to have a possibility of operation returning to the previous wiring option.
For making the transitional wiring, I ordered on Aliexpress the following connectors:
2. Mating part for connection to the camera C-133 connector, took from the donor wiring.
Реклама. ООО "АЛИБАБА.КОМ (РУ)", ИНН 7703380158
But since my ordered connectors were delayed, I ordered the transitional wiring for Mitsubishi Connect from Aleksey Zaigard, who sent me everything along with a flashed car stereo.
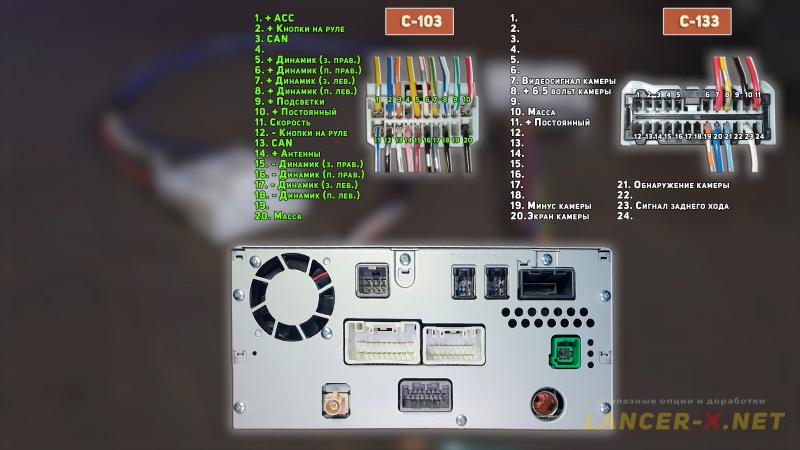
 This is how my wiring, which is connected to the car stereo MMCS is looking now.
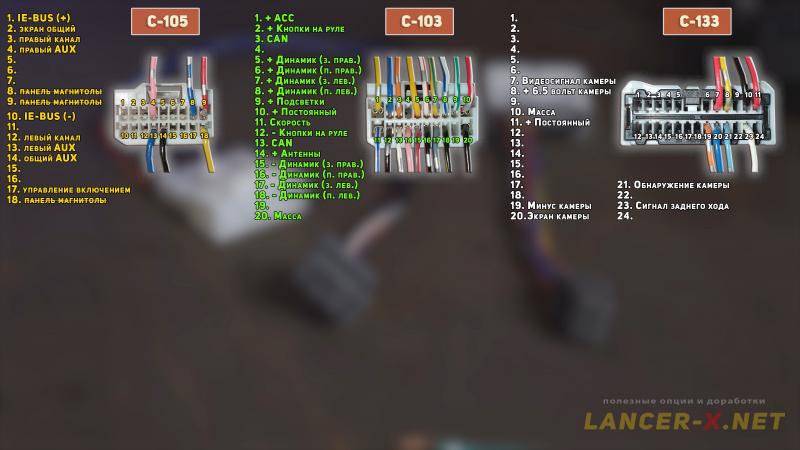
Connectors С-105 and С-103 are the same for connection on Mitsubishi Connect and car stereo MMCS.
 We do not need the connector С-105, I won't install it to the Mitsubishi Connect.
Connector С-103 has a standard connection.
 Additionally, we will take all the necessary wires for CAN adapter connection from connector С-103.
 - Constant plus from pin 10 of connector С-103.
- Mass from pin 20 of connector С-103 or car body.
- CAN bus: pin 3 of connector C-103 is CAN H and pin 13 of connector C-103 is CAN L.
Connect CAN bus from the car to the CAN adapter, and from adapter already to the car stereo.
And it remains to connect the standard camera and microphone. I remind you that here is necessary to re-pinning or transitional wiring, as the connectors are different.
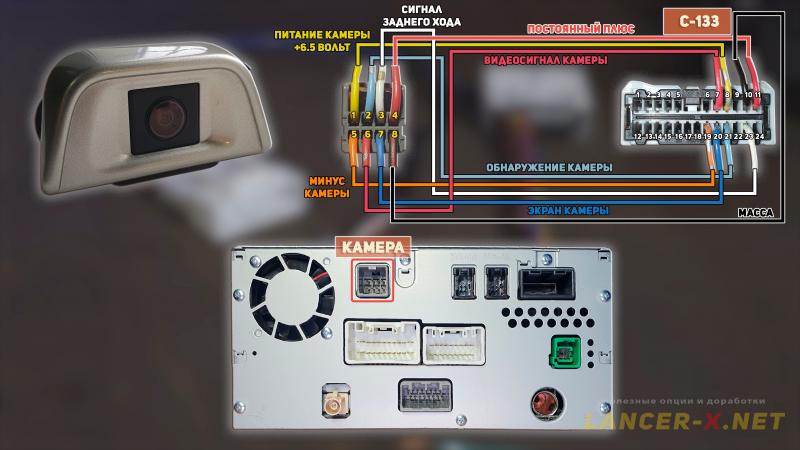 The camera is connected to the Mitsubishi Connect as follows:
- camera supply to pin 1.
- camera detection to pin 2.
- reverse signal to pin 3.
- constant plus to pin 4.
- camera minus to pin 5.
- camera video signal to pin 6.
- camera screen to pin 7.
- mass to pin 8.
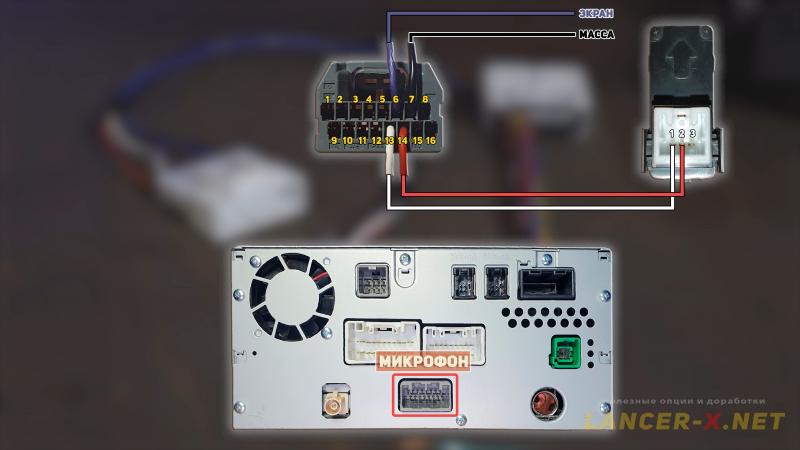 Due to the fact, that Hands free Bluetooth system is already present in Mitsubishi Connect car stereo, we do not need Bluetooth unit from car stereo MMCS anymore. It is necessary to connect only microphone and mass to the Mitsubishi Connect, using the following scheme:
- pin 1 of microphone connector to pin 13.
- pin 2 of microphone connector to pin 14.
- connect microphone screen to pin 6.
- mass to pin 7.
 Also, I will connect additionally the GPS antenna to the Mitsubishi Connect, which was in the set, the antenna is not original, but it will be enough.
 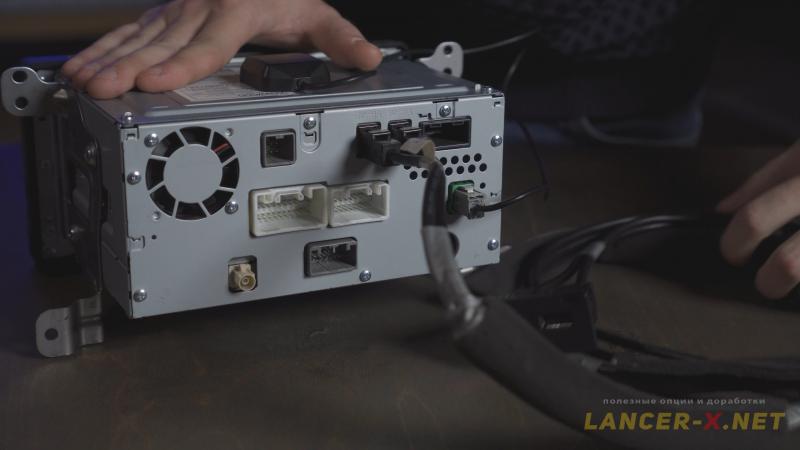 The wire with USB ports, which I will bring out in the area of jumper or in the glove box, is connected to these connectors.
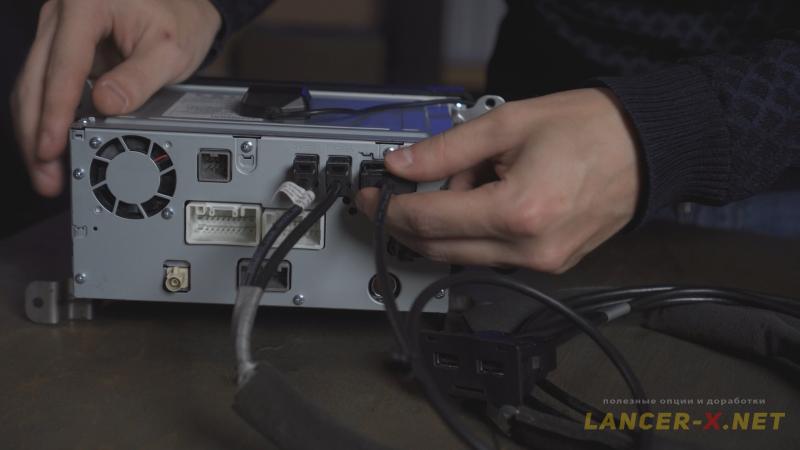 Here is connected the wire of HDMI connector for connection and playing the video from any source, for example from TV tuner or the smartphone.
Реклама. ООО "АЛИБАБА.КОМ (РУ)", ИНН 7703380158
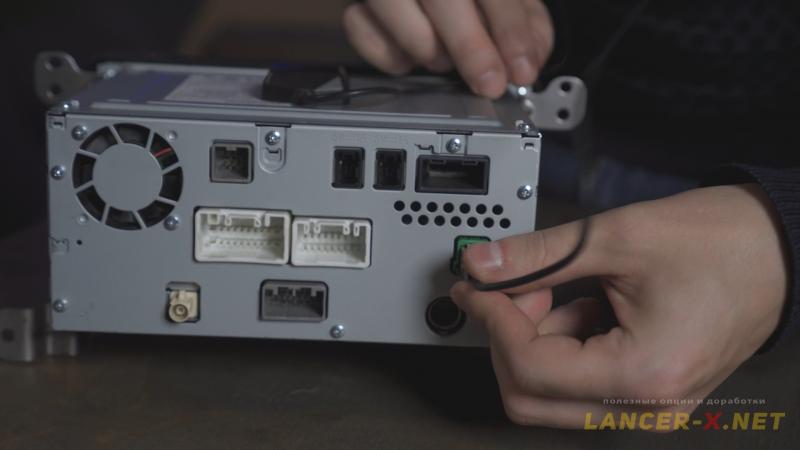
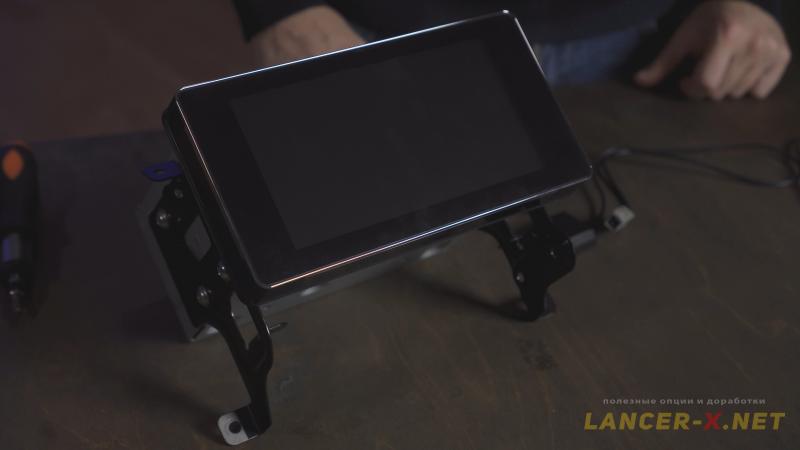 Screw brackets and it is possible to install the car stereo in the car!
Mitsubishi Connect installation on Lancer X
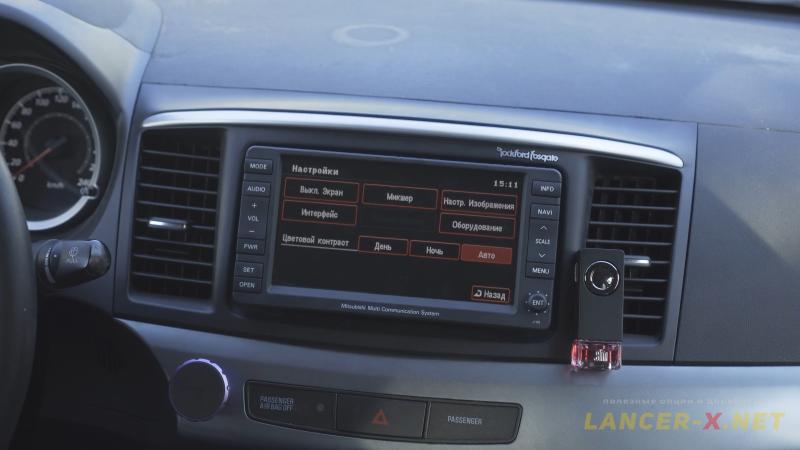
Before removing a car stereo MMCS J-05 and installing a Mitsubishi Connect, it is necessary to make changes in Variant coding of ETACS unit in order to provide the correct operation.
Before activating, I advise you to read the article where discussed in detail how to activate the hidden functions and options on Mitsubishi Lancer X.
For activation the Mitsubishi Connect on Lancer X you need:
1. J2534 compatible adapter. Bought here: Аliexpress
Реклама. ООО "АЛИБАБА.КОМ (РУ)", ИНН 7703380158
2. MMCodingWriter, the program for downloading and coding recording.
3. MUT Coding Mitsubishi, the program for coding editing.
4. Laptop.
Since 2021, the MUT Coding Mitsubishi program has become paid, or you can buy it from the developer, or use the built-in editor in the MMCoding Writer program.
Always do backup copies for original Variant and Custom codings!!!!!!!!!!
Find and activate the following points in the Variant:
- AUDIO - - > Not Present
- AND [AVN] - - > Present
- AND [AVN] - - > Present
If you have the standard rear view camera installed, activate the following point, in order to have a camera screen switched on when switching the reverse gear on:
- Rear view camera - - > Present
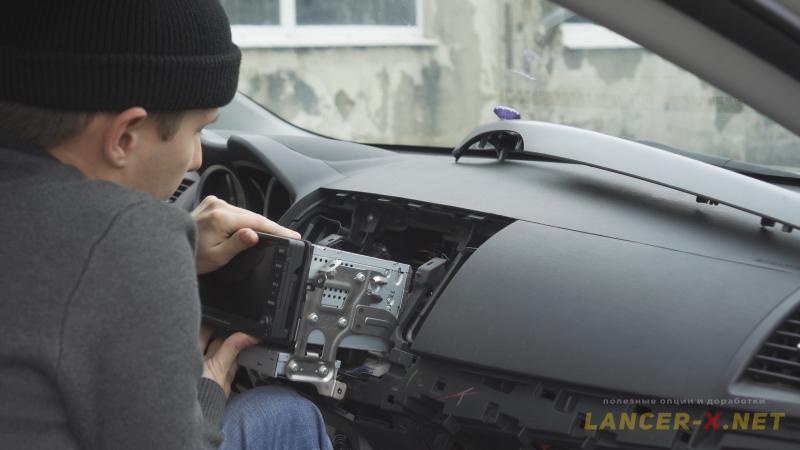 After that, it is possible to disconnect a car stereo MMCS J-05 from the car and remove it.
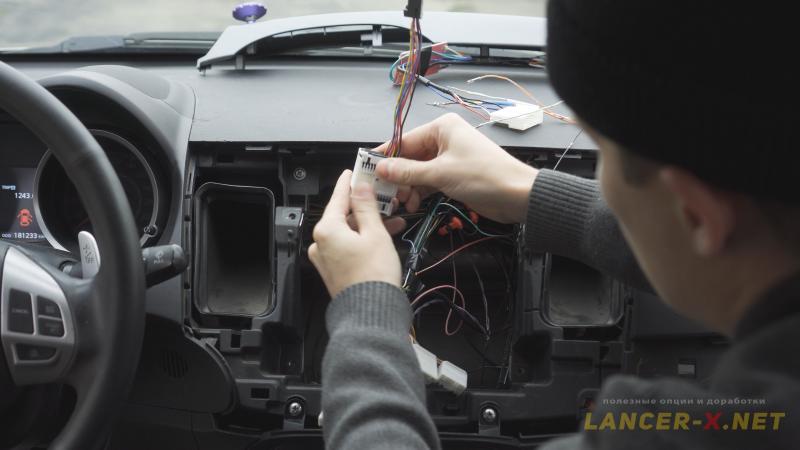 Attach a transitional wiring for connection the camera, microphone and CAN adapter to the Mitsubishi Connect.
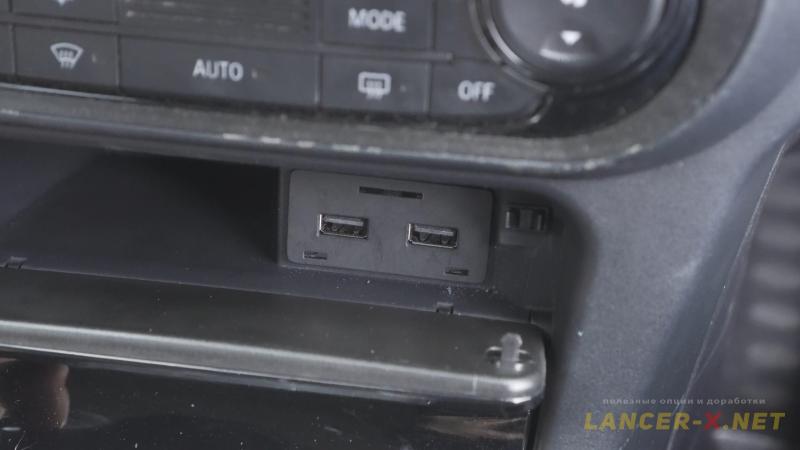 I have decided to bring USB into the central console, not in the arm rest, but due to the fact, that I have non-original console, I had to grind a little the seating position by a rasp and USB ports have latched standard.
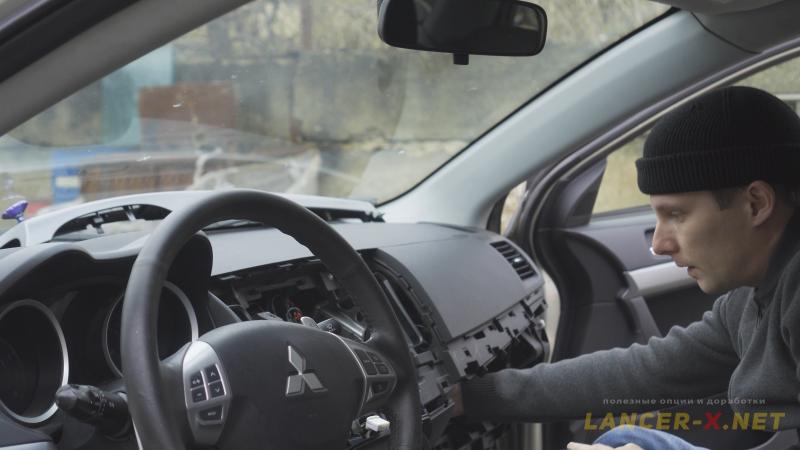 I brought the HDMI wire into the glove box.
 Connect all connectors and install the Mitsubishi Connect to its rightful place.
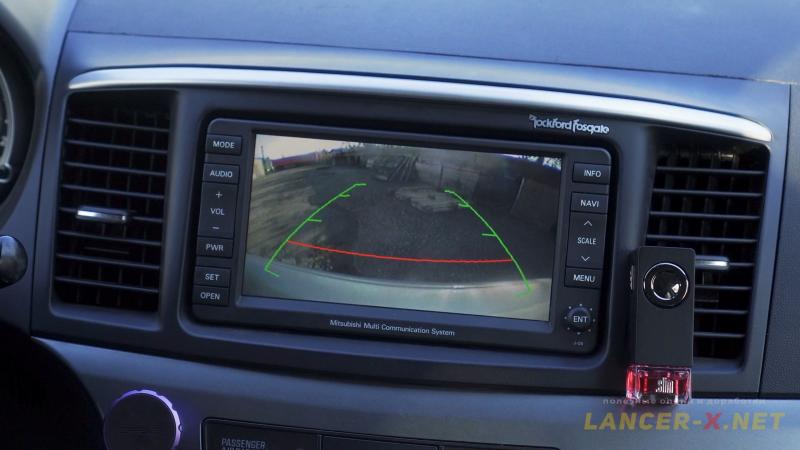
 My first impression is that the Mitsubishi Connect looks no worse than standard car stereo MMCS. Test run showed that everything is installed and connected correctly.
Advantages and disadvantages of Mitsubishi Connect on Mitsubishi Lancer X
I won't describe all car stereo functionality in details, as I have done it in the video, as well as showed the advantages of modified firmware. I will just mention the main advantages and disadvantages.
Advantages of Mitsubishi Connect
- almost standard installation and connection.
- capacitive touchscreen display with much higher resolution than MMCS.
- ideal reception of FM radio stations. No FM converter needed.
- built-in CAN box and Hands free Bluetooth.
- HDMI port.
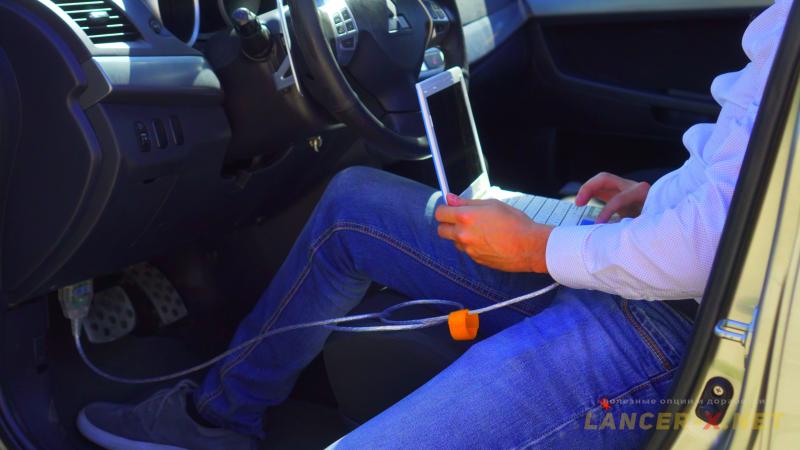
Android Auto and Car Play (possibility for smartphones connection).
Disadvantages of Mitsubishi Connect
- car stereo price.
- for full functionality, a CAN adapter is required.
- a modified firmware is required, in order to correct some "annoying" functions.
- navigation operates only via connected phone (Android Auto or Car Play).
To sum up, I really liked the Mitsubishi Connect and will use this car stereo without any doubts, and as for car stereo MMCS, I am going to sell it, as Mitsubishi Connect is in many ways better than MMCS.
But I want to mention that if there was not any possibility to install Mitsubishi Connect on Lancer X, I would left car stereo MMCS and never exchanged it.
Video instruction for Mitsubishi Connect installation on Lancer X
[media=https://www.youtube.com/watch?v=f_63hkiZFCo]
Related links: