Standard options and upgrades for Lancer X
Installation of the MMCS car stereo on Lancer X
Install the standard MMCS J-05 car stereo, as well as connect the FM converter.

Lancer-X.net
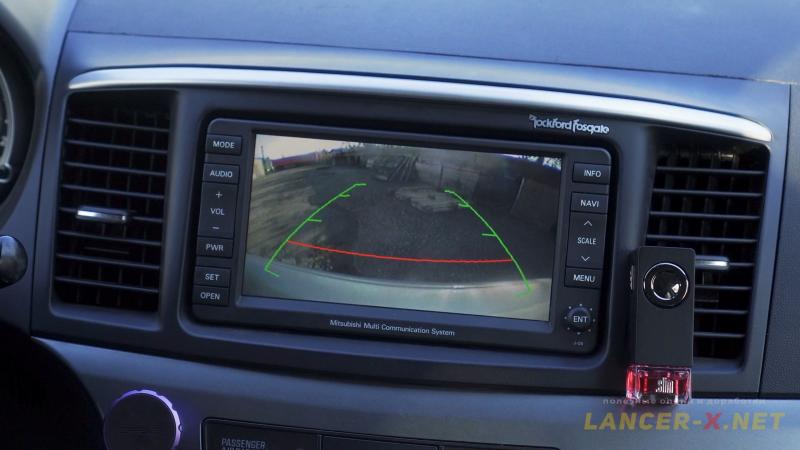
In previous article I successfully installed the standard rear view camera on Mitsubishi Lancer X, and now we need to display somewhere the picture from given camera.
When choosing the car stereo, I was choosing between 4 variants:
- Mitsubishi Connect with CAN adapter by Nikolai.
- Pioneer, for good sound.
- Standard MMCS car stereo.
- something powerful on android, for example Teyes CC3 for Mitsubishi Lancer X.Реклама. ООО "АЛИБАБА.КОМ (РУ)", ИНН 7703380158
All 4 variants have their advantages and disadvantages.
For example, if one buys the Mitsubishi Connect, it is better to search 022 version, and it is rather rare and the price for all set is from 25 000 rubles, plus adapter by Nikolai, which lets to interact with CAN busbar, that is another 6 000 rubles.
But for the present day Mitsubishi Connect is one from the most relevant systems, there are even Apple CarPlay and Android Auto in it.
Pioneer is for melomane and qualitative sound supporters, but it is not for me.
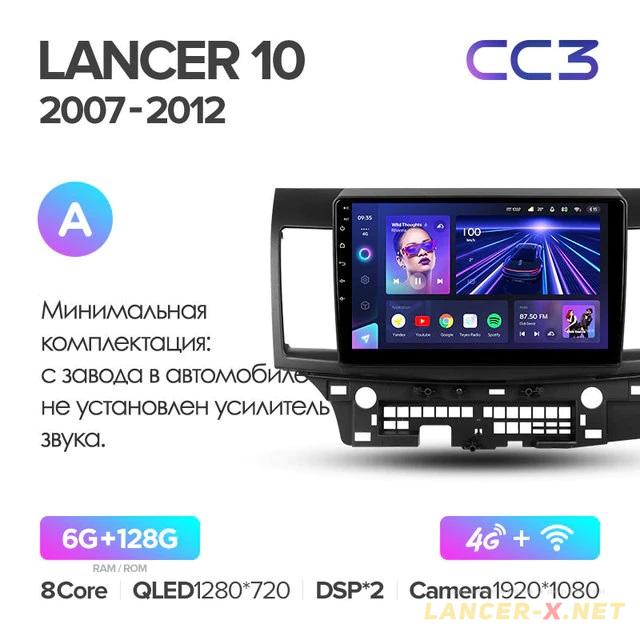 Teyes СС3 is very modern and powerful car stereo. The only disadvantage of which is the price of course and a little curved casting of standard frame.
But I have decided to install firstly exactly the standard ecosystem, that was developed specially for Mitsubishi.
Although, the MMCS car stereo is rather archaic device, I was not get discouraged, as the standard car stereos are quite reliable devices, which can interact with CAN busbar of the car, it is possible to connect Bluetooth, USB, loudspeaker mode, standard camera etc.
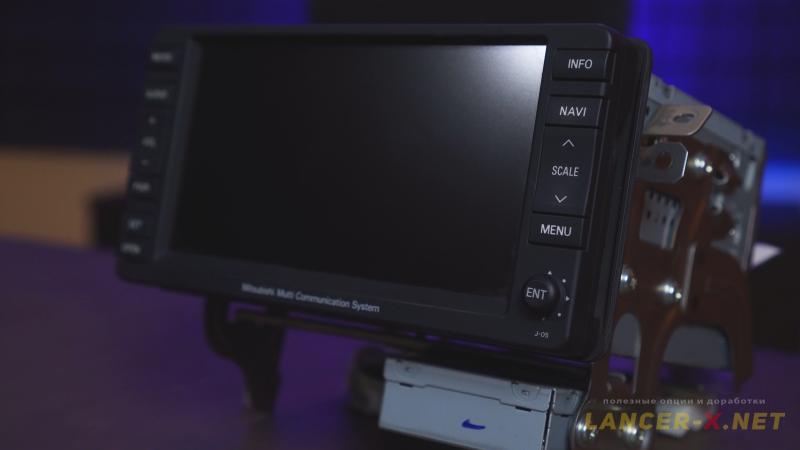 And due to the fact, that I am a supporter of standard decisions, if I had not installed the MMCS car stereo, I would never forgive myself for that. That is why I bought MMCS J-05 car stereo with CAN box and universal Russian firmware.
For easy reference, this article is represented in 2 versions: text and video at the end.
Types and version of MMCS car stereos for Mitsubishi
From the beginning I looked for MMCS R-03 car stereo- is the car stereo version for Russian market. But the seller had only Japanese versions MMCS J-03 and MMCS J-05 available.
I bought MMCS J-05, as this is almost fully analog of MMCS R-03, except that Japanese versions of car stereos have the cutdown FM frequencies and it is necessary to connect the FM converter to the car stereo in order everything will operate in Russia.
Nominally, one can divide the car stereos of MMCS series into 2 types: earlier versions on NR-261 firmware and more recent versions on NR-242 firmware.
The MMCS car stereos on NR-261 firmware
They are divided into version, depending on the supply market:
- J series, for Japanese market, with cutdown FM frequencies and DVD of NTSC standard.
- N series, for American market.
- E series, for European market.
- R series, for Russian market.
- P and C series, for French market, more specifically for Peugeot and Citroen.
Every car stereo has numbers after the letter, the higher they, the newer the MMCS car stereo model. For example, the latest car stereo for Russian market is R-03.
The higher numbers, the better it is, for example MMCS R-03 and J-05 car stereos support the Hands free unit of new style and USB, and low-end models of these MMCS car stereos support only Hands free unit of old design without USB.
And another obvious advantage is that all MMCS car stereos on NR-261 firmware, whatever the region, could be firmwared with universal Russian firmware by donnnl.
There are also disadvantages, but they are not significant, I will describe them in the end of the article.
Further details about characteristics, versions etc., of MMCS car stereos on NR-261 firmware you can read here.
The MMCS car stereos on NR-242 firmware
 These are more modern devices, they have better screen resolution and design. There is a SD- card instead the hard disc.
 The numeration of these car stereos begins from 1. But those, who crossed over to given car stereos, said about ambivalence, although the car stereos are newer, but not all so good as it would be.
Here the link to the article, where the user crossed over from MMCS R-03 car stereo to MMCS W-12 and compares given devices visually.
Also further details about characteristics, versions etc., of MMCS car stereos on NR-242 firmware you can read here.
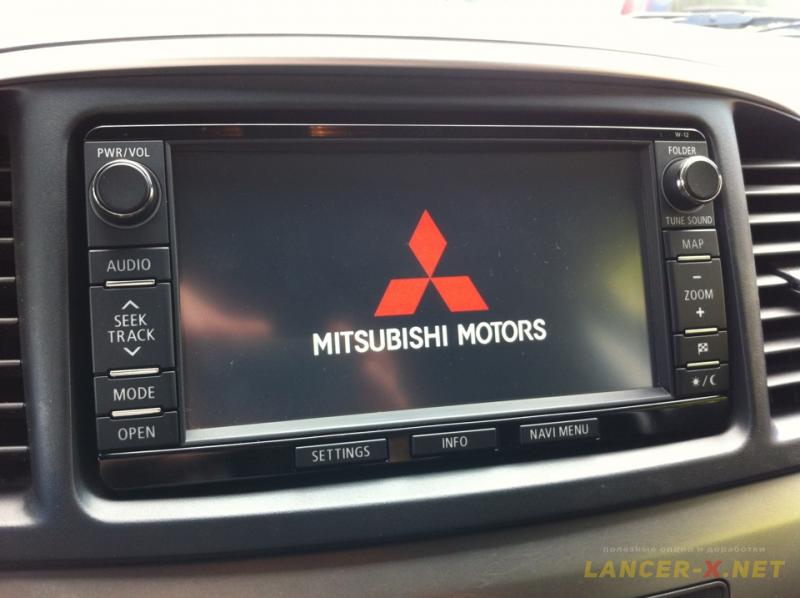
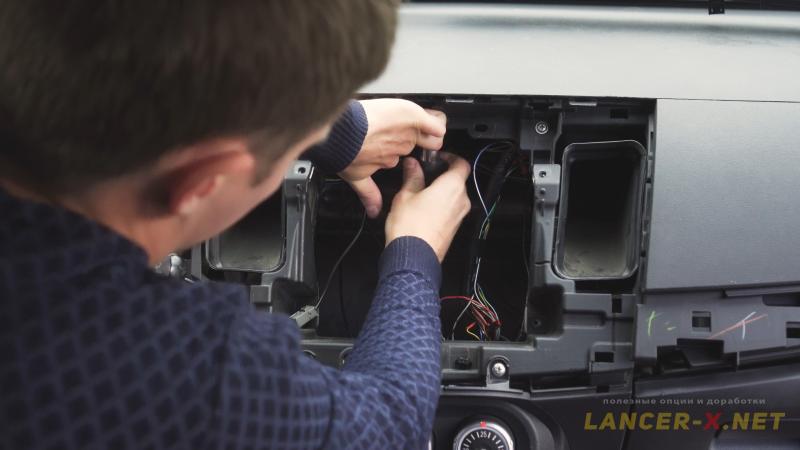
Installation of the MMCS J-05 car stereo on Mitsubishi Lancer X
The information from website mmc-manuals.ru helped me well in the connection, namely the diagram of location and pinning of MMCS NR-261 connectors.
As well as the diagram of standard audio jack pinning.
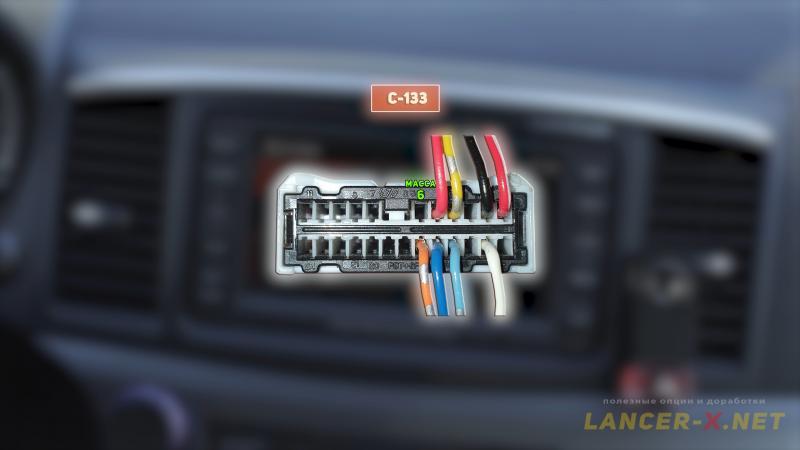
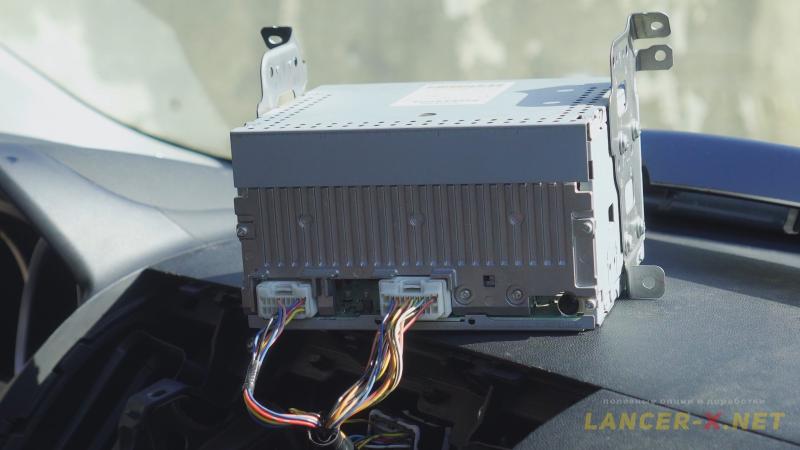 If you have the simple car stereo installed, without display, there will be connected 2 connectors to it: C-103 and C-105. There is also necessary the third connector C-133 for MMCS car stereo operation, this connector will be winded to the car stereo wiring on before restyling Lancer X.
As a rule, one has not to restore the wiring for connection on before restyling Lancer X, all connectors, with all necessary wires will be from the factory.
But on restyled Lancer X the wiring is cutdowned, the connector C-133 is absent, as well as there are not some wires in the C-103 and C-105 connectors. One has to buildup all of this.
The connector C-105 of MMCS car stereo
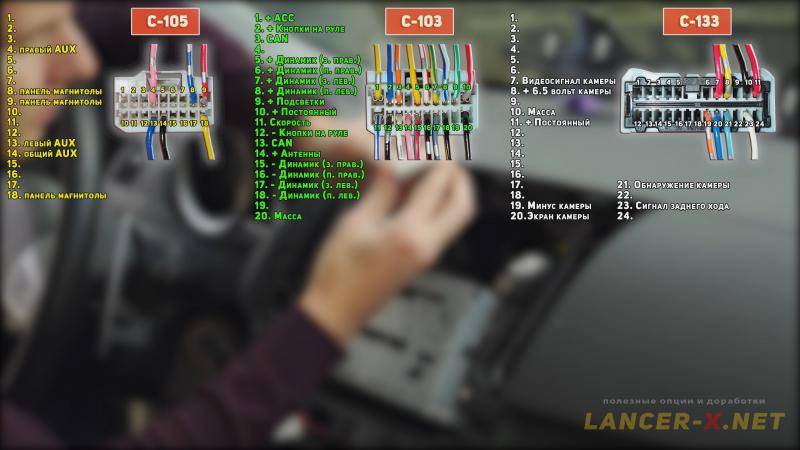 Pinning of connector C-105:
1.
2.
3.
4. Right AUX.
5.
6.
7.
8. Car stereo panel (is not used in MMCS car stereo).
9. Car stereo panel (is not used in MMCS car stereo).
10.
11.
12.
13. Left AUX.
14. General AUX.
15.
16.
17.
18. Car stereo panel (is not used in MMCS car stereo).
One can restore nothing from the wiring in given connector, but we add pins, necessary for operation of Hands free unit of new style and USB in this connector in the nearest future.
The connector C-103 of MMCS car stereo
Pinning of connector C-103:1, + ACC
2. + Buttons on the steering wheel
3. CAN
4.
5. + Loudspeaker (rear right)
6. + Loudspeaker (front right)
7. + Loudspeaker (rear left)
8. + Loudspeaker (front left)
9. + Backlights
10. + Constant
11. Speed
12. - Buttons on the steering wheel
13. CAN
14. + Antennas
15. + Loudspeaker (rear right)
16. + Loudspeaker (front right)
17. + Loudspeaker (rear left)
18. + Loudspeaker (front left)
19.
20. Mass
 If compare with connector C-103on my car, then I have 4 wires absent in given connector:
- pin 1, this is a constant plus, one can take it from the jumper or from connector C-310 pin 1 of ETACS unit, this is the connector for additional equipment connection.
- pin 9, this is backlight plus, one can take it from pin 16 of connector C-10 of alarm signaling.
- pin 11, this is a vehicle speed signal, one can take it from dash panel connector C-01 pin 20.
- pin 20, this is a mass, take it form the car's body.
Also bear in mind that on the cars from 2012 year made the pins 23 and 33 will be absent, this is a CAN bus bar. One can take it from connector C-04 behind the devices panel. Connect pin 3 in pin 23 of connector C-103, and pin 13 in pin 33 of connector C-103.
Or you can take CAN bus bar from the dash panel connector C-01, connect pin 14 in pin 23 and pin 15 in pin 33.
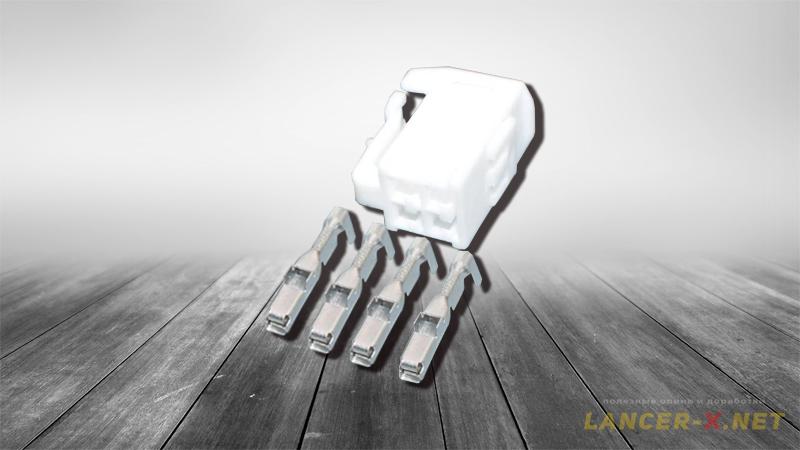
Restoring the connector C-133 of MMCS car stereo
I began to restore the connector C-133 in article about installation of rear view standard camera. As a donor I used the door connector C-126 or C-112, its mating part was ideal for the role of connector C-133.
Pinning of connector C-133:1.
2.
3.
4.
5.
6.
7. Video signal of the camera
8. + 6.5 V of camera
9.
10. Mass
11. + Constant
12.
13.
14.
15.
16.
17.
18.
19. Minus of the camera
20. Screen of the camera
21. Camera detection
22.
23. Signal of the back run
24.
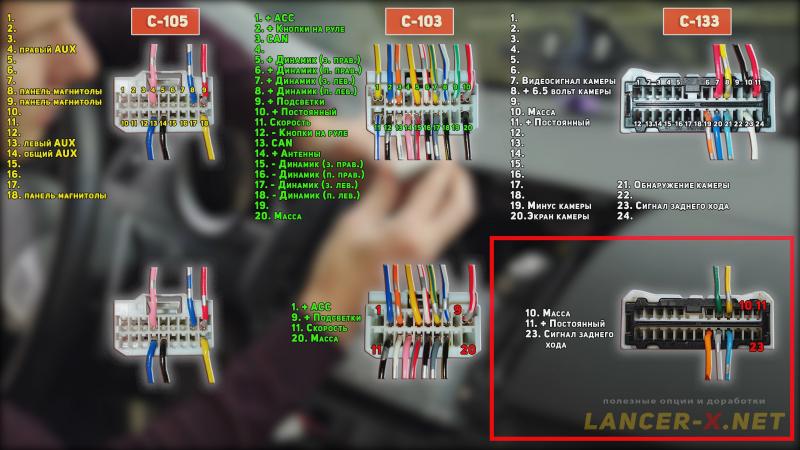 If compare with connector C-133 on my car, then I have 3 wires absent in given connector:
- pin 10, this is a mass, take it form the car's body.
- pin 11, this is a constant plus, take it from pin 10 of connector C-103 of the car stereo, I will cut into given wire using the compression terminals.
- pin 23, this is a back run signal, take from pin 2 of connector C-311 of ETACS unit.
Terminals (bought on Aliexpress).
Реклама. ООО "АЛИБАБА.КОМ (РУ)", ИНН 7703380158
Now the wiring is restored.
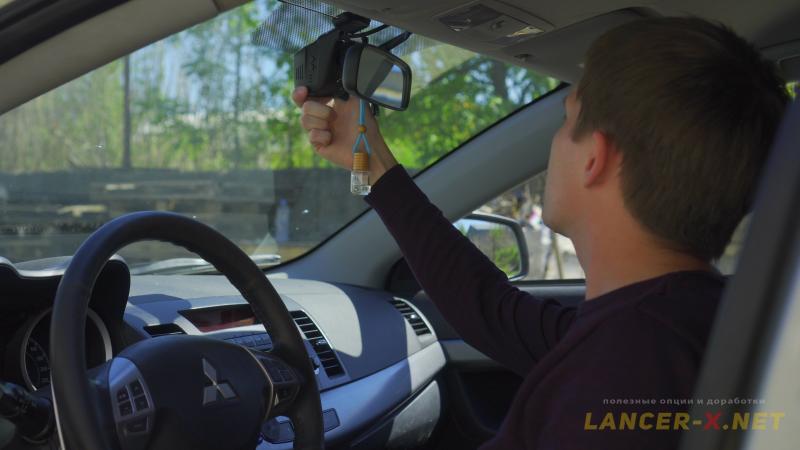
Installation of the GPS antenna for MMCS J-05 on Mitsubishi Lancer X
 There was the standard GPS antenna in the set with the car stereo. It is fastened in the standard place under the car stereo, the installation is intuitive.
Installation of FM converter for Japanese version of MMCS car stereo
As I told you before, there are cutdowned FM frequencies on Japanese car stereo versions, and it is necessary to connect FM converter in order the Russian FM frequencies begin to operate on given car stereo. It is relevant for MMCS car stereos of L series, we do not need the FM converter for R series.
 Connect the antenna's plug in the converter, and put plug form the converter into antenna's seat of the car stereo.
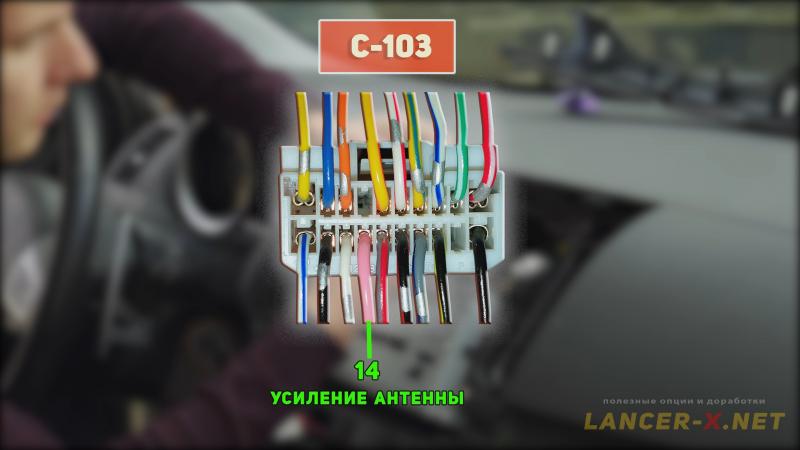 For steady operation of FM converter it is necessary to apply 12 V on it. We will take them from wire of antenna gain in the connector C-103 pin 14, this is the car stereo connector.
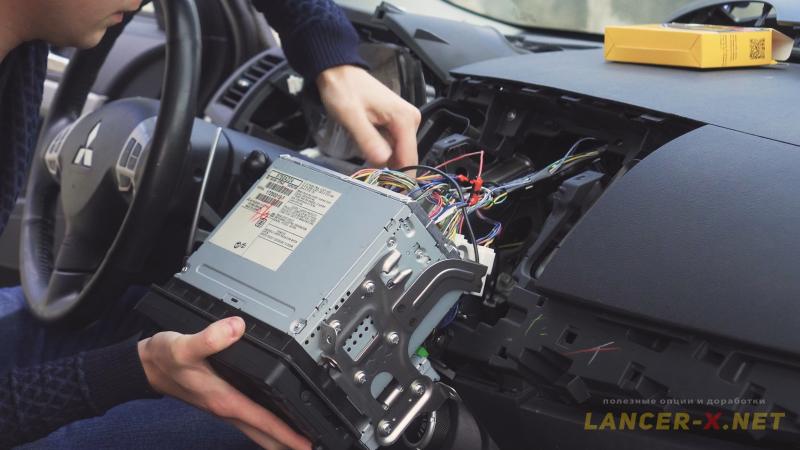 And now we can connect all connectors and install the car stereo on its proper place. I bought the original frame for given car stereo with Rockford Fosgate writing. Maybe I will install this system in the nearest future...
 I also bought the standard tweeters. The wiring for their connection will be from the factory, remove protective covers and install tweeters instead of them. Going forward, I can tell you exactly that they are useful, the volume begins more three-dimensional.
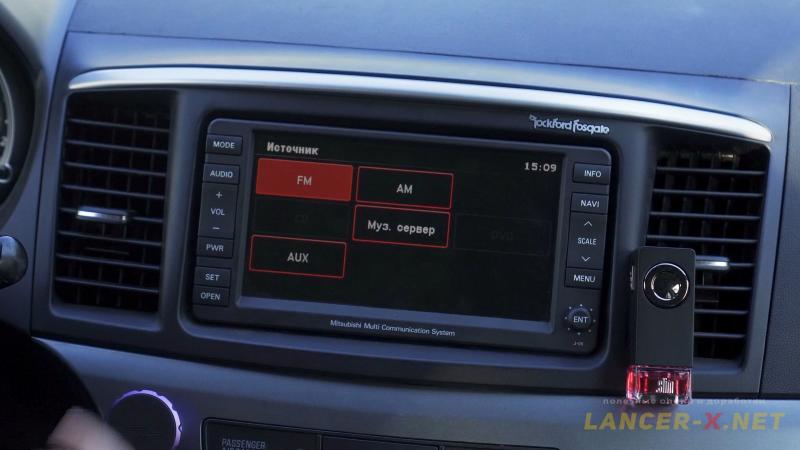
 If at the first start you did not have the opportunity to select AUX, then you need to add mass to pin 6 in the c-133 connector of the car stereo.
Advantages and disadvantages of MMCS J-05 on Mitsubishi Lancer X
I will not describe the full functionality as I did it in details in the video, I just draw attention on some advantages and disadvantages.
Advantages of MMCS J-05
- standard option, which means the standard connection.
- perfectly fit with Lancer X car interior.
- sound is more qualitative than on standard car stereo.
- As a result of CAN box, one can adjust some functions without cable and laptop.
- possibility of standard connection of the camera, Hands free, Bluetooth and USB.
- speed operation and display response.
- ecosystem with the car.
Disadvantages of MMCS J-05
- complication of connection on restyled Lancer X, but it will be easier with my instruction.
- radio frequency reception is worse on Japanese versions due to the FM converter connection.
- navigation of 2014 year is not updated any more. But navigation is worthy.
- small screen resolution, but it does not catch the eye, it is sufficient for daily task.
To sum up, I liked the car stereo and I did not regret that installed exactly this one.
Using this car stereo and CAN box I unlocked highly the potential of my car greatly.
And for those, who wants take the maximum not from the car, but from car stereo itself (watch Youtube, use modern navigation, use internet and play games), it is better to install the car stereo on Android, for example Teyes СС3.
Video instruction for MMCS J-05 car stereo installation on Mitsubishi Lancer X
Related links: