Standard options and upgrades for Lancer X
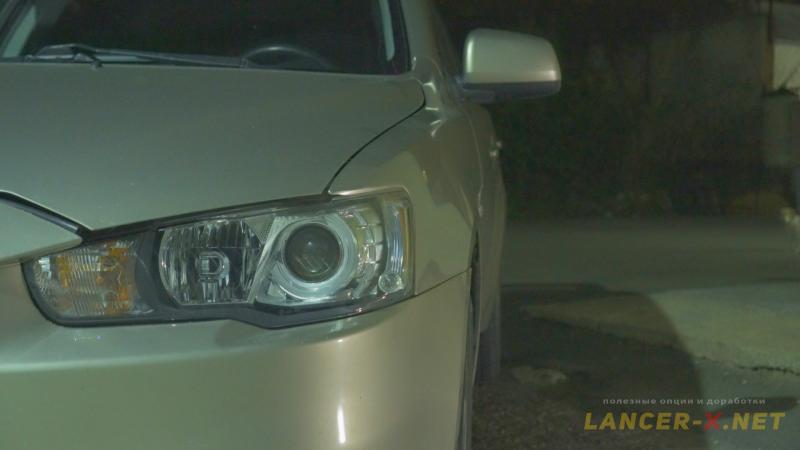
Auto-corrector for xenon headlights Lancer X
Install and activate an automatic corrector for standard xenon headlights on Lancer X.

Lancer-X.net
We are smoothly moving to the installation of standard xenon headlights, that is why we will divide the whole procedure into 3 stages:
- installation of headlights automatic corrector.
- installation of xenon headlights and adaptive front lights system in turnings (AFS).
- installation of standard headlights washer.
Let us begin from installation of headlights automatic corrector.
For easy reference, this instruction is represented in 2 versions: text and video at the end.
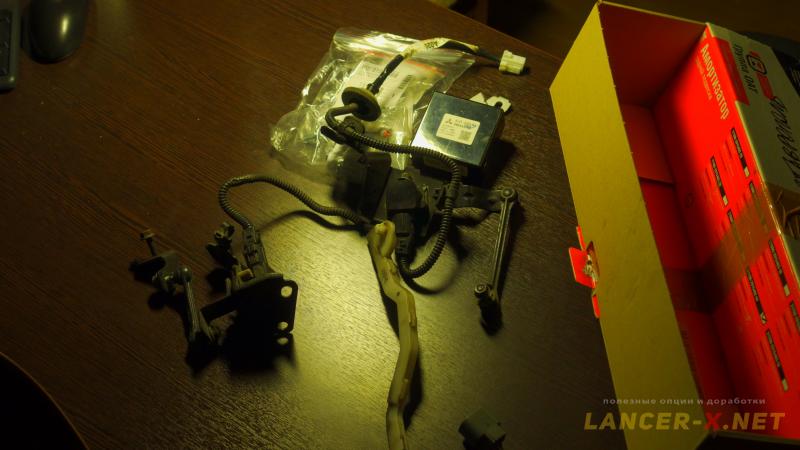
Repair parts for automatic corrector
It is necessary to check the availability of all connectors for connection before installation, as they can be absent in some trim levels. as they can be absent in some trim levels. In that case, one have to built up.
Or, for example, on Lancer X before 2011year made the auto-corrector block and AFS block are 2 separate blocks. But on Lancer X from 2011 year made, auto-corrector block and AFS are combined in 1 block.
For installation we need:1. AFS unit + Auto-corrector-8634A049. For Lancer X before 2011year made there will be 2 separate blocks.
2. Headlights auto-corrector set: front and rear sensor assemblies with brackets, levers, wiring and hardware. There are several modifications.
3. Clamp MS480002 and screw MB409438 for front sensor wiring.
4. Other hardware were in the set.
Don't even look on prices for new auto-corrector components, as it costs too much. Search second-hand on auto junk market. There are plenty of offers.
Installation of front and rear auto-corrector sensor.
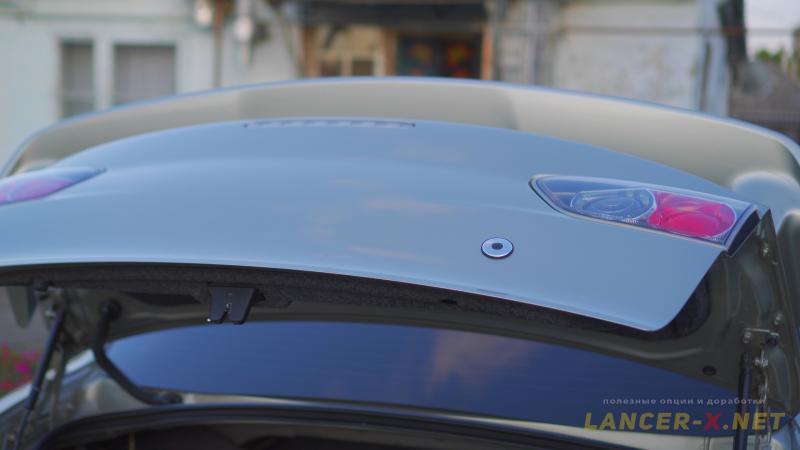
The sensors are installed on the right side of the car. Let us begin from rear sensor.
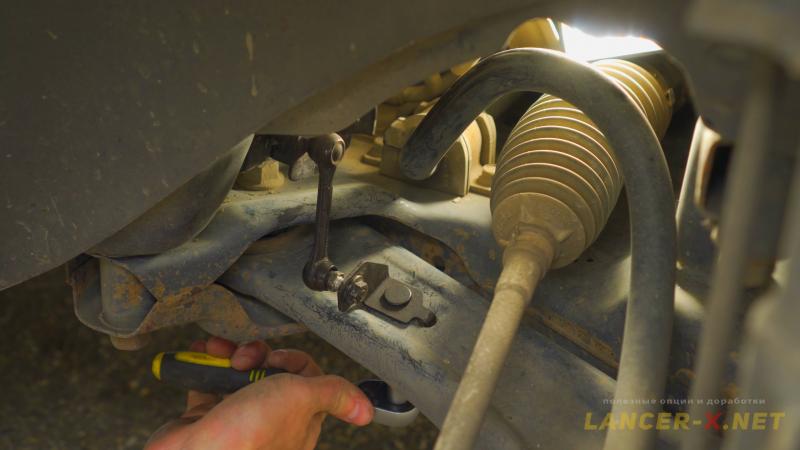
Using a jack, raise the rear right side of the car and remove the rear right wheel.
 The mounting points for the sensor come from the factory, we clean them of dirt and bait our sensor, attach the sensor levers to the car's suspension lever, all fasteners are also provided there.
There will be a protective cover just above the sensor, remove it and pull the wire through the hole. The wire will have a similar protective cover for tightness. After that, put the wheel back.
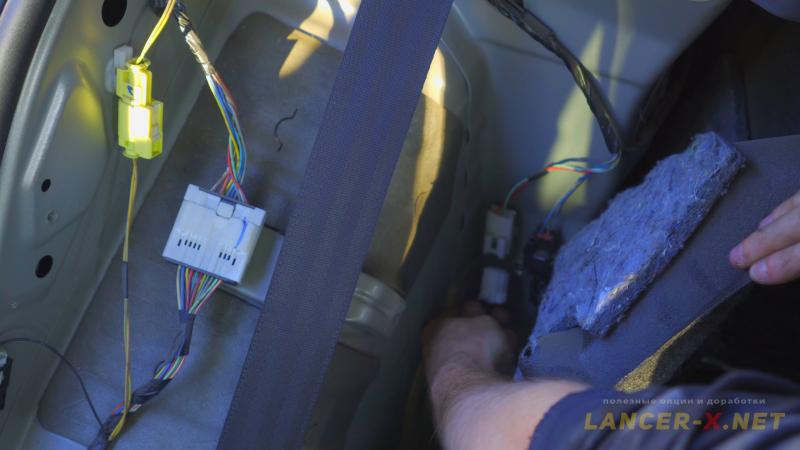
Now we fold back the right rear seat and the trunk lining from the passenger compartment. At the bottom there will be a connector, and just below our connector from the rear sensor, which we extended earlier. Connect it all.
Next, go to the front part, remove the front right wheel.
All mountings are also provided for the front sensor. But everything is installed a little more difficult, as one have to fix the sensor to the body by touch, access for one of the nuts is difficult.
 Fastening the auto-corrector levers to the car's suspension lever by analogy with the rear sensor.
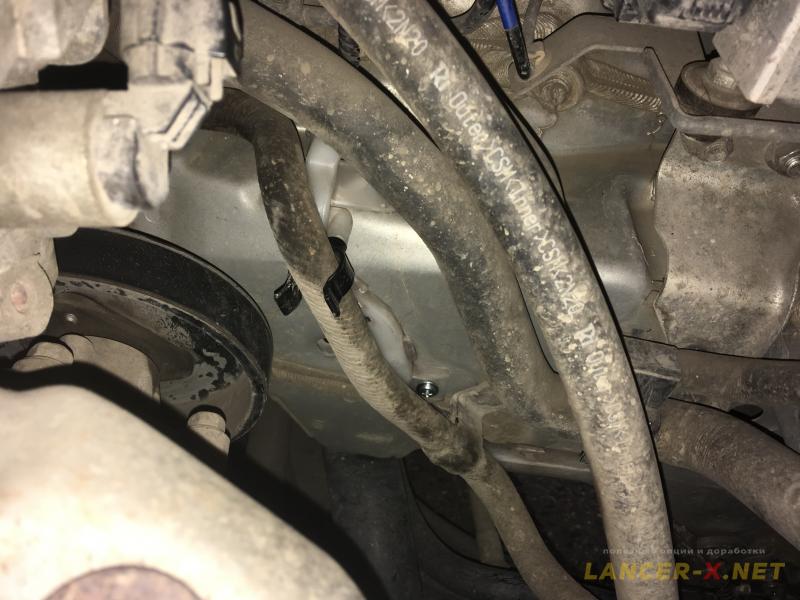 Difficulties can arise when attaching the plastic cover with the front sensor wiring, as there is little space and must be fixed to the body. Difficult, but quite practicable.
This cover is attached to the body using the MS480002 clamp and MB409438 screw.
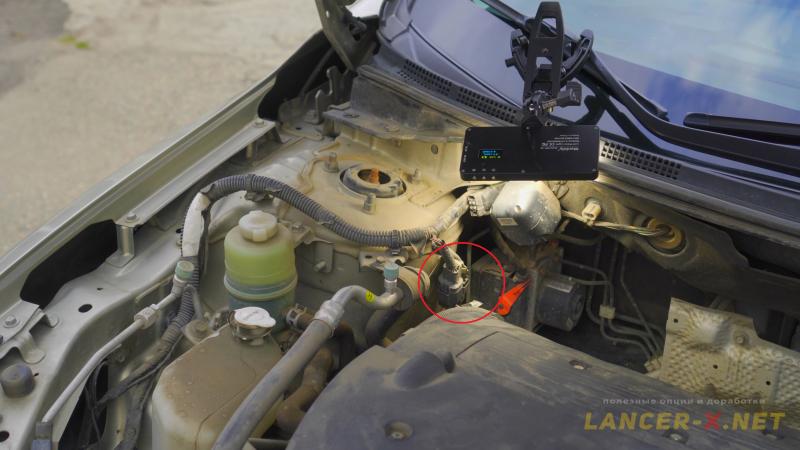 When everything is installed, connect the front sensor to the auto-corrector connector.
Installation of auto-corrector block on Lancer X
I have Lancer X from 2011 year made, that is mean that auto-corrector block and AFS are combined in 1 block.
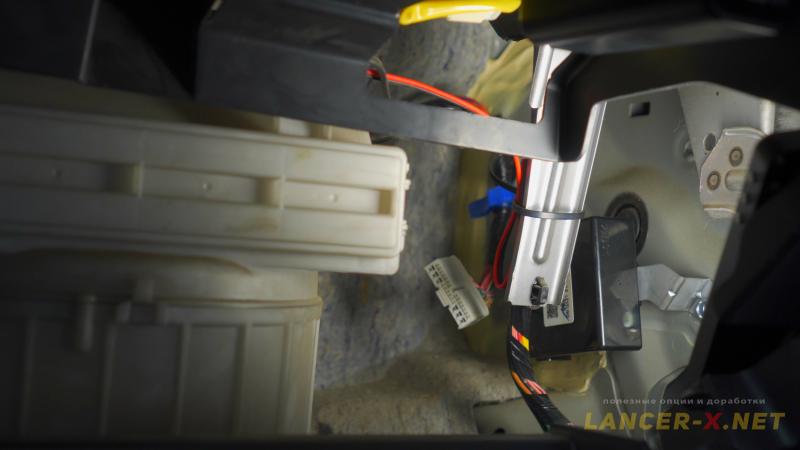 A bracket comes with the block, so we immediately attach this block to the body near the glove compartment. The connector for its connection is installed from the factory.
Activation of headlights automatic corrector on Lancer X
For auto-corrector operability, it is necessary to activate it. But it is better to perform activating after standard xenon headlights installation.
For activating you need:
1. J2534 compatible adapter. Bought here: Аliexpress
Реклама. ООО "АЛИБАБА.КОМ (РУ)", ИНН 7703380158
2. MMCodingWriter software for downloading and code writing.
3. MUT Coding Mitsubishi software for code editing.
4. Laptop.
Since 2021, the MUT Coding Mitsubishi program has become paid, or you can buy it from the developer, or use the built-in editor in the MMCoding Writer program.
Always do backup copies for original Variant and Custom codings!!!!!!!!!!
With detailed activation procedure you can acquaint in this article: Activation of hidden functions on Lancer X.
For auto-corrector operability on this block will be necessary the activation of 2 points in ETACS:
- Head lamp auto leveling device --> Present
- H/L auto leveling type --> CAN communication and dynamic type
Now, everything is installed and works.
I repeat that it is better to perform activating after xenon headlights installation. If we activate it before installation, the auto-corrector and AFS error will appear on the dashboard.
Video of installation the headlights automatic corrector on Lancer X
Related links: