Standard options and upgrades for Lancer X
Light and illumination sensor on Lancer X
Install and activate the light and illumination sensor on Lancer X.

Lancer-X.net
Firstly, I have already install the similar sensor in the article about Installation of climate control equipment on Lancer X, but then it was just light sensor 7825A003, which is necessary for more correct operation of climate control.
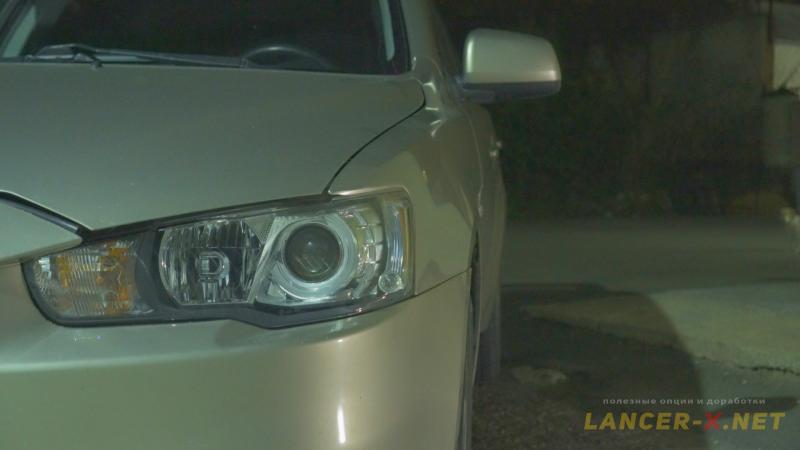
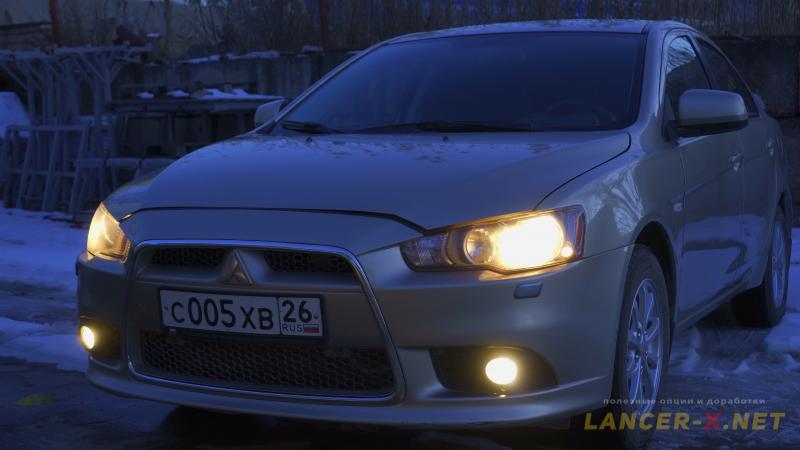
After implementation of DRL on standard reflex headlights on my Lancer X, I have decided to install the combined light and illumination sensor 7825A019, which is necessary for full automation of marker lights and low beam switching-on without my intervention.
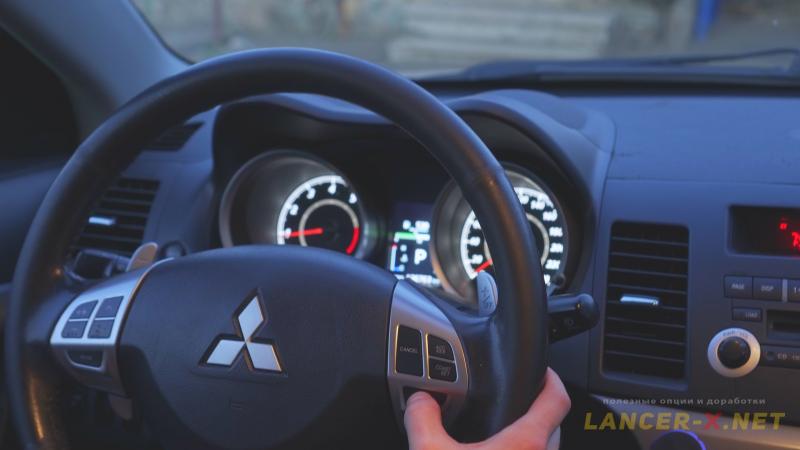
Also, for the possibility of auto lights mode switching-on, let us install the understeering switch with auto condition 8614A061.
For your convenience, there will be 2 variants of the instruction- the text one and video in the end.
Let us begin the installation of understeering switch 8614A061, but this will work too 8614A060, the difference only in that there is an additional button on the end in 8614A060.
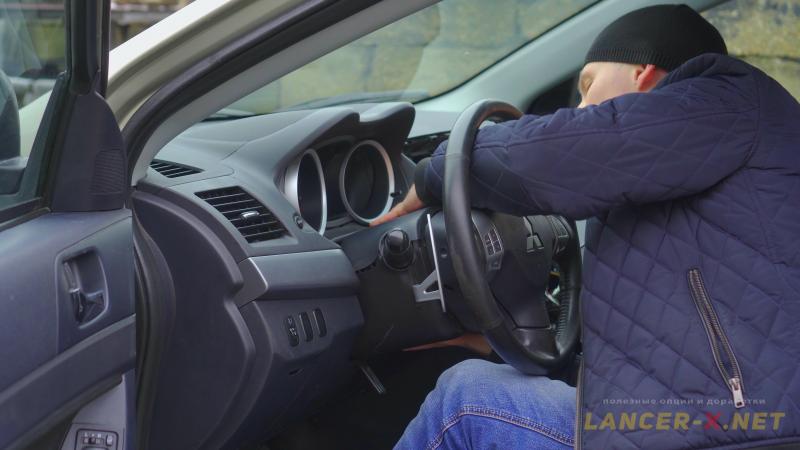 The installation is simple, unscrew 2 screws, which hold the 2 halves of steering tube facing and divide them.
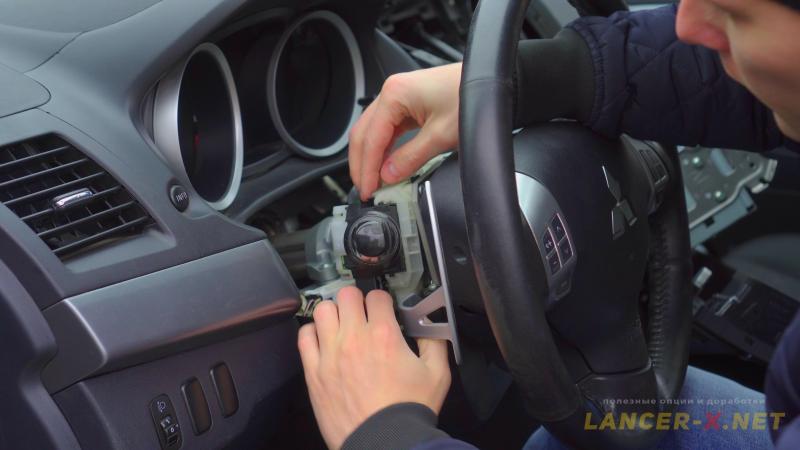 Next, fasten the understeering switch clamps and extend, disconnect the connector. And connect the new understeering switch with auto condition.
 As I noted before, I will instal the combined light sensor, i.e in which the light sensor and illumination sensor are combined - 7825A019.
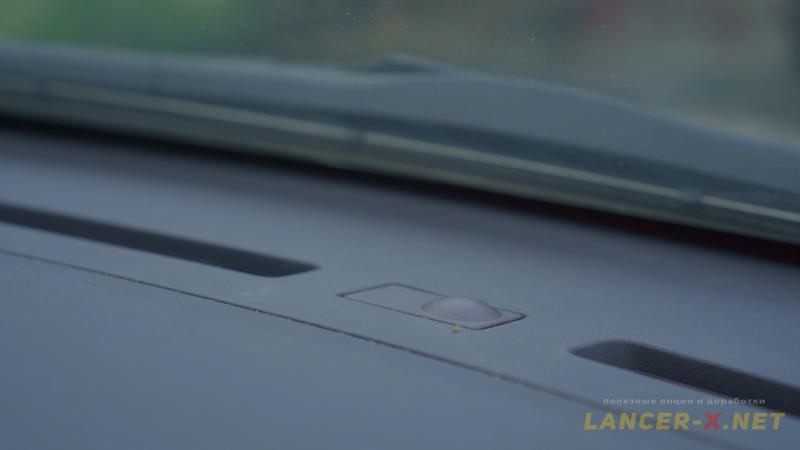 If there was the blind plug before installation, then it is taken out quite easily. And if you, like me, had light sensor 7825A003, then it is taken out quite difficult. There is the high risk of breaking the lugs of the upper cover fastening of the sensor, and the sensor itself could fall under the dashboard, the place is very narrow and inconvenient. Be careful.
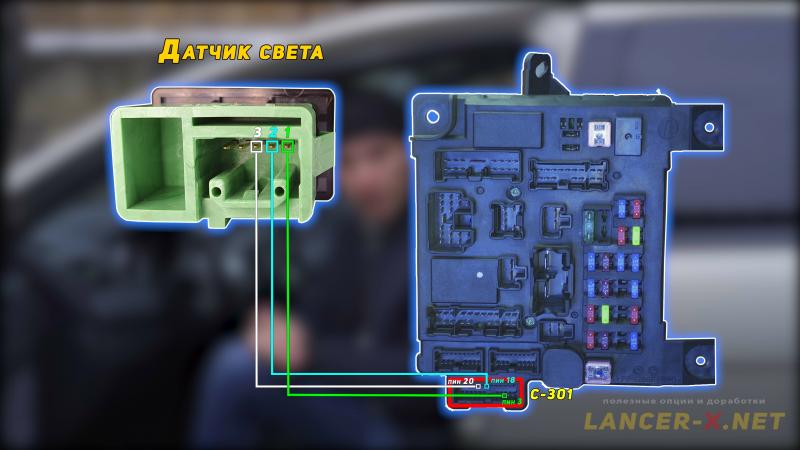 Now, it is necessary to connect the new light and illumination sensor 7825A019, connecting all 5 pins:
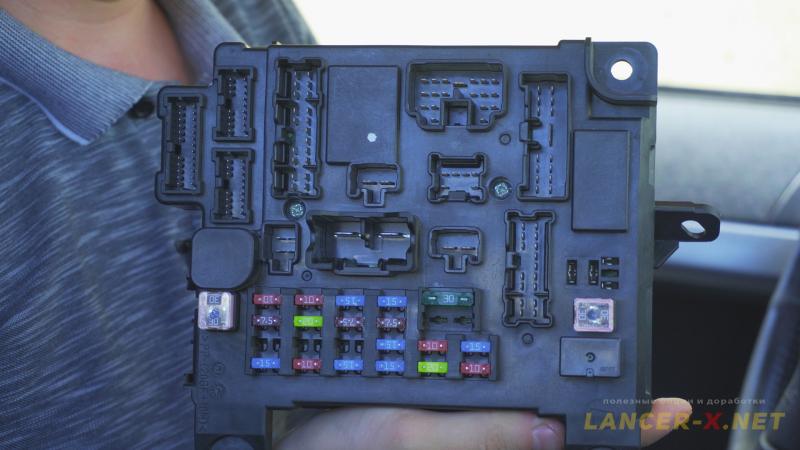
- 1, 2, 3 pins, these are light sensor pins. They must be led to the ETACS unit and connected to the С-301 connector:
Pin 1 of light sensor, to the pin 3 of C-301 connector.
Pin 2 of light sensor, to the pin 18 of C-301 connector.
Pin 3 of light sensor, to the pin 20 of C-301 connector.
- 4 and 5 pins, these are illumination sensor pins of climate control, here is all are connected in the article about Installation of climate control.
Activating of light sensor (without rain sensor)
Before activating, I advise you to read the article where discussed in detail how to activate the hidden functions and options on Mitsubishi Lancer X.
For activating of DRL mode, it is necessary:
1. J2534 compatible adapter. Bought here: Аliexpress
Реклама. ООО "АЛИБАБА.КОМ (РУ)", ИНН 7703380158
2. MMCodingWriter software for downloading and code writing.
3. MUT Coding Mitsubishi software for code editing.
4. Laptop.
Since 2021, the MUT Coding Mitsubishi program has become paid, or you can buy it from the developer, or use the built-in editor in the MMCoding Writer program.
Always do backup copies for original Variant and Custom codings!!!!!!!!!!
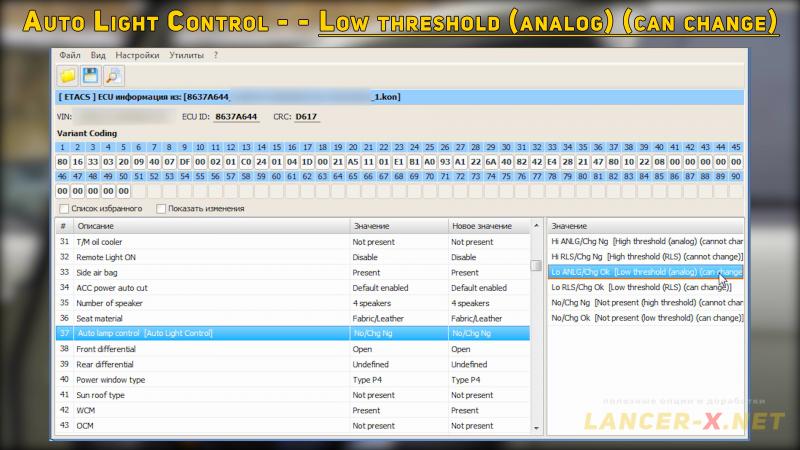 Find Auto Light Control in Variant coding and choose 1 from 2 modes:
- Auto Light Control - - > High threshold (analog) (cannot change) - marker lights and low beam switch-on at a time.
- Auto Light Control - - > Low threshold (analog) (can change) - firstly marker lights switch-on, then the low beam.
I chose this Low threshold (analog) (can change) mode.
Also, depending on your region, you can adjust the sensitivity of light sensor in Custom coding in the Sensitivity for auto lamp point.
Video instruction of light and illumination sensor installation on Lancer X
Related links: