Standard options and upgrades for Lancer X
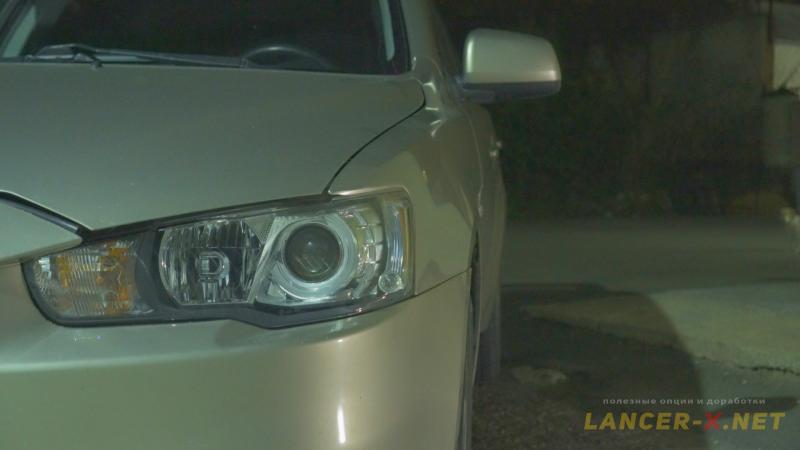
Standard headlights washer on Lancer X
Install all necessary to implement a standard headlights washer on Lancer X. Let us activate it and test.

Lancer-X.net
To be honest, headlights washer is a very controversial option. I have to switch it off for all my cars, due to very high consumption of washing liquid.
But, according to the regulations of the Customs Union, to which Russia has joined, if there are headlights with gas-discharge lamps on the car, it is necessary:
- working auto-corrector (we have installed it in article about Auto-corrector).
- working headlights washer.
That is why it is necessary to install it on my Mitsubishi Lancer X.
For easy reference, this instruction on headlights washer installation is represented in 2 versions: text and video at the end.
I highly recommend to watch video version for better understanding of installation process.
At the beginning, looking at list of repair parts, everything seems extensive, incomprehensible and hard. But when all repair parts are assembled and the step-by-step logic of the installation is studied, the mounting becomes instantly clear and easy.
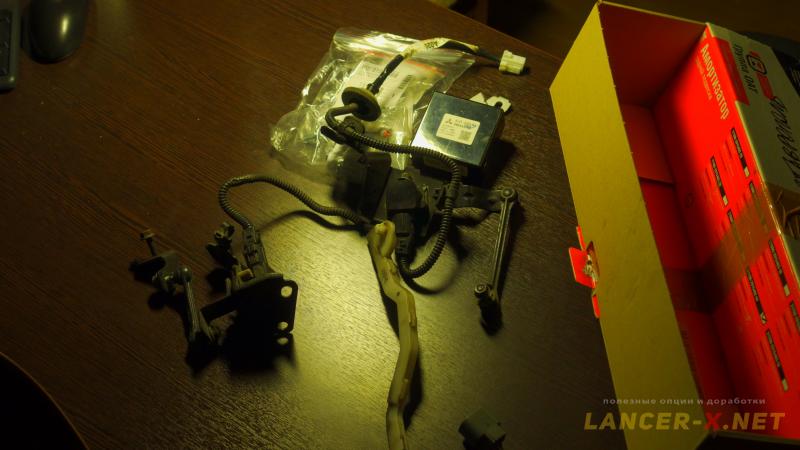
Components for standard headlights washer installation
You can take the easy way out and buy the universal washer with fan-shaped (non-retractable) nozzles, for example from Hella, they are placed under the headlight.
But I took the way of standard execution, saving money where possible.
All repair parts were collected during a year, some was bought new, some on aliexpress, advertisements and wreck yards.
The list of components:
1. Right / left nozzle. One can buy it on Aliexpress.
2. Right / left cover. One can buy it on Aliexpress.
Реклама. ООО "АЛИБАБА.КОМ (РУ)", ИНН 7703380158
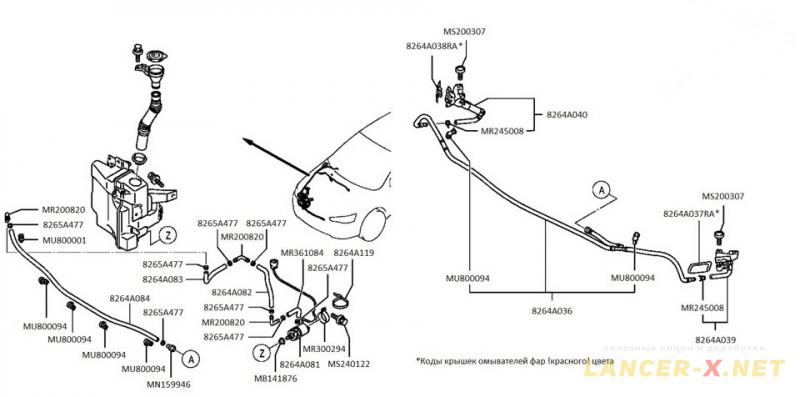
3. Screws 4 pcs. - MS200307 is for attaching the nozzles to the bumper.
4. Understeering switch with washer.
5. Relay - 8627A030
6. Headlight washer motor, optionally 3 pieces:
- 8264A081 - original.
- 98510-3F200 - quite a good substitute from Kia.
- KWM041 - the cheapest one of the three by Cortex company, I bought it for trial.
But it is better to buy second-hand original or from Kia.
7. Sealing ring for the motor - MB141876
8. Bracket for headlight washer motor - MR300294 (you can make it yourself, a usual strip that surrounds the motor).
9. Bolt M6x20 - MS240122 is for the motor clamp.
10. Clamp-latch - MB487971. Instead of these, I have bought common clamps in auto parts store- 15 pcs. They are required for attaching the hoses to the fittings.
11. Washer pipe assembled - 8264A036. I bought it very cheaply at one of the wreck yards. Its main plus is that it is assembled. But if you wish, you can assemble it yourself.
12. Hydraulic connector - MN159946. If you assemble the 8264A036 hose yourself, you won't need it.
13. Original tubes (8264A082, 8264A083, MR361084, 8264A084). But I DIDN'T BUY them, instead I bought a 5 meter hose with an inner diameter of 10 mm. in a plumbing store.
14. Fittings - MR200820. I did not buy the original, I bought it in a plumbing store with a stock of 10 pcs. brass corner.
15. Tie wrap-clamp long 6 pcs. - MU800094.But you can replaced it on common clamps.
16. The waterproof connector was bought in the automotive market.
Headlights washer installation
When installing a standard headlight washer on the Mitsubishi Lancer X, I was guided by a very detailed diagram that I found on the drive2 portal.
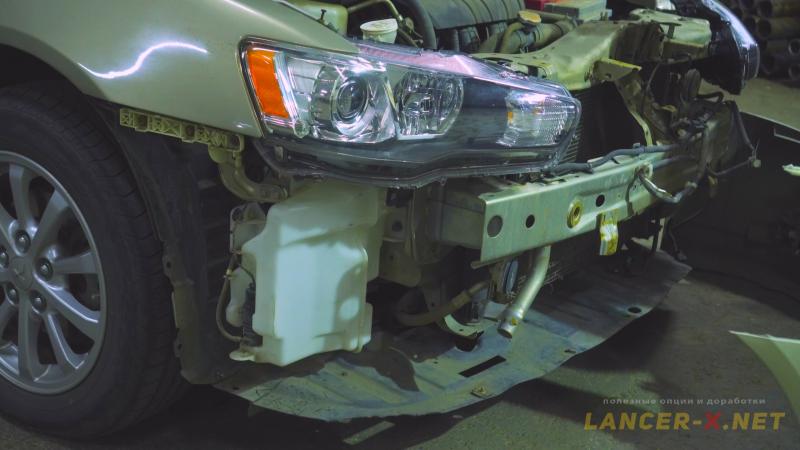
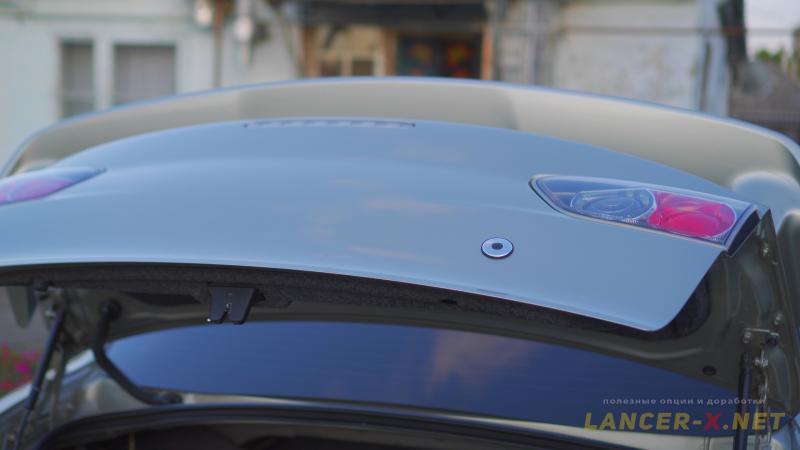
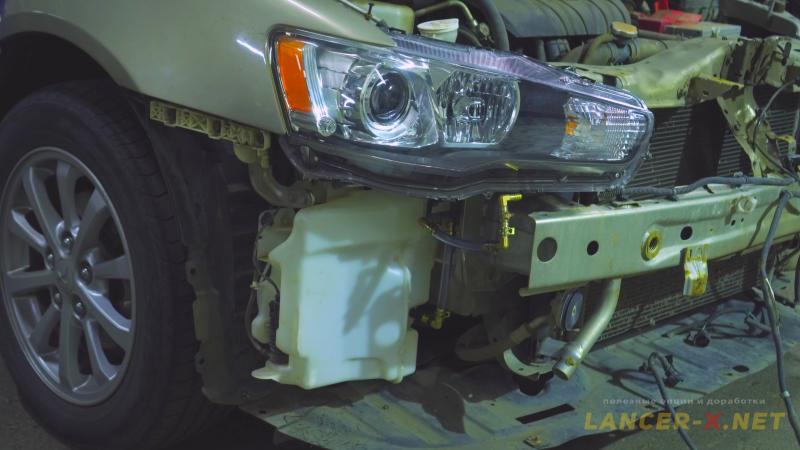
We throw off the bumper and unscrew the washer tank.
There will be a standard connector next to the washer tank, it is only suitable for connecting the original 8264A081 washer motor.
If you have a non-original motor, then the connection connector will have to be replaced with a waterproof one, and the other end of the waterproof connector should be soldered to a non-original headlight washer motor.
There is a special mounting seat on the tank, in which a 15 mm hole must be drilled. Insert the sealing ring MB141876 into this hole.
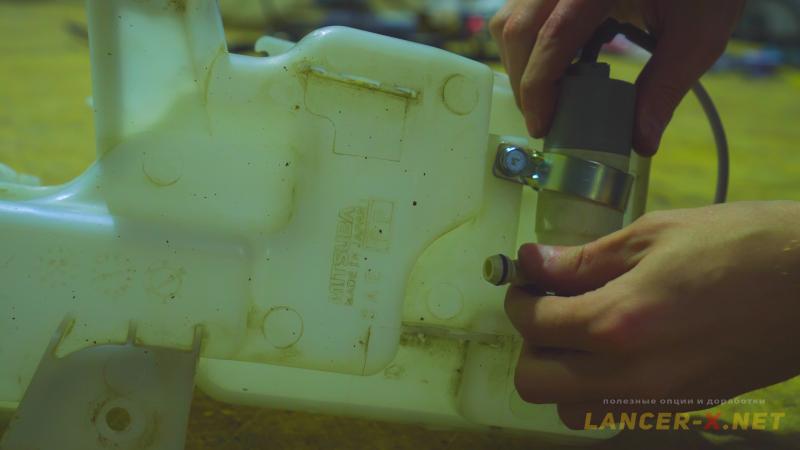
Next, we install the headlight washer motor in the tank, fix it with the bracket MB141876 and the bolt MS240122.
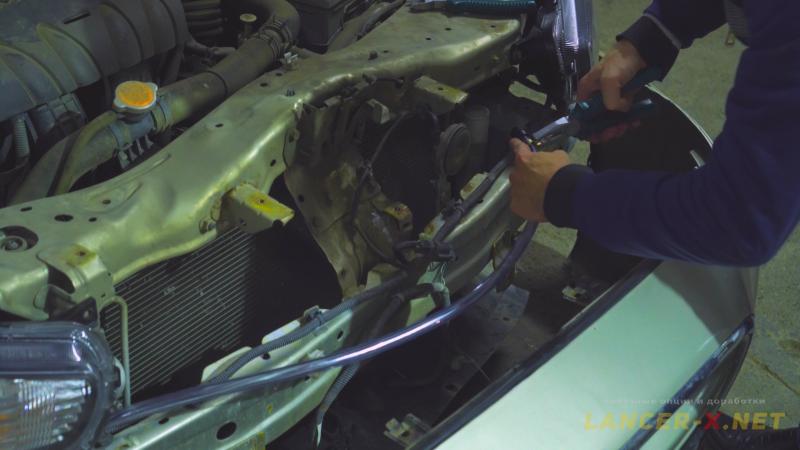
From the motor, you need to bring the hose to the amplifier.
For this we use a 5 m hose, brass corner fittings and clamps. Let me remind that I bought all this in a plumbing store, as the original ones are very expensive.
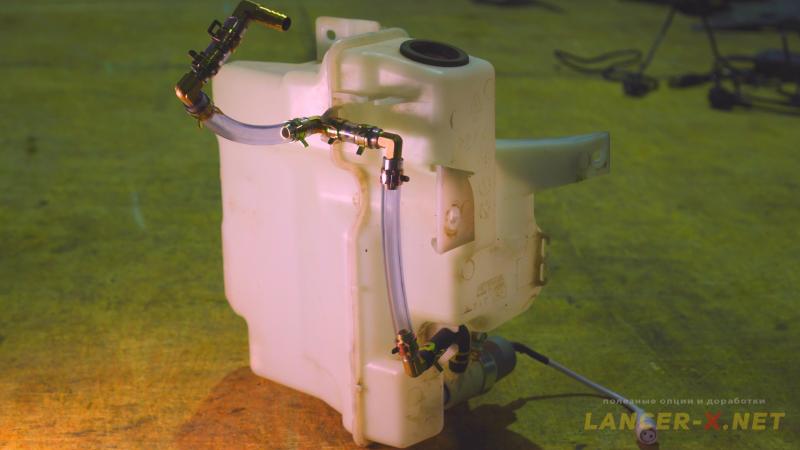
The final construction should look like this.
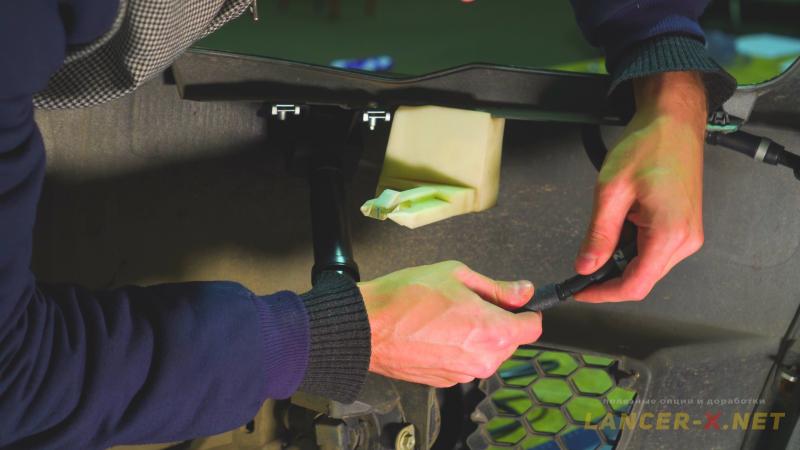
We install back the washer tank, connect the motor using a waterproof connector.
At this stage, a hose with a fitting fits from the tank to the amplifier.
Connect the hose to the fitting and extend it almost the entire length along the amplifier, securing it with clamps.
At the other end of the hose, you will need to install the MN159946 hydraulic connector. But this is provided that you have a Washer tube assembled - 8264A036. If you assemble this tube yourself, using hoses, fittings, then you do not need the MN159946 hydraulic connector.
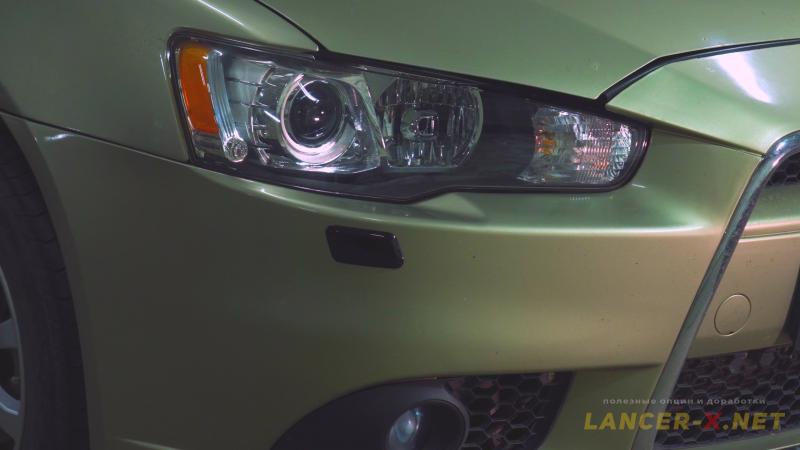
Now you need to install the washer nozzles on the bumper.
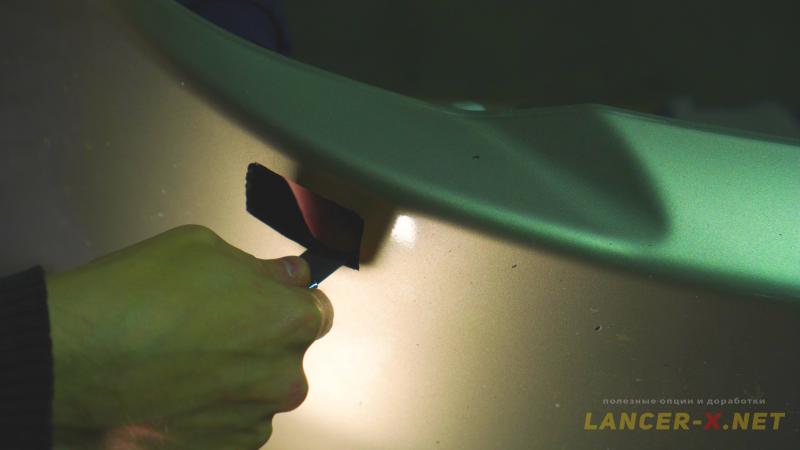
There are marks on the inner side of the bumper, along which it is necessary to cut holes for the nozzles. The plastic is soft enough, so adjusting the holes can be done with an ordinary clerical knife.

After that, we insert our nozzles, fasten them to the bolts MS240122. From the outside, we install the washer covers.
Install the washer tube assembled - 8264A036 and connect it to the nozzles.
Before installing the bumper, connect the mating part of the washer tube assembled - 8264A036 with the MN159946 hydraulic connector of our hose, which we stretched a little earlier along the amplifier.
Put the bumper back on the Mitsubishi Lancer X.
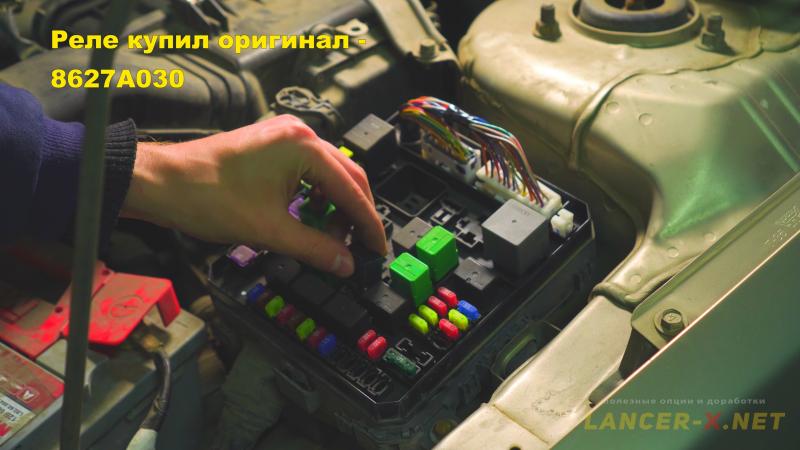
Install the relay 8627A030 into the relay box under the hood.
Change understeering into the new one with headlights washer button.
Standard headlights washer activating on Lancer X
For the headlight washer operation, you will need to activate 1 point in the ETACS unit coding:
- Head lamp washer --> Popup 1.
With detailed activation procedure you can acquaint in this article: Activation of hidden functions on Lancer X.
Now fill in the washer liquid.
At the first start, it is necessary to remove air from the system and pump the liquid through the hoses to the nozzles.
After that, the headlight washer is fully installed and ready for use.
Video instruction for headlights washer installation on Lancer X
Related links: